Introduction
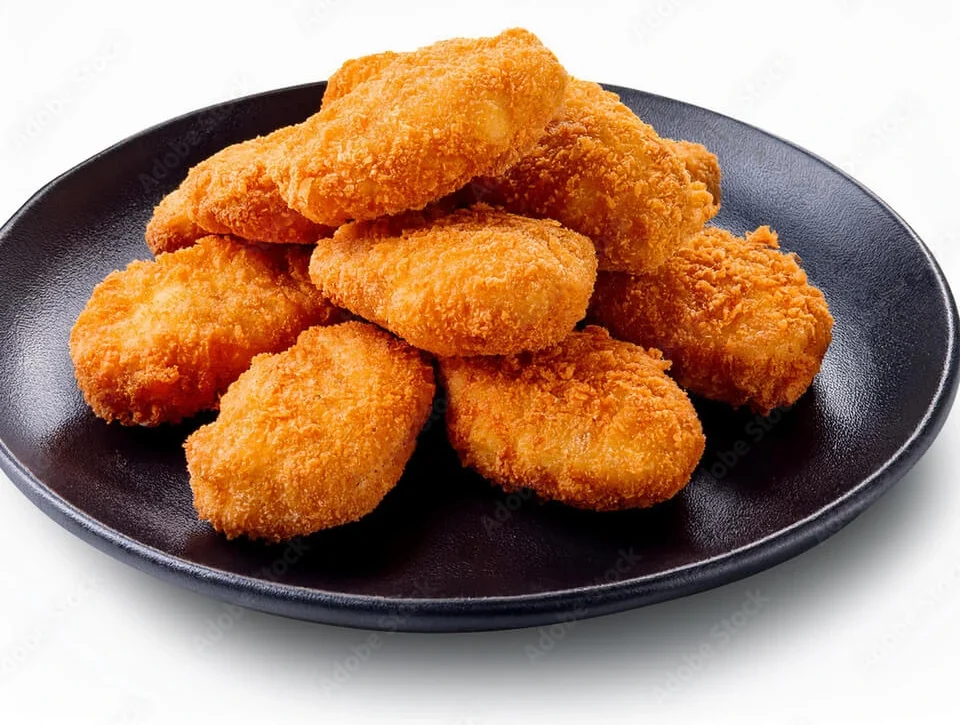
baked chicken cutlet recipes are a versatile and popular dish loved by many for their crispy, tender texture and delicious flavor. Whether served as a main course, in sandwiches, or as a topping for salads, chicken cutlets can be enjoyed in countless ways. While traditional frying gives them a golden crust, baking chicken cutlets in the oven is a healthier alternative, allowing you to cut down on oil while still achieving that crispy finish.
In this guide, we’ll walk you through everything you need to know to bake the perfect baked chicken cutlet recipes. You’ll learn how to make oven-baked breaded chicken that’s juicy and flavorful, discover how long to cook chicken cutlets for the ideal texture, and get tips to ensure your chicken comes out perfectly crispy every time. Get ready to master this easy and delicious recipe!
1) Why Oven-Baked Chicken Cutlets Are a Healthy Choice
Subheading 1: Healthier than Frying
Why Baking Chicken Cutlets recipes is the Healthier Choice
When it comes to preparing baked chicken cutlet recipes, baking them in the oven offers several health benefits over the traditional frying method. While fried chicken can be mouth-wateringly crispy, it comes at the cost of added calories and unhealthy fats. Let’s break down why baking is the better option for a healthier meal:
Less Oil, Fewer Calories
Baking reduces the need for excess oil, making it a more calorie-conscious choice.
One of the most significant differences between frying and baking is the amount of oil used. Frying chicken often requires submerging the cutlets in hot oil, which leads to them absorbing a significant amount of fat. In contrast, baking requires just a light coat of oil or cooking spray, which can drastically reduce the calorie count of each serving. This simple change can make a big difference for those watching their calorie intake or looking to make a healthier choice without sacrificing flavor.
Lower in Unhealthy Fats
Say goodbye to the excess unhealthy fats found in fried food.
Fried chicken is often cooked in oils that are high in saturated fats, which, when consumed in excess, can raise cholesterol levels and contribute to heart disease. On the other hand, baking allows you to control the amount of fat you use, making it easier to choose healthier options like olive oil or even omit the oil altogether. This can significantly lower the unhealthy fat content of your meal.
No Need for Deep-Frying
No deep fryer?
Deep-frying is not only messy but also requires special equipment, such as a deep fryer, to achieve those crispy cutlets. Baking, on the other hand, is much simpler and only requires a standard oven. This makes it an easier and more convenient method for anyone who doesn’t have access to or doesn’t want to deal with deep-frying equipment.
Transition to Next Section
By baking chicken cutlets instead of frying them, you’re already on your way to a healthier meal. But making them crispy and delicious can sometimes feel like a challenge. Next, let’s explore the simple techniques you can use to achieve that perfect, crispy texture without all the oil.
Subheading 2: Retains Flavor and Moisture
How the Oven Keeps Chicken Juicy While Making It Crispy
When it comes to baking chicken cutlets, one common concern is whether the meat will dry out during the cooking process. Fortunately, the oven offers several advantages that help retain the chicken’s natural flavor and moisture while achieving a deliciously crispy crust. Let’s explore how baking works its magic to keep your chicken juicy and tender on the inside, with a perfectly crisp exterior.
Even Cooking for Tenderness
Baking allows heat to distribute evenly, helping to lock in moisture.
Unlike frying, where the high heat can cause uneven cooking and potentially dry out certain areas of the chicken, baking offers a gentler, more consistent heat distribution. The oven’s heat surrounds the baked chicken cutlet recipes, cooking it evenly from all sides. This process helps seal in the juices, ensuring that the meat remains tender and moist throughout the cooking process. With baking, there’s no need to worry about overcooking or uneven texture, as the heat evenly penetrates the chicken.
The Power of Oven Temperature
Controlling the temperature helps to achieve the perfect balance of crispy and juicy.
When baking chicken cutlets, controlling the oven temperature is key to achieving that perfect balance between crispy breading and juicy chicken. The ideal temperature for baking breaded chicken is around 375°F to 400°F. At this temperature, the breading becomes crispy without burning, while the baked chicken cutlet recipes cooks through gently, maintaining its juiciness. This process allows the cutlet to develop a golden, crispy crust while keeping the inside tender and flavorful.
Sealing in Juices with a Coating
The breading acts as a barrier, trapping moisture inside the chicken.
The breading on your chicken cutlets is not just for flavor and texture—it’s also an important factor in retaining moisture. As the cutlets bake, the breading creates a protective barrier around the chicken, which prevents the juices from escaping and helps keep the meat moist. This makes the cutlets tender and flavorful, as the seasoning and natural juices remain locked inside, rather than being lost in the cooking process.
Transition to Next Section
Now that we’ve covered how the oven helps retain moisture and enhances flavor, let’s take a closer look at the essential step—how long to cook chicken cutlets in the oven. Knowing the right cooking time and temperature is crucial to achieving that perfect result every time.
Subheading 3: Perfect for Meal Prep
Why Baked Chicken Cutlets Are a Weeknight Winner
When life gets busy, having easy, ready-to-eat meals on hand is a lifesaver. Baked chicken cutlets are the perfect solution for meal prep, offering a quick and convenient option that you can store and reheat throughout the week. Let’s explore why baked chicken cutlets make an ideal meal prep choice and how you can enjoy them for days to come.
Easy to Store for Later
Baked chicken cutlets are simple to store, ensuring freshness and flavor all week long.
After you’ve baked your chicken cutlets, storing them for later use is a breeze. Simply allow them to cool completely and place them in an airtight container. Whether you’re prepping for a few days or an entire week, baked chicken cutlets can be easily stored in the refrigerator for up to 4 days without losing flavor or texture. The coating remains crispy, and the chicken stays tender, making it easy to enjoy a healthy, home-cooked meal even on the busiest days.
Quick and Easy to Reheat
Reheating baked chicken cutlets is quick and doesn’t sacrifice quality.
One of the greatest benefits of meal prepping baked chicken cutlets is how easy they are to reheat. Unlike other dishes that might lose their texture or flavor when reheated, the breaded baked chicken cutlet recipes can be warmed up in the oven or on a stovetop without losing its crispiness. Simply place the cutlets in the oven at a low temperature (around 350°F) for 10-12 minutes, or heat them in a skillet with a little oil to bring back that crispy texture. This ensures you get a fresh, hot meal in just minutes.
Versatile for Different Meal Ideas
Baked chicken cutlets can be used in a variety of ways to keep your meals interesting.
Meal prepping with baked chicken cutlets isn’t just about reheating the same dish day after day. You can easily incorporate them into various meals to keep things exciting. Slice them up and add to salads, toss them in a wrap, or serve with a side of roasted vegetables. You can even top a pizza or mix into pasta dishes. The versatility of baked chicken cutlets makes them a fantastic addition to your meal prep routine, as they can be enjoyed in many different ways throughout the week.
Transition to Next Section
With the convenience and versatility of baked chicken cutlets for meal prep, you’re all set for a week of delicious and hassle-free meals. Now, let’s dive into the next essential step: understanding how long to cook chicken cutlets in the oven for the best results.
2) How to Make Crispy and Juicy Oven-Baked Breaded Chicken
Subheading 1: The Best Breading Techniques
Step-by-Step Guide to Coating Chicken with Bread Crumbs, Parmesan, and Spices
Breading chicken cutlets is an art that can make or break the final result. A perfect breading creates a crispy, golden crust while adding flavor and texture. The good news is that achieving the ideal breading is simple with the right technique and ingredients. Here’s a step-by-step guide to coating your chicken cutlets with bread crumbs, Parmesan cheese, and spices to create the perfect crispy exterior.
Step 1: Prepare the Chicken
Start with the right baked chicken cutlet recipes for the best results.
Before breading your chicken, ensure that it’s properly prepped. Begin by flattening the chicken breasts to an even thickness, which allows for uniform cooking. Use a meat mallet or rolling pin to gently pound the chicken between two sheets of plastic wrap or parchment paper. This step helps the chicken cook more evenly, resulting in tender meat with a perfectly crispy coating. Pat the chicken dry with paper towels to remove excess moisture—this helps the breading adhere better.
Step 2: Set Up Your Breading Stations
Create a simple breading station for easy coating.
The secret to a perfect breading process lies in a well-organized setup. You’ll need three shallow dishes for the breading procedure:
- Flour Station: In the first dish, add all-purpose flour, a pinch of salt, and pepper. The flour helps the egg wash stick to the chicken.
- Egg Wash Station: In the second dish, beat two large eggs (or use egg whites for a lighter option) with a tablespoon of water or milk. The egg wash helps the breading adhere and adds moisture to the cutlets.
- Breadcrumb Station: In the third dish, combine breadcrumbs (regular or panko for extra crunch), grated Parmesan cheese, and any desired spices (like garlic powder, onion powder, and Italian seasoning). The Parmesan adds a rich, savory flavor, and the breadcrumbs form the crispy coating.
Step 3: Coat the Chicken Cutlets
The key to even and crispy breading lies in the technique.
Start by dredging each baked chicken cutlet recipes in the flour mixture. Make sure the cutlet is fully coated, shaking off any excess flour. Next, dip the floured chicken into the egg wash, ensuring it’s evenly covered. This step helps the breading stick and adds moisture. Finally, transfer the chicken to the breadcrumb mixture, pressing lightly so the breadcrumbs adhere. Be sure to coat the entire surface of the chicken, pressing down to create an even, thick layer of breading. For an extra-crispy crust, you can repeat this step for a double coating.
Step 4: Rest the Coated Chicken
Let the breaded cutlets rest to ensure a better crust.
Once the chicken is coated, let it rest for a few minutes on a plate or tray. This step is important because it allows the breading to set, preventing it from falling off during baking. Resting also ensures that the coating crisps up evenly as the chicken bakes.
Step 5: Bake to Perfection
The final step—bake your breaded chicken to crispy, golden-brown perfection.
Place your breaded chicken cutlets on a baking sheet lined with parchment paper or a wire rack. If you’re using a wire rack, it allows air circulation, making the breading extra crispy. Bake in a preheated oven at 375°F to 400°F for about 20-25 minutes, flipping halfway through for even crispiness. The chicken should be golden brown and the internal temperature should reach 165°F.
Transition to Next Section
Now that you’ve mastered the art of breading chicken cutlets, the next step is ensuring that your breaded chicken comes out crispy and juicy every time. Let’s dive into the oven temperature, cooking time, and techniques that will help you achieve the perfect balance of crispy and tender.
Subheading 2: How to Achieve the Perfect Crispy Crust
Tips on Getting the Breading Crispy with Baking Time, Oven Temperature, and Oil Spray
A perfectly crispy crust on baked chicken cutlets is the hallmark of a great dish. Achieving that crunchy, golden exterior without the need for deep frying is entirely possible when you use the right techniques and oven settings. Here are some essential tips for ensuring your chicken cutlets come out crispy and delicious every time.
Tip 1: Preheat Your Oven to the Right Temperature
The key to crispiness starts with a properly preheated oven.
Getting the oven temperature just right is one of the most crucial steps in ensuring a crispy crust. Preheat your oven to 375°F to 400°F, depending on the thickness of your chicken and your desired level of crispness. At this temperature, the breading will have enough time to crisp up without overcooking the chicken. A higher temperature can help achieve a crispier, crunchier crust, while still keeping the inside juicy and tender. Make sure the oven is fully preheated before placing your cutlets inside—this ensures that the chicken begins to cook immediately, forming a crispy layer on the outside.
Tip 2: Use a Light Coat of Oil for Extra Crispiness
Oil spray helps achieve a golden, crisp exterior without frying.
One of the secrets to a perfectly crispy crust is using just the right amount of oil. While traditional frying involves submerging the chicken in hot oil, baking allows you to achieve a similar effect with far less oil. To enhance crispiness, lightly spray the breaded chicken cutlets with cooking spray (or drizzle with a small amount of olive oil) just before baking. The oil will help the breading turn golden and crisp, creating a crunchy texture similar to frying but without the excess calories. You can also lightly coat the baking sheet with oil to ensure that the chicken doesn’t stick.
Tip 3: Bake on a Wire Rack for Even Crisping
Elevate the cutlets to allow heat to circulate for uniform crispiness.
To get an evenly crispy crust all around your chicken cutlets, bake them on a wire rack placed over a baking sheet. This allows hot air to circulate underneath the chicken, which promotes even cooking and prevents the breading from getting soggy from any excess moisture. If you don’t have a wire rack, you can simply place the cutlets directly on a parchment-lined baking sheet, but a wire rack will give you the best results for an all-around crispy texture.
Tip 4: Flip Halfway Through for Even Crisping
Turning the chicken halfway through ensures both sides are crispy.
For the crispiest breading, flip your chicken cutlets halfway through the baking time. This ensures that both sides get exposed to heat evenly and results in a golden, crunchy crust on both the top and bottom. Flip the chicken gently with tongs or a spatula to maintain the integrity of the breading. Typically, flipping halfway through will give you the best result in terms of crispiness and overall texture.
Tip 5: Don’t Overcrowd the Pan
Give each cutlet space to breathe for a crispier finish.
Overcrowding the baking pan can lead to steam building up, which makes the breading soggy and prevents the chicken from getting crispy. For optimal results, ensure there’s enough space between each cutlet so that the heat can circulate freely around them. If needed, bake in batches or use a larger baking sheet to give each piece room to cook evenly. The air circulation around the chicken is key to getting that perfect, crispy crust.
Tip 6: Monitor Baking Time and Internal Temperature
Perfect baking time ensures the ideal texture and doneness.
The baking time for chicken cutlets will vary depending on their thickness and the oven temperature, but it typically ranges between 20-30 minutes. To ensure they’re perfectly cooked, use a meat thermometer to check the internal temperature—your chicken should reach 165°F. If you like an extra crispy crust, you can broil the cutlets for the last 1-2 minutes of cooking, keeping an eye on them to prevent burning.
Transition to Next Section
Now that you have all the tips for achieving a perfect crispy crust, it’s time to explore the next step—how long to bake chicken cutlets to get them just right. Let’s dive into cooking times and how to ensure your chicken is cooked through while maintaining that juicy interior
Subheading 3: Breaded Chicken Breast in the Oven
Why Chicken Breasts Are Ideal for This Recipe
When it comes to baking breaded chicken cutlets in the oven, chicken breasts are often the top choice for their texture, flavor, and versatility. In this section, we’ll discuss why chicken breasts are perfect for this recipe and how they help create the ideal crispy and juicy breaded cutlet.
Tender and Lean Protein
Chicken breasts offer the perfect balance of tenderness and lean protein.
One of the main reasons chicken breasts are ideal for breading and baking is that they are a lean source of protein. Unlike other cuts of chicken, such as thighs, chicken breasts have less fat, making them a healthier choice for those looking to enjoy a lighter meal. Their naturally tender texture also makes them the perfect candidate for breading, as they don’t dry out easily when cooked properly in the oven. This allows for the creation of a crispy, flavorful exterior without sacrificing the juicy, tender interior.
Quick Cooking Time
Chicken breasts cook quickly and evenly in the oven.
Chicken breasts, especially when they are pounded to an even thickness, cook much faster than other cuts of meat. This makes them perfect for busy weeknight dinners or meal prep. Because they are relatively thin and uniform in shape, chicken breasts bake evenly and require less time in the oven, typically around 20-25 minutes at 375°F. This helps to maintain their moisture while achieving a golden, crispy coating. The shorter cooking time also ensures that the breading doesn’t overcook or burn, allowing you to achieve the perfect balance of crispy crust and juicy meat.
Versatile and Mild Flavor
Chicken breasts have a mild flavor that complements any seasoning.
Another reason chicken breasts are ideal for breading is their mild flavor. They act as a blank canvas, easily taking on the flavors of the seasonings, herbs, and spices used in the breading. Whether you prefer a simple seasoning mix with salt, pepper, and garlic, or a more complex flavor profile with Italian seasoning and Parmesan cheese, chicken breasts absorb and complement a wide range of flavor profiles. This versatility allows you to customize your breaded chicken cutlets to suit different tastes, making them perfect for any occasion, from casual family dinners to elegant meals.
Perfect Texture for Breading
The smooth surface of chicken breasts allows for an even, crispy coating.
Chicken breasts have a smooth surface that’s ideal for breading. Because of their even shape, they provide a consistent surface for the breading to adhere to, ensuring that every bite is crispy and flavorful. When you bread chicken thighs or other cuts, the uneven surface can result in inconsistent coverage, but chicken breasts allow for a perfectly even coating of breadcrumbs, Parmesan, and spices. This ensures that each baked chicken cutlet recipes has a uniform crunch, creating that irresistible crispy exterior with each bite.
Lean and Healthy Meal Option
A healthier alternative to frying, chicken breasts in the oven provide a lighter meal.
When baked in the oven, breaded chicken breasts provide a healthier alternative to deep-fried versions, without compromising on flavor. The lean nature of chicken breasts means that when baked, they offer a much lower fat content compared to fried chicken. This makes baked breaded chicken breasts an ideal choice for those looking for a lighter, healthier meal, without sacrificing taste. Additionally, using the oven eliminates the need for excessive oil, which helps keep the dish light and reduces unnecessary calories.
Transition to Next Section
Now that we understand why chicken breasts are the perfect choice for breaded oven-baked cutlets, let’s move on to the next important aspect: achieving the right baking time and temperature for perfectly cooked chicken cutlets every time. In the next section, we’ll explore how to bake breaded chicken breasts to perfection.
3) How Long to Cook Chicken Cutlets in the Oven
Subheading 1: General Cooking Time for Chicken Cutlets
How Long to Bake Breaded Chicken Based on Thickness
Cooking chicken cutlets to perfection requires careful attention to baking time and temperature, especially when it comes to the thickness of the meat. The right cooking time ensures that the breaded chicken cutlets are crispy on the outside and juicy on the inside. In this section, we will discuss how the thickness of your chicken cutlets affects baking time and how to adjust accordingly for the best results.
Thin Chicken Cutlets: Quick and Even Cooking
Thin chicken cutlets bake quickly and evenly in the oven.
When chicken breasts are pounded or sliced thinly, they cook faster, making them an ideal choice for a quick meal. Thin cutlets typically range from ½ to ¾ inch in thickness, which means they will bake in approximately 15-20 minutes at 375°F. At this thickness, the chicken cooks through rapidly, while the breading crisps up nicely, creating the perfect balance of texture.
Pro Tip: If you’re unsure whether the cutlet is done, use a meat thermometer to check the internal temperature. It should read 165°F to ensure that the chicken is fully cooked.
Medium-Thick Chicken Cutlets: A Little Extra Time
For chicken cutlets around 1 inch thick, add a few extra minutes.
Medium-thick chicken cutlets (about 1 inch thick) are still relatively quick to bake, but they will need a bit more time to reach the desired internal temperature of 165°F. You should bake these cutlets for about 20-25 minutes at 375°F, flipping halfway through to ensure even crisping on both sides. The extra thickness means the cutlet needs a little more time in the oven to cook through without drying out.
Pro Tip: If your cutlets are on the thicker side, you may want to slightly reduce the oven temperature to 350°F. This will allow the chicken to cook more slowly, ensuring the breading doesn’t burn while the meat cooks thoroughly.
Thick Chicken Cutlets: Longer Baking Time Required
Thicker chicken breasts need significantly more time to bake through.
For thicker chicken breasts (over 1 inch), you’ll need to bake them for 30 minutes or more, depending on their size. If your cutlets are particularly thick, it’s a good idea to use a lower oven temperature, around 350°F, and bake them for 30-35 minutes, flipping halfway through. The lower temperature helps prevent the breading from burning while allowing the thicker chicken to cook fully.
Pro Tip: If your chicken breasts are particularly thick, consider using a meat mallet to pound them out before breading, ensuring they cook more evenly and quicker. Alternatively, you can butterfly the chicken breasts to reduce thickness, making them bake faster.
Factors That Affect Baking Time
Several factors can impact how long it takes to bake chicken cutlets.
While thickness is the primary factor, other elements can affect cooking time:
- Bone-in vs. Boneless: Bone-in chicken breasts take longer to cook than boneless cutlets. If you’re using bone-in cutlets, expect to add 5-10 extra minutes of baking time.
- Oven Calibration: Not all ovens cook at the same temperature, so it’s a good idea to use an oven thermometer to ensure your oven is preheated correctly.
- Breading Thickness: If you’ve used a double layer of breading, the cutlet may need a little extra time in the oven to ensure that the breading crisps up properly without burning.
How to Check for Doneness
Ensure your chicken is cooked through by using a meat thermometer.
The most reliable way to check if your chicken cutlets are done is to use a meat thermometer. Insert it into the thickest part of the baked chicken cutlet recipes. When the temperature reaches 165°F, the chicken is fully cooked and safe to eat. The meat should be opaque and the juices should run clear.
Pro Tip: If you don’t have a meat thermometer, you can also cut into the thickest part of the chicken to check that the meat is no longer pink and the juices run clear.
Transition to Next Section
Now that you understand how to adjust the baking time based on thickness and how to check for doneness, let’s move on to tips for achieving that perfect golden, crispy crust. In the next section, we’ll discuss how to make sure the breading crisps up while keeping the chicken juicy on the inside.
Subheading 2: Recommended Oven Temperature
Discuss Ideal Baking Temperature (375°F – 400°F)
Choosing the right oven temperature is crucial for baking the perfect baked chicken cutlet recipes. Too high, and the breading may burn before the chicken cooks through. Too low, and the breading may not crisp up as desired. In this section, we’ll discuss the ideal baking temperature for chicken cutlets, and why 375°F to 400°F is the sweet spot for achieving crispy, golden-brown perfection.
375°F: The Perfect Middle Ground
375°F is often the best temperature for baking chicken cutlets.
For most breaded baked chicken cutlet recipes, an oven temperature of 375°F strikes the perfect balance between crispiness and juiciness. At this temperature, the chicken cooks through without drying out, while the breading becomes perfectly golden and crispy. It allows the breading to set without burning, giving the chicken ample time to cook thoroughly. For cutlets that are medium-thick or thin (around ¾ inch), 375°F provides the best results, producing a moist interior with a crunchy exterior.
Pro Tip: If you are using thicker chicken breasts, you can still bake at 375°F but may need to adjust the cooking time slightly to ensure the chicken cooks fully without burning the breading.
400°F: A Higher Temperature for Extra Crispiness
If you’re looking for extra crispy chicken cutlets, consider raising the temperature to 400°F.
Baking at 400°F can help to achieve a crisper, more pronounced crunch on the breading. This is ideal if you like a really crispy, well-browned crust. At 400°F, the chicken cutlets cook faster, which can be a benefit when you’re short on time. However, since the temperature is higher, you’ll need to monitor the breading closely to prevent it from over-browning or burning.
Pro Tip: If you choose to bake at 400°F, consider flipping the chicken halfway through to ensure that both sides of the breading are evenly crisped. Also, check the internal temperature of the chicken to ensure it reaches 165°F.
Oven Temperature Considerations
Why you should adjust the temperature based on the thickness of your chicken and desired crispiness.
While 375°F to 400°F are the most common recommended temperatures, there are a few factors to consider when determining the exact temperature for your recipe:
- Thickness of the Chicken: If your chicken cutlets are very thick (1 inch or more), you may want to start at 375°F to allow the chicken to cook slowly and evenly without burning the outside.
- Double Breading: If you’ve applied a double layer of breadcrumbs for extra crunch, a slightly lower temperature (375°F) will help prevent the breading from burning before the chicken cooks through.
- Moisture Content: If you’ve marinated your chicken or used a wet batter before breading, a slightly higher temperature (around 400°F) will help crisp up the coating more effectively.
How to Ensure Even Cooking
Consistent temperature and airflow are key to even cooking.
Regardless of your chosen temperature, it’s important to preheat your oven properly and avoid opening the oven door too frequently, as this can lower the temperature inside. A preheated oven ensures that your chicken cutlets begin cooking immediately when placed inside, which is crucial for getting the breading just right.
Pro Tip: If you’re concerned about uneven heat distribution, try using a convection oven if you have one. Convection ovens circulate hot air more evenly, resulting in a perfectly crispy, golden-brown crust without overcooking.
Do You Need to Use a Baking Rack?
Consider using a rack to elevate the chicken cutlets for even crisping.
To further improve the crispiness of your chicken cutlets, consider placing them on a baking rack set over a baking sheet. Elevating the chicken allows hot air to circulate around the breading, promoting even crisping on both sides. This method helps the cutlets stay crispy, rather than becoming soggy from resting in their own juices.
Pro Tip: If you don’t have a baking rack, simply flipping the chicken halfway through the cooking time will help ensure even cooking and crispiness on both sides.
How to Check if Your Oven Is at the Right Temperature
Make sure your oven is preheated to the right temperature.
It’s essential to confirm that your oven is at the correct temperature before placing your chicken cutlets inside. Oven temperatures can sometimes be inaccurate, so investing in an oven thermometer can help ensure that your oven is consistently reaching the right temperature. This ensures that your chicken cutlets cook evenly, without undercooking or burning.
Pro Tip: For more consistent results, use the middle rack of your oven for even heat distribution.
Transition to Next Section
Now that you know the ideal oven temperatures and how to adjust based on thickness and desired crispiness, let’s dive into tips for making sure your chicken cutlets are baked to perfection. In the next section, we’ll focus on achieving the perfect crispy coating that everyone will love.
This expanded section highlights the benefits and considerations of baking chicken cutlets at 375°F to 400°F, offering tips for achieving a crispy crust, ensuring even cooking, and adjusting temperature based on thickness. It provides detailed advice for getting the most out of your oven, ensuring your breaded chicken cutlets turn out perfectly every time. The section transitions smoothly into the next, focusing on tips for perfecting the crispy exterior.
Subheading 3: How to Check for Doneness
Use of a Meat Thermometer and Visual Cues to Ensure Perfect Chicken Cutlets
When it comes to baking chicken cutlets, the key to success is making sure they are fully cooked without overcooking. A perfectly cooked baked chicken cutlet recipes should be juicy on the inside, with a crispy, golden crust on the outside. In this section, we’ll explore how to check for doneness using a meat thermometer and visual cues, so you can ensure that your chicken is cooked to perfection every time.
Using a Meat Thermometer for Accurate Results
The most reliable way to check for doneness is by using a meat thermometer.
A meat thermometer is an essential tool for cooking chicken to the right temperature. The U.S. Department of Agriculture (USDA) recommends cooking all poultry to an internal temperature of 165°F to ensure it’s safe to eat. To use a meat thermometer effectively, insert it into the thickest part of the baked chicken cutlet recipes without touching the bone, if using bone-in cutlets.
Pro Tip: Make sure the thermometer is inserted into the chicken cutlet’s center, avoiding any fat or bone, as these can give inaccurate readings. Once the thermometer reads 165°F, your chicken is safe and fully cooked. If it’s below this temperature, give the chicken a few more minutes in the oven.
Visual Cues: Look for Clear Juices and White Meat
Visual cues can also help confirm doneness if you don’t have a thermometer on hand.
In addition to using a meat thermometer, there are visual signs to look for when checking chicken cutlets for doneness. Once the chicken reaches 165°F, it will have certain distinguishing characteristics:
- Clear Juices: When you cut into the baked chicken cutlet recipes, the juices should run clear, not pink. If the juices are still pink or red, the chicken needs more time in the oven.
- White, Opaque Meat: The chicken’s meat should appear white and opaque, rather than translucent or pink. The texture should feel firm, and there should be no signs of redness in the meat itself.
Pro Tip: If you’re unsure, you can also slice the thickest part of the cutlet to visually inspect the inside. It should no longer be pink and should look cooked all the way through.
The Importance of Resting Your Chicken Cutlets
Let your chicken rest for a few minutes to allow the juices to redistribute.
Once your chicken cutlets are done baking, let them rest for about 5 minutes before serving. Resting allows the juices to redistribute throughout the meat, making the chicken more tender and juicy. If you slice into the chicken immediately after baking, the juices will escape, leaving the meat dry.
Pro Tip: Cover your chicken loosely with foil while it rests to keep it warm and prevent the crust from softening.
Alternative Doneness Test: The “Press Test”
If you don’t have a meat thermometer, you can use the “press test” to check for doneness.
The “press test” is a method that involves pressing gently on the baked chicken cutlet recipes with a fork or tongs to check for firmness. If the chicken is firm to the touch and bounces back, it’s likely cooked through. If it feels soft or mushy, it likely needs more time in the oven. While this method isn’t as precise as using a thermometer, it can work well in a pinch.
Pro Tip: As with all methods, the press test should be combined with other cues (like juices running clear) for the best accuracy.
How to Avoid Overcooking Chicken Cutlets
Overcooking chicken cutlets can result in dry, tough meat and a less-than-ideal texture.
To prevent overcooking, always check the internal temperature near the end of the estimated cooking time. Chicken cutlets are generally done when the internal temperature reaches 165°F, but they can continue to cook slightly as they rest. Keeping an eye on the time and using a meat thermometer will help you avoid cooking them too long.
Pro Tip: If you’re using thin cutlets, they will cook faster, so make sure to check for doneness a bit earlier than with thicker cuts.
Summary of Doneness Tips
To recap, here are the most effective ways to ensure your chicken cutlets are perfectly cooked:
- Use a meat thermometer to check for 165°F.
- Look for clear juices and white, opaque meat.
- Rest the chicken for 5 minutes before serving.
- Use the press test as a backup method.
- Avoid overcooking by checking doneness early.
Transition to Next Section
Now that you know how to check for doneness using both a meat thermometer and visual cues, you’ll be able to bake your chicken cutlets with confidence. In the next section, we’ll dive deeper into perfecting the texture of your breaded chicken and how to keep it crispy and golden-brown.
4) Tips and Tricks for baked chicken cutlet recipes
Subheading 1: Seasoning Your Chicken
Key Spices and Herbs to Use (Garlic Powder, Italian Seasoning, etc.)
Seasoning your chicken cutlets is one of the most important steps in creating a flavorful dish. While breading adds a crispy texture, it’s the seasoning that infuses the chicken with delicious flavors. In this section, we’ll explore the best spices and herbs to use for seasoning your chicken, ensuring that each cutlet is packed with taste, from the inside out.
Essential Spices for Chicken Cutlets
Garlic powder, onion powder, and paprika – the must-have spices for a well-seasoned cutlet.
To start, garlic powder is a staple seasoning for chicken cutlets, bringing a savory, aromatic depth to the dish. Onion powder is another great addition, as it complements garlic perfectly and enhances the overall flavor. Together, garlic and onion powders create a balanced, flavorful base that works well with most breading.
Paprika is another key seasoning that gives chicken cutlets a mild heat and a subtle smokiness. For those who love a little kick, you can choose smoked paprika for a deeper flavor or hot paprika for a spicier touch.
Pro Tip: When using garlic powder and onion powder, make sure to coat the chicken evenly to get the most flavor in every bite.
Herbs to Elevate Flavor
Fresh and dried herbs that pair beautifully with chicken.
In addition to spices, fresh and dried herbs elevate the flavor profile of your chicken cutlets. Italian seasoning is an excellent all-purpose herb blend that combines thyme, oregano, rosemary, and basil—perfect for adding a Mediterranean flair to your dish. If you’re going for a more herby profile, oregano and rosemary are classic choices that pair beautifully with chicken.
Parsley, whether fresh or dried, adds a hint of brightness, balancing out the richer flavors of garlic and onion powder. A little basil or thyme can also go a long way, giving your chicken cutlets a slightly sweet, aromatic edge.
Pro Tip: If you’re using fresh herbs, chop them finely so they can easily adhere to the chicken, enhancing the flavor. If using dried herbs, be mindful of the quantities as they tend to be more concentrated than fresh herbs.
Customizing Your Seasonings
How to create your own unique seasoning blend for chicken cutlets.
The beauty of seasoning chicken cutlets is that it’s customizable based on your preferences. While garlic powder, onion powder, and Italian seasoning are great go-to choices, you can easily create a seasoning mix that suits your taste. For a more savory kick, consider adding cumin, chili powder, or coriander. These spices give your chicken a warm, earthy flavor that pairs perfectly with the crispy breading.
If you’re aiming for a zesty flavor, consider incorporating lemon zest or lemon pepper into your seasoning mix. The acidity of lemon will contrast beautifully with the richness of the chicken. You can also make the dish even more savory by adding a touch of parmesan cheese to the seasoning blend, which adds a salty, umami depth that pairs wonderfully with the breading.
Pro Tip: Experiment with a pinch of cayenne pepper or red pepper flakes for a subtle heat, or brown sugar for a touch of sweetness to balance the spices.
Salt and Pepper – The Foundation of Flavor
Don’t forget the basics – salt and black pepper are essential for any seasoning blend.
While it’s easy to focus on the more exotic spices, don’t underestimate the power of salt and black pepper. Salt is crucial for enhancing the flavors of all the other spices and herbs. A generous sprinkle of salt will bring out the natural flavor of the chicken, while freshly cracked black pepper adds a hint of sharpness that contrasts beautifully with the other spices.
Pro Tip: Make sure to season your chicken with salt and pepper before applying the breading. This will help the seasonings penetrate the meat, ensuring every bite is flavorful, not just the crust.
How to Apply the Seasoning to Your Chicken
Properly seasoning your chicken ensures even coverage and maximum flavor.
To get the best results, start by patting your chicken cutlets dry with paper towels. This helps the seasonings stick to the chicken. Next, apply a thin layer of olive oil or melted butter to the chicken. This will help the seasonings adhere while also adding moisture. Sprinkle your chosen seasoning mix evenly over both sides of the chicken, massaging it into the meat for even coverage. You can also marinate the chicken for a few hours or overnight to allow the flavors to penetrate even deeper.
Pro Tip: When breading the chicken, you can also add some seasoning to the breadcrumbs for an extra burst of flavor.
Transition to Next Section
Now that your chicken cutlets are seasoned and ready to go, let’s move on to the next step—getting that perfect, crispy breading. In the following section, we’ll cover the best techniques for coating your chicken cutlets, so the seasoning and breading come together in perfect harmony.
Subheading 2: Making Sure Your Chicken Cutlets Cook Evenly
Importance of Space on the Baking Tray, Flipping Mid-Way
One of the most common challenges when baking chicken cutlets is ensuring that they cook evenly. Whether you’re cooking a few cutlets or a whole batch, the way you arrange them on the baking tray and how you handle them during the baking process can make all the difference. In this section, we’ll discuss the key factors to ensure your chicken cutlets are perfectly crispy and cooked through.
Proper Spacing on the Baking Tray
Give your chicken cutlets room to breathe for even cooking.
When arranging chicken cutlets on the baking tray, it’s crucial to give each piece enough space to allow for proper air circulation. If the cutlets are too close together, they will steam instead of bake, which can result in soggy, unevenly cooked chicken. Proper spacing ensures that the heat from the oven can circulate around each piece, giving you that crispy, golden crust on all sides.
Make sure the cutlets are spaced at least 1 inch apart. This will allow the hot air to evenly circulate, ensuring that every side of the chicken gets the same amount of heat. If you’re cooking a large batch, consider using two trays or cooking them in batches to maintain this spacing.
Pro Tip: Line your baking tray with parchment paper or a silicone baking mat for easy cleanup and to prevent the chicken from sticking.
Flipping Chicken Mid-Way for Even Crispiness
Turn your chicken cutlets halfway through baking for a uniform crust.
To achieve an even, golden-brown crust on both sides of your chicken cutlets, it’s essential to flip them halfway through the cooking process. Flipping ensures that both sides get direct contact with the heat and that the breading crisps up nicely. Not flipping can lead to one side being more cooked and the other more underdone.
A good rule of thumb is to flip your chicken cutlets about 10 minutes into baking, depending on their thickness and the oven temperature. You should see the breading start to brown on one side, signaling it’s time to flip. When flipping, use tongs or a spatula to carefully turn each cutlet to avoid disrupting the breading.
Pro Tip: If you want extra crispiness, you can lightly spray the chicken with oil again after flipping it to encourage an even crispier texture on the second side.
Why Flipping and Spacing Matter for Perfectly Cooked Chicken
Flipping and spacing aren’t just about texture—they affect the cooking process too.
The combination of proper spacing and flipping at the right time not only ensures a crispy exterior but also helps your chicken cook through evenly. Spacing your chicken properly allows heat to circulate freely, reducing the chance of hot spots or uneven cooking. Flipping halfway through helps balance the cooking process, ensuring that the breading crisps uniformly and the meat stays juicy inside.
Without proper spacing and flipping, the outer layer of your chicken cutlets may burn before the inside reaches the desired temperature, leading to dry, overcooked chicken. On the other hand, if you don’t flip the chicken, you may end up with soggy breading on one side and unevenly cooked meat.
Pro Tip: For even more crispy results, you can place the chicken cutlets on a rack over the baking tray instead of directly on the tray. This will allow air to circulate underneath the cutlets as well, ensuring that all sides get evenly cooked.
Using the Right Bakeware for Even Cooking
The bakeware you choose can also impact the evenness of the cooking.
To get the best results, use a rimmed baking sheet or a baking rack. A rimmed sheet ensures that the chicken stays contained while also allowing airflow around each cutlet. If you’re looking for an even crisper crust, placing the chicken on a wire rack allows the heat to circulate under the cutlet, promoting an even crispiness all around.
Be mindful of the material of your bakeware as well. A heavy-duty baking sheet or a cast iron pan helps distribute heat more evenly, which can prevent hot spots and lead to more consistent cooking. Avoid using non-stick pans with a lip, as they can cause uneven airflow and limit crispiness.
Pro Tip: If using a baking rack, lightly grease it or use parchment paper to prevent the breading from sticking.
Checking for Even Cooking Towards the End
Keep an eye on the chicken cutlets to ensure they are cooking evenly towards the end.
As your chicken cutlets near the end of their cooking time, it’s important to check that they’re cooking evenly on all sides. If one side looks darker than the other, it may need to be flipped or rotated for a more even finish. You can also gently press down on the cutlets with tongs to ensure they’re cooked through without any raw spots.
Pro Tip: If the cutlets seem to be cooking unevenly, try rotating the baking sheet halfway through cooking for an extra boost of even heat distribution.
Summary of Tips for Even Cooking
To recap, here are the key steps to ensuring your chicken cutlets cook evenly:
- Space the cutlets at least 1 inch apart on the baking tray for proper air circulation.
- Flip the chicken halfway through the cooking time for even crispiness on both sides.
- Use a rack or baking sheet to promote even heat distribution and crispiness.
- Check the chicken visually towards the end of cooking to make sure the meat is cooked evenly.
- Rotate the tray if needed to address any hot spots in the oven.
Transition to Next Section
With the spacing and flipping in place, your chicken cutlets are well on their way to being perfectly cooked and crispy. Next, we’ll dive into tips for checking the doneness of your cutlets using a meat thermometer and visual cues, so you can be sure they’re cooked through without being overdone.
Subheading 3: How to Make the Breading Stick
Tips on Egg Wash and Breading Consistency
Achieving a crispy, golden-brown crust on your chicken cutlets is all about getting the breading to adhere properly. The key to making the breading stick without falling off during the baking process lies in the right technique and using the right ingredients. In this section, we’ll explore how to properly coat your chicken cutlets with a consistent breading and the importance of egg wash for sticking power.
The Egg Wash – The Secret to Adhesion
How an egg wash creates the perfect base for breading to stick.
An egg wash is one of the most important elements in making sure the breading sticks to your chicken cutlets. It acts as a binder that helps the breadcrumbs adhere evenly to the chicken. The egg proteins form a sticky surface on the chicken, which gives the breadcrumbs something to cling to during baking.
To create the perfect egg wash, whisk together one or two eggs with a small amount of water or milk—about 1 to 2 tablespoons. The milk adds a touch of richness, while the water helps thin the egg mixture so it can evenly coat the chicken. For extra flavor, you can also season the egg wash with a pinch of salt, pepper, or even a little garlic powder to complement the breading.
Pro Tip: If you want an even thicker coating, you can use buttermilk in place of water or milk. The acidity of buttermilk helps tenderize the chicken while also ensuring that the breading sticks better.
The Breading Process – Dry, Wet, Dry
Mastering the three-step breading technique for even coverage.
To make sure the breading sticks well to your chicken, use the dry, wet, dry technique. This process involves three simple steps:
- First Dry Coat: Dredge the chicken in seasoned flour (optional) or breadcrumbs before dipping it in the egg wash. This first dry coating creates a foundation for the egg wash to adhere to and helps the breading stay intact during baking.
- Egg Wash: Dip the chicken into the egg wash, ensuring it’s fully coated. The egg wash should cling to the chicken without dripping too much.
- Final Coat: After the egg wash, coat the chicken again with seasoned breadcrumbs or panko crumbs. Press gently to ensure the breadcrumbs stick evenly to the chicken. This double coating helps ensure that the breading stays intact and that the cutlets come out crispy and golden.
Pro Tip: For extra crunch, use panko breadcrumbs instead of regular breadcrumbs.Panko creates a lighter, airier crust that is much crispier when baked.
Breading Consistency – The Right Amount of Coating
Why the thickness of the breading matters for texture and flavor.
The consistency of your breading is crucial for achieving the perfect crust. If the breading is too thin, it won’t provide enough texture and crunch; too thick, and it may become soggy or fall off during baking. The ideal breading should be thin but even, with just enough coating to create a crispy, golden crust that enhances the flavor of the chicken.
To ensure even coating, gently shake off excess flour and egg wash before dipping the chicken in the breadcrumbs. If you have too much flour or egg wash, the breading may clump together, resulting in an uneven coating. Similarly, press the breadcrumbs firmly into the chicken to make sure they stick evenly without falling off.
Pro Tip: If you want a super crispy coating, consider adding Parmesan cheese to your breadcrumbs. The cheese adds both flavor and a crisp texture to the crust.
Using the Right Breadcrumbs for Better Adhesion
The role of breadcrumbs in creating a crispy crust.
Not all breadcrumbs are created equal. The type of breadcrumbs you use can significantly affect how well the breading sticks to your chicken and how crispy it becomes. Regular breadcrumbs are fine for a standard crispy coating, but panko breadcrumbs (Japanese-style breadcrumbs) are often the best choice for a light, airy, and extra-crunchy crust.
Panko breadcrumbs have larger, flakier pieces than traditional breadcrumbs, allowing for a better crisp when baked. They also tend to stay intact better, ensuring your breading sticks and doesn’t fall off during the cooking process.
Pro Tip: If you can’t find panko, try making your own by toasting slices of white bread until golden brown, then grinding them into coarse crumbs. This homemade version will mimic the texture of panko and give you great results.
Common Mistakes to Avoid
Pitfalls that can prevent your breading from sticking properly.
While breading chicken cutlets is a simple process, there are a few mistakes to avoid that can prevent the breading from sticking. Here are some common pitfalls:
- Over-wetting the chicken: If the chicken is too wet when it’s dipped into the egg wash, the breading won’t adhere properly. Make sure to pat the chicken dry before you start the breading process.
- Skipping the flour layer: Some people skip the flour layer before the egg wash, but this step is important for creating a smooth surface for the egg to adhere to.
- Not pressing the breadcrumbs: If the breadcrumbs aren’t pressed gently into the chicken, they might fall off during baking. Don’t skip this step to ensure a solid coating.
- Using too much egg wash: If you dip the chicken too much into the egg wash, it will become soggy and the breading will slide off. Use just enough egg wash to coat the chicken without excess.
Transition to Next Section
Now that your breading is securely adhered to your chicken cutlets, it’s time to prepare them for the oven. In the next section, we’ll explore the importance of cooking time, the ideal oven temperature, and how to ensure your chicken cutlets are perfectly crispy and cooked through every time.
Conclusion
Recap of the Importance of Baking Chicken Cutlets for a Healthier, Flavorful Meal
Baking chicken cutlets is not only a great way to enjoy a healthier version of this classic dish, but it also results in a deliciously flavorful and crispy meal. By opting to bake your chicken cutlets instead of frying them, you reduce the amount of oil used, cut down on calories, and still get the same great taste. The oven-baked method locks in moisture and ensures a perfectly crispy exterior, while allowing you to control the seasoning and breading for maximum flavor.
Encourage Experimentation with Seasoning Blends and Breading Methods
Why the best chicken cutlets are the ones you make your own.
One of the most exciting aspects of baking chicken cutlets is the ability to experiment with different seasonings and breading methods. You can personalize your chicken by playing with various herb and spice blends like Italian seasoning, garlic powder, or paprika for a custom flavor. Don’t be afraid to mix things up with your breading too. Try adding Parmesan cheese or crushed crackers for a different texture and taste. The possibilities are endless, so have fun with it and create your own signature baked chicken cutlet recipes!
Invite Readers to Try Out the Recipe and Share Their Results
Join the conversation and share your delicious creations!
Now that you’ve learned the best techniques for making crispy, juicy, oven-baked chicken cutlets, it’s time to try the recipe for yourself. Whether you’re making these for a weeknight dinner or a special gathering, we’re confident that these chicken cutlets will be a hit with your family and friends. After you’ve baked your chicken cutlets, be sure to share your results and any variations you’ve made in the comments section below. We’d love to hear how you put your own twist on this tasty dish!
Final Thoughts and Encouragement to Get Cooking
Cooking is all about creativity and enjoyment!
Don’t be afraid to get creative in the kitchen! With this easy-to-follow recipe and baking tips, you can confidently create chicken cutlets that are not only delicious but also healthier than traditional fried versions. Remember, the secret to great cooking lies in patience, practice, and a willingness to experiment. Happy baking, and enjoy your delicious, crispy chicken cutlets!