
Introduction
The ketogenic diet, commonly known as keto, has taken the world by storm, offering a low-carb, high-fat approach to healthy eating. It’s loved for its ability to help with weight management, improve energy levels, and even support certain health conditions. However, preparing keto meals daily can sometimes feel overwhelming, especially for busy families.
That’s where the crockpot (or slow cooker) comes in! This kitchen hero simplifies meal prep, allowing you to create delicious, low-carb meals with minimal effort. Just toss your ingredients in, set the timer, and let the crockpot do the work.
In this post, we’ll explore how you can create easy, family-friendly keto crockpot recipes that everyone will love. These meals are not only time-saving but also packed with flavor, making them a perfect solution for busy weeknights or meal prep. Whether you’re new to keto or a seasoned pro, these recipes will help you stick to your low-carb lifestyle without compromising on taste or convenience.
Let’s dive in and discover the joy of effortless, delicious keto crockpot meals!
1) Why Choose a Crockpot for Keto Meals?
fore more information : https://www.wholesomeyum.com/prep/slow-cooker/
Preparing keto meals can sometimes feel like a challenge, but using a crockpot makes it easier than ever. Here’s why it’s a game-changer for anyone following a ketogenic diet:
Convenience and Time-Saving
One of the biggest advantages of a crockpot is how it simplifies meal prep. With a few simple steps—chopping ingredients, adding them to the pot, and setting the timer—you can walk away and let the slow cooker handle the rest. This hands-free cooking method is perfect for busy days when you don’t have time to stand over the stove. By the time you’re ready to eat, a flavorful, fully-cooked meal is waiting for you.
Enhanced Flavor
Crockpots are known for bringing out the best in ingredients. The slow cooking process allows flavors to meld together over hours, resulting in richer, more robust dishes. This is especially beneficial for keto recipes, where spices, herbs, and healthy fats play a vital role in enhancing taste. Think tender, fall-apart meats and savory, well-seasoned stews that make every bite satisfying.
Perfect for Batch Cooking
Meal prep is a cornerstone of the ketogenic lifestyle, and crockpots make it effortless. With their large capacity, you can cook enough food for multiple meals at once. This is especially useful for families or those who like to plan ahead. Simply store the leftovers in the fridge or freezer, and you’ll have ready-to-go keto meals for the week. It’s a time-saving solution that ensures you stick to your diet, even on the busiest days.
By combining convenience, enhanced flavor, and batch cooking capabilities, a crockpot is the ultimate tool for anyone looking to create delicious and easy keto meals that the whole family will enjoy.
2) Must-Have Keto Ingredients for Crockpot Cooking
Must-Have Keto Ingredients for Crockpot Cooking
To create delicious and satisfying keto crockpot meals, having the right ingredients is key. By choosing ingredients that are naturally low in carbs and packed with flavor, you can create hearty dishes the whole family will love. Here’s a detailed look at the essential keto staples for crockpot cooking:
Low-Carb Vegetables
Low-carb vegetables form the foundation of many keto crockpot recipes, providing texture, flavor, and nutrients without adding unnecessary carbs. These veggies are ideal for slow cooking, as they hold their shape and absorb the flavors of the dish.
- Cauliflower: A keto superstar, cauliflower can be used in soups, stews, and casseroles. Its mild taste makes it an excellent substitute for starchy ingredients like potatoes or rice. Add cauliflower florets to curries or mash them for a creamy side dish.
- Zucchini: This versatile veggie works well in a variety of dishes. Slice it into rounds for casseroles, spiralize it as a pasta substitute, or dice it into soups for a tender yet firm bite.
- Spinach: Packed with nutrients, spinach adds a pop of green and a boost of vitamins to any dish. Toss it into your crockpot toward the end of cooking to keep its vibrant color and delicate texture.
- Other Options: Bell peppers, mushrooms, broccoli, and celery are also fantastic choices for keto crockpot recipes, adding flavor and bulk without extra carbs.
Protein Options
Protein is a crucial component of keto meals, helping to keep you full and supporting muscle health. The crockpot is perfect for cooking proteins to tender, juicy perfection.
- Chicken: Boneless, skinless chicken thighs and breasts are staples in keto recipes. They’re versatile, easy to cook, and absorb the flavors of the dish beautifully.
- Beef: Cuts like chuck roast, stew meat, or ground beef work wonderfully in crockpot meals. From beef stews to low-carb chili, this protein is ideal for hearty, satisfying dishes.
- Pork: Pork shoulder, pork chops, and ground pork are excellent for slow-cooking. They’re perfect for recipes like pulled pork, carnitas, or savory keto soups.
- Seafood: While seafood cooks faster, it can still be a great addition to crockpot recipes. Shrimp, salmon, or white fish can be added toward the end of the cooking process for flavorful, protein-packed meals.
Keto-Friendly Sauces and Seasonings
The right sauces and seasonings can transform a simple dish into something extraordinary. When choosing these, look for keto-approved options that are free of added sugars and carbs.
- Sugar-Free Marinara: Perfect for Italian-inspired dishes, sugar-free marinara adds a rich tomato flavor to recipes like keto lasagna or meatballs.
- Coconut Cream: A creamy and keto-friendly alternative to dairy, coconut cream works well in curries, soups, and casseroles, adding a luscious texture and subtle sweetness.
- Garlic: A staple in almost every kitchen, garlic enhances the flavor of your dishes without adding carbs. Use fresh cloves, minced garlic, or garlic powder for convenience.
- Other Seasonings: Include herbs and spices like paprika, cumin, oregano, thyme, and rosemary for depth of flavor. For heat, add chili flakes or cayenne pepper. Don’t forget salt and pepper to balance the flavors of your dish!
- Broths and Stocks: Use low-sodium chicken, beef, or vegetable broth as a base for soups and stews. These add depth to your recipes while keeping them keto-friendly.
By stocking up on these must-have keto ingredients, you’ll be ready to create a variety of flavorful and family-friendly crockpot meals that support your low-carb lifestyle. Whether you’re making a comforting stew, a creamy curry, or a hearty casserole, these ingredients will ensure your dishes are both delicious and satisfying.
3) 5 Delicious Keto Crockpot Recipes to Try
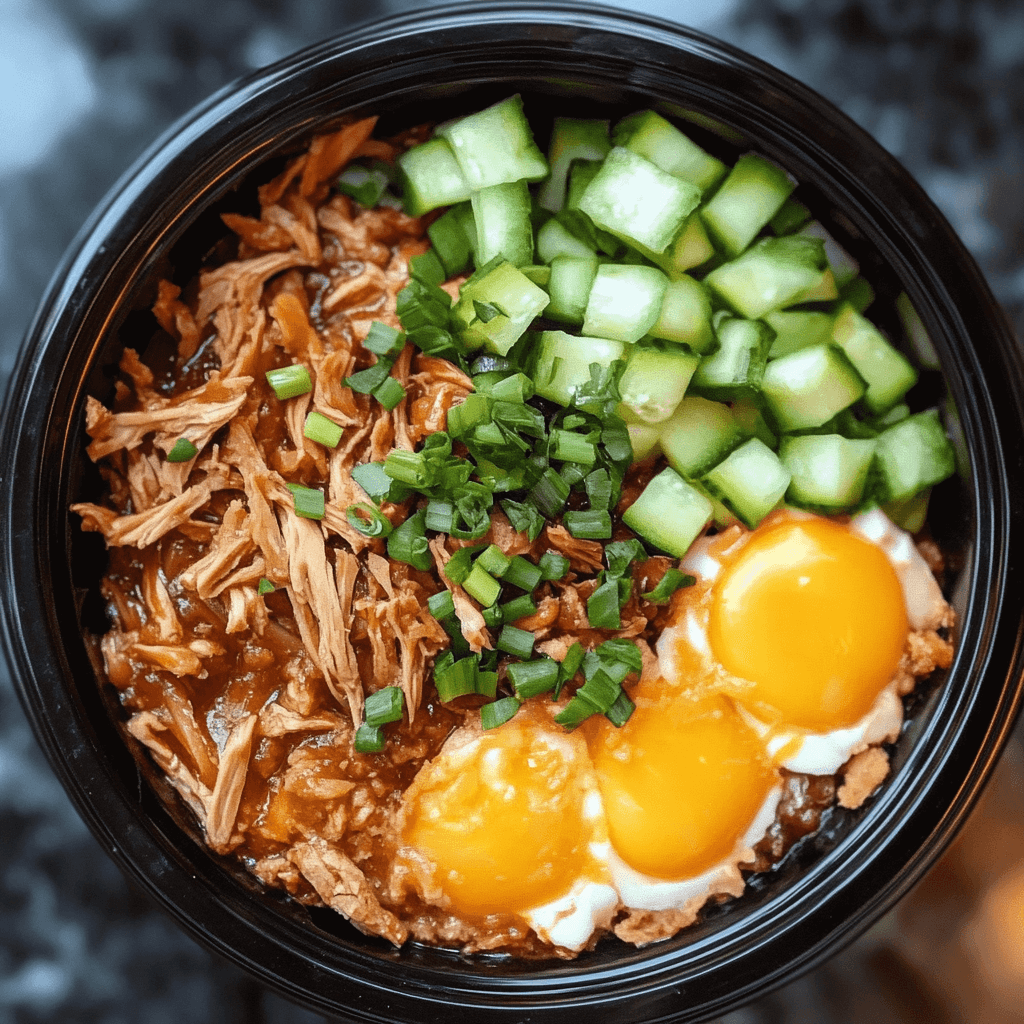
Creamy Garlic Chicken with Zucchini Noodles
Creamy Garlic Chicken with Zucchini Noodles is the ultimate comfort food for anyone following a ketogenic diet. This dish combines tender, slow-cooked chicken with a rich, garlicky cream sauce, served over light and low-carb zucchini noodles. It’s a perfect example of how keto meals can be indulgent, flavorful, and family-friendly. Here’s a closer look at how this dish comes together and why it’s a must-try for your crockpot repertoire:
Why You’ll Love This Recipe
- Rich and Creamy Flavor: The combination of garlic, cream, and seasonings creates a luxurious sauce that elevates the dish.
- Low-Carb Alternative: Zucchini noodles (or “zoodles”) are an excellent substitute for traditional pasta, keeping the meal light and keto-friendly.
- Minimal Effort, Maximum Reward: The crockpot does all the work, ensuring the chicken is perfectly tender and infused with flavor.
Key Ingredients
- Chicken: Use boneless, skinless chicken breasts or thighs. Thighs add a bit more flavor and juiciness, while breasts are leaner.
- Zucchini: Spiralized zucchini serves as the “noodles” for this dish. It absorbs the sauce beautifully and provides a satisfying texture.
- Heavy Cream or Coconut Cream: Creates the creamy base for the sauce while keeping it keto-compliant.
- Garlic: The star of the dish! Fresh minced garlic or garlic powder adds a punch of flavor.
- Butter or Ghee: Adds richness to the sauce while enhancing the garlic’s flavor during cooking.
- Parmesan Cheese: Optional but highly recommended for an extra layer of savory goodness.
- Herbs and Spices: Think dried thyme, parsley, and a hint of paprika for depth and balance.
How to Make It
- Prepare the Chicken: Season the chicken with salt, pepper, and your favorite herbs (e.g., thyme or paprika).
- Set Up the Crockpot: Add butter or ghee to the crockpot along with minced garlic. Place the seasoned chicken on top.
- Make the Sauce: Pour heavy cream or coconut cream over the chicken. If you’re using Parmesan cheese, sprinkle it in now for extra creaminess.
- Cook on Low: Let the chicken cook on low for 4–6 hours (or on high for 2–3 hours) until it’s tender and infused with the garlic sauce.
- Prepare the Zucchini Noodles: Spiralize zucchini into noodles. Just before serving, lightly sauté the zoodles in olive oil or butter for a couple of minutes to warm them up and remove excess water.
- Assemble the Dish: Plate the zucchini noodles and top with the creamy garlic chicken. Spoon additional sauce over the top and garnish with fresh parsley or a sprinkle of Parmesan.
Tips for Success
- Avoid Overcooking the Zoodles: Zucchini noodles cook quickly and can become soggy if overdone. A quick sauté is all they need.
- Thicken the Sauce: If the sauce is too thin, stir in a small amount of cream cheese or grated Parmesan after cooking. Alternatively, remove the lid during the last 30 minutes to let it reduce.
- Make It Your Own: Add mushrooms, spinach, or sun-dried tomatoes to the crockpot for extra flavor and nutrition.
Why It’s Perfect for Families
This dish is a hit with everyone, even those not following a keto diet. The creamy sauce is comforting, the chicken is tender and juicy, and the zucchini noodles provide a fun, healthy twist. You can even serve the chicken and sauce over traditional pasta or rice for family members who aren’t low-carb, making it versatile enough for any household.
Creamy Garlic Chicken with Zucchini Noodles is proof that keto meals don’t have to be boring or overly complicated. With just a few simple ingredients and the magic of the crockpot, you can create a restaurant-quality dish that’s sure to become a family favorite!
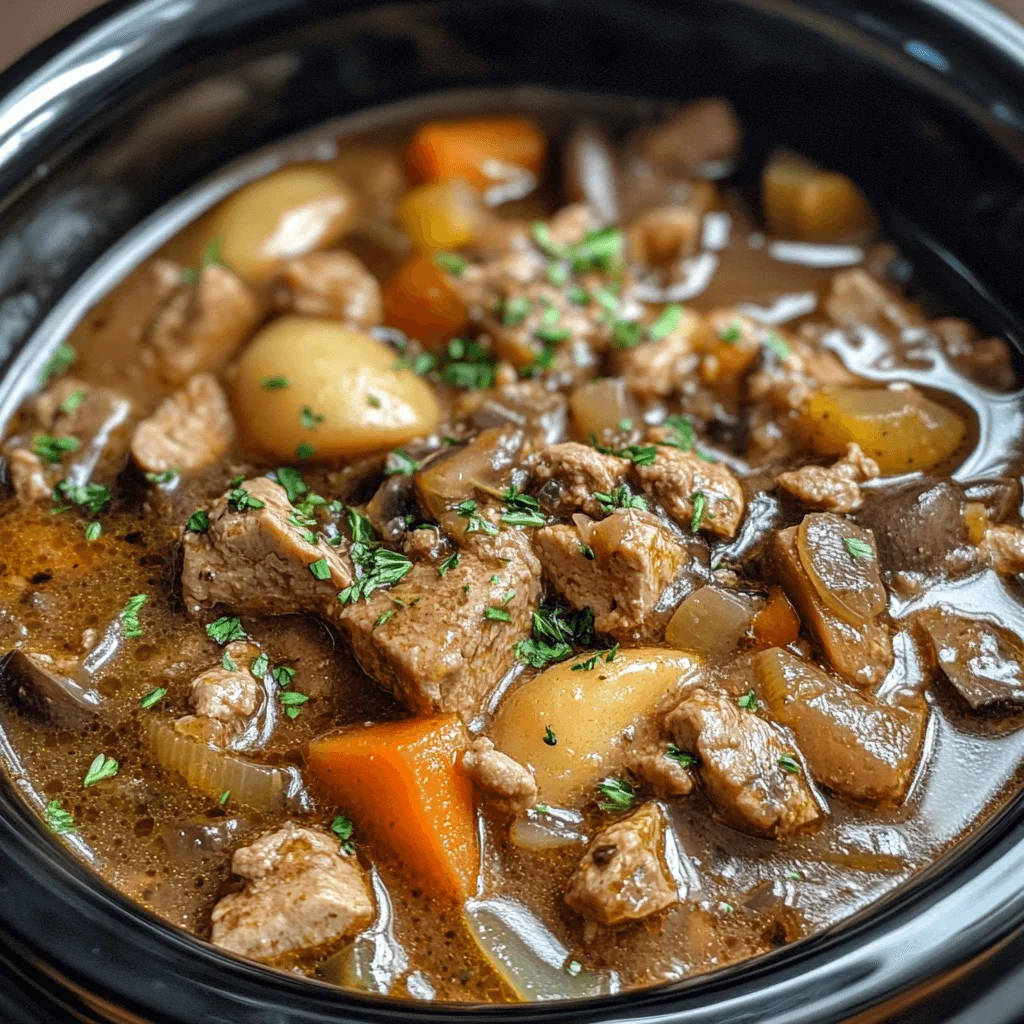
Slow-Cooked Beef Stew with Cauliflower Mash
Slow-Cooked Beef Stew with Cauliflower Mash is a hearty, comforting dish that brings together tender beef, flavorful vegetables, and a creamy, low-carb side. It’s the ultimate keto-friendly comfort food, perfect for cold nights or when you’re craving something warm and satisfying. The combination of slow-cooked, melt-in-your-mouth beef with a velvety cauliflower mash creates a balanced meal packed with nutrients and rich, savory flavors.
Why You’ll Love This Recipe
- Rich and Hearty: The beef stew is loaded with depth of flavor, thanks to the slow cooking process and aromatic spices.
- Low-Carb Comfort Food: Cauliflower mash is a keto-approved alternative to traditional mashed potatoes, offering the same creamy texture without the carbs.
- Easy to Prepare: The crockpot does all the hard work, making this a set-it-and-forget-it meal that’s perfect for busy days.
Key Ingredients
For the Beef Stew:
- Beef Chuck Roast or Stew Meat: These cuts of beef are ideal for slow cooking as they become tender and flavorful over time.
- Low-Carb Vegetables: Include onions, celery, and mushrooms for texture and flavor. You can also add turnips or radishes as a potato substitute.
- Broth: Beef or vegetable broth serves as the base for the stew. Opt for low-sodium, keto-friendly options.
- Tomato Paste: Adds richness and depth to the broth without adding too many carbs.
- Herbs and Spices: Use bay leaves, thyme, rosemary, garlic, and black pepper for a classic, aromatic flavor profile.
- Healthy Fats: Olive oil or ghee for searing the beef and enhancing the richness of the dish.
For the Cauliflower Mash:
- Cauliflower: Use fresh or frozen cauliflower for a creamy mash.
- Butter or Ghee: Adds richness and flavor to the mash.
- Cream Cheese or Heavy Cream: Helps create a silky, smooth texture.
- Seasonings: Garlic powder, salt, and pepper are essential for flavor. Optionally, add grated Parmesan for extra creaminess and depth.
How to Make It
Step 1: Prepare the Beef Stew
- Sear the Beef: Heat a skillet with olive oil or ghee. Season the beef with salt and pepper, then sear it on all sides until browned. This step locks in the flavor.
- Layer Ingredients in the Crockpot: Add the browned beef to the crockpot. Layer with diced onions, celery, mushrooms, and any additional vegetables.
- Add Broth and Seasonings: Pour in the beef broth and stir in tomato paste. Add garlic, thyme, rosemary, and bay leaves.
- Slow Cook: Cook on low for 6–8 hours (or on high for 3–4 hours) until the beef is tender and the vegetables are soft.
Step 2: Make the Cauliflower Mash
- Steam the Cauliflower: Steam or boil cauliflower florets until they’re fork-tender. Drain well to remove excess water.
- Blend or Mash: Add the cooked cauliflower to a food processor or use an immersion blender. Blend with butter, cream cheese, and seasonings until smooth and creamy. Adjust seasoning to taste.
- Keep Warm: Cover and set aside until the stew is ready to serve.
Step 3: Assemble the Dish
- Remove the bay leaves from the stew and adjust the seasoning with salt and pepper as needed.
- Spoon the cauliflower mash onto a plate or bowl and ladle the beef stew over the top. Garnish with fresh parsley or thyme for a pop of color.
Tips for Success
- Use Bone Broth for Added Nutrition: Bone broth not only enhances the flavor but also adds collagen and nutrients, making the dish even healthier.
- Thicken the Stew Naturally: If you prefer a thicker stew, remove some of the liquid and blend it with a few cooked vegetables, then stir it back into the pot.
- Prepare Ahead: This dish tastes even better the next day as the flavors meld. Make a big batch and store leftovers in the fridge or freezer for easy meal prep.
Why It’s Perfect for Families
This dish is a crowd-pleaser, even for those not following a keto diet. The beef stew is hearty and satisfying, while the cauliflower mash provides a creamy, comforting side that pairs beautifully with the rich flavors of the stew. For non-keto family members, you can serve the stew with traditional mashed potatoes or crusty bread alongside the cauliflower mash.
Slow-Cooked Beef Stew with Cauliflower Mash is a cozy, delicious meal that’s ideal for busy weeknights or lazy weekends. It’s proof that keto eating doesn’t mean sacrificing flavor or comfort—this dish is a true win for your taste buds and your low-carb lifestyle!
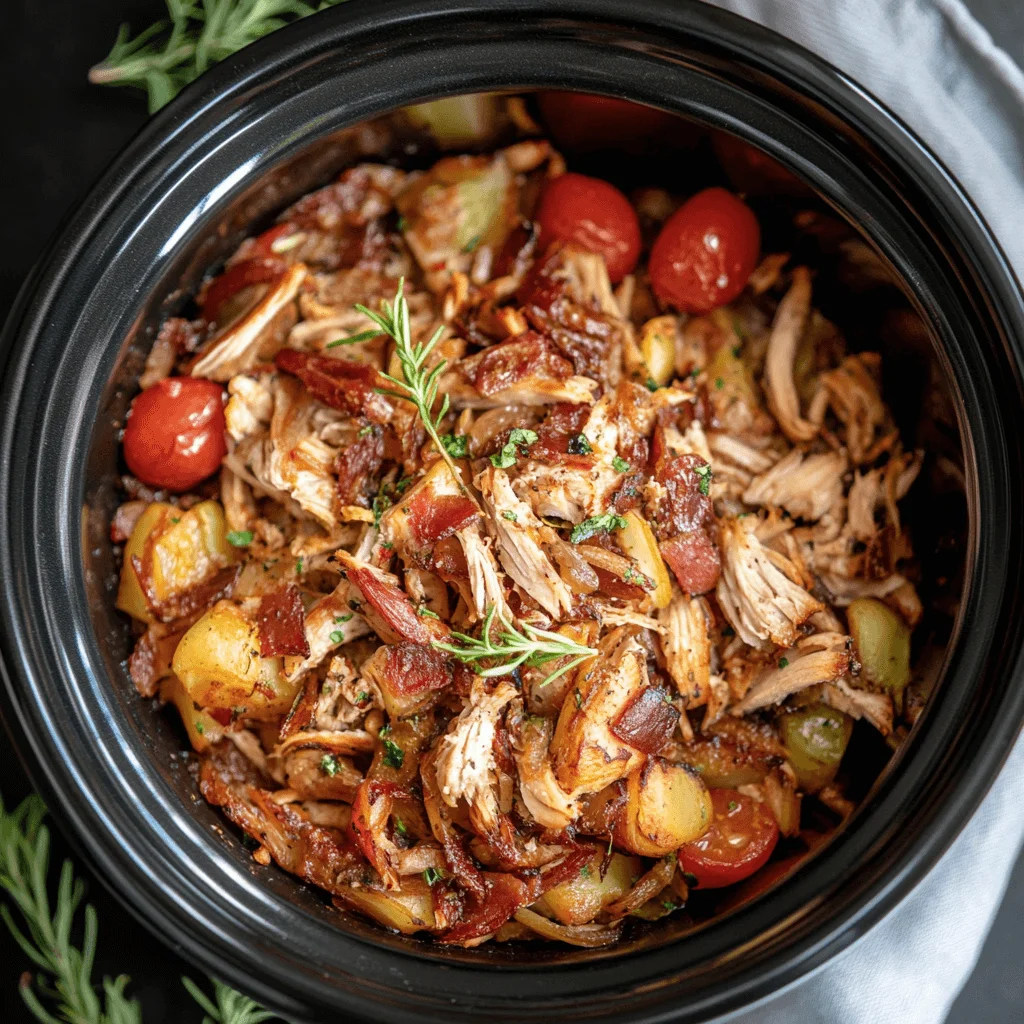
Keto BBQ Pulled Pork with Cabbage Slaw
Keto BBQ Pulled Pork with Cabbage Slaw is the perfect fusion of smoky, tender pulled pork and crunchy, tangy slaw, making it a standout dish for any keto meal plan. This recipe combines the deliciousness of slow-cooked pork with a sugar-free BBQ sauce and pairs it with a vibrant, low-carb slaw for the ultimate keto-friendly comfort food. Whether you’re serving it for a family dinner or a casual get-together, this dish will satisfy your cravings while keeping your carb count low.
Why You’ll Love This Recipe
- Tender, Flavorful Pulled Pork: The slow-cooked pork becomes irresistibly tender, soaking up the smoky, tangy BBQ flavors with every bite.
- Low-Carb Slaw: The cabbage slaw provides a perfect balance to the richness of the pork. It’s crunchy, refreshing, and packed with flavor, without the carbs of traditional coleslaw.
- Perfect for Meal Prep: This dish stores and reheats well, making it ideal for meal prep or large gatherings.
Key Ingredients
For the Keto Pulled Pork:
- Pork Shoulder (or Pork Butt): This cut is perfect for slow cooking because of its fat content, which makes the meat tender and juicy after hours of cooking.
- Sugar-Free BBQ Sauce: The star of the dish is the BBQ sauce. Make sure to use a low-carb, sugar-free BBQ sauce to keep the dish keto-friendly. Alternatively, you can make your own using tomato paste, apple cider vinegar, mustard, and spices.
- Spices and Seasonings: A blend of smoked paprika, garlic powder, onion powder, ground mustard, and chili powder will give the pulled pork its smoky, tangy flavor. Salt and pepper are essential for seasoning the meat.
- Apple Cider Vinegar: Adds acidity and a bit of sweetness to balance out the richness of the pork.
- Beef or Chicken Broth: This adds moisture to the crockpot and ensures the pork stays juicy as it cooks.
For the Cabbage Slaw:
- Green Cabbage: The base for the slaw, offering crunch and texture without the carbs of traditional coleslaw ingredients like carrots.
- Shredded Red Cabbage: Adds color and a slightly peppery flavor to balance the richness of the pork.
- Avocado Mayonnaise or Regular Mayonnaise: A creamy base for the slaw dressing. If you prefer a dairy-free option, you can use avocado mayo, which is both keto and paleo-friendly.
- Apple Cider Vinegar: Adds tang and a bit of sharpness to the slaw, complementing the sweetness of the BBQ sauce.
- Mustard: Adds a sharp, zesty flavor to the slaw dressing.
- Sweetener: Use a keto-friendly sweetener like erythritol or stevia to balance the acidity of the vinegar.
- Seasonings: Salt, pepper, and a pinch of celery seed or caraway seeds for added flavor.
How to Make It
Step 1: Prepare the Pulled Pork
- Season the Pork: Rub the pork shoulder with a blend of spices, including smoked paprika, garlic powder, onion powder, chili powder, and salt and pepper.
- Slow Cook the Pork: Place the seasoned pork in the crockpot. Add apple cider vinegar and broth to keep the meat moist during cooking. Cover and cook on low for 8–10 hours, or on high for 4–6 hours, until the pork is fork-tender and can be easily shredded.
- Shred the Pork: Once the pork is cooked, remove it from the crockpot and shred it with two forks. Return it to the pot and mix it with the sauce. Add the sugar-free BBQ sauce and let the pork absorb the flavors for about 30 minutes on low.
Step 2: Prepare the Cabbage Slaw
- Shred the Cabbage: Finely shred the green and red cabbage. You can use a sharp knife or a mandoline slicer to achieve thin, uniform slices.
- Make the Slaw Dressing: In a separate bowl, whisk together the mayonnaise, apple cider vinegar, mustard, sweetener, salt, pepper, and any optional seasonings. Adjust the vinegar and sweetener to suit your taste preferences.
- Combine and Toss: Add the shredded cabbage to the bowl with the dressing and toss everything together until the cabbage is evenly coated. Let it sit for at least 10 minutes to allow the flavors to meld.
Step 3: Assemble the Dish
Serve the pulled pork over a plate or in a bowl, topped with a generous helping of cabbage slaw on the side. If you prefer, you can serve the pork and slaw on a low-carb bun or lettuce wrap for a handheld meal. Garnish with fresh herbs like cilantro or parsley for added color and flavor.
Tips for Success
- Make Your Own BBQ Sauce: Homemade BBQ sauce allows you to control the ingredients and sweetness, ensuring it’s 100% keto-compliant. Simply combine tomato paste, apple cider vinegar, mustard, garlic powder, and a sugar substitute to create your own sauce.
- Adjust the Slaw to Taste: Feel free to tweak the slaw dressing by adding more vinegar for tang or more sweetener if you prefer it sweeter. You can even add a dash of hot sauce or cayenne pepper if you like a bit of heat.
- Meal Prep: This recipe is ideal for meal prep. The pulled pork and slaw both store well in the fridge for up to 4 days. Reheat the pulled pork in the microwave or on the stove, and serve it cold or at room temperature with the slaw.
Why It’s Perfect for Families
Keto BBQ Pulled Pork with Cabbage Slaw is a crowd-pleaser that’s easy to make and customizable for different tastes. The slow-cooked pork is tender and flavorful, making it appealing to both keto followers and non-keto eaters. The cabbage slaw offers a refreshing crunch that contrasts perfectly with the richness of the pork, and the sugar-free BBQ sauce gives it that classic BBQ flavor without the carbs.
This dish also works well for feeding a group or preparing meals ahead of time. Whether served on its own, with a side of roasted veggies, or in a keto-friendly wrap, it’s a delicious and satisfying meal everyone will enjoy.
Keto BBQ Pulled Pork with Cabbage Slaw is a perfect example of how slow cooking and keto ingredients can come together to create a flavorful and satisfying meal. With minimal effort and plenty of flavors, this dish is sure to become a regular in your keto meal rotation!
Low-Carb Chili with Avocado Topping
Low-Carb Chili with Avocado Topping is a flavorful, hearty dish that brings all the comfort of traditional chili without the carbs. Packed with protein from ground beef (or turkey) and rich spices, this keto-friendly chili provides the warmth and satisfaction of a classic chili recipe, with an added burst of creamy texture and fresh flavor from the avocado topping. It’s the perfect meal for cozy evenings, game days, or meal prep, offering a filling and nutritious option for anyone following a low-carb lifestyle.
Why You’ll Love This Recipe
- Hearty and Filling: The combination of protein, spices, and low-carb vegetables makes this chili a satisfying meal that will keep you full for hours.
- Avocado Topping for Extra Creaminess: The fresh avocado topping adds richness, flavor, and healthy fats to balance out the chili’s bold, savory flavors.
- Quick and Easy: This chili comes together quickly in the crockpot, requiring minimal effort for maximum flavor.
Key Ingredients
For the Chili:
- Ground Beef (or Turkey): Ground beef is the classic choice for chili, but ground turkey is a great leaner alternative. Both are high in protein and provide a savory base for the chili.
- Low-Carb Vegetables: Use ingredients like bell peppers, onions, zucchini, and tomatoes. These add texture and natural sweetness to the chili, without the high carb count of beans.
- Crushed Tomatoes: The base for the chili’s sauce, providing acidity and depth. Opt for no-sugar-added crushed tomatoes to keep it keto-friendly.
- Bone Broth or Beef Broth: Adds richness and helps create the chili’s base, making it more flavorful and satisfying.
- Chili Spices: A blend of chili powder, cumin, paprika, garlic powder, onion powder, and cayenne pepper brings depth and heat to the chili. Adjust the cayenne to your preferred spice level.
- Tomato Paste: A small amount of tomato paste helps thicken the chili and intensifies the tomato flavor.
- Olive Oil or Ghee: Use for sautéing the vegetables and ground meat to infuse flavor.
- Salt and Pepper: Essential for seasoning the dish and bringing out the flavors of the ingredients.
For the Avocado Topping:
- Ripe Avocados: The star of the topping, adding creamy texture and healthy fats that balance out the spicy chili.
- Lime Juice: A squeeze of lime juice brightens up the avocado and adds a fresh, tangy flavor that complements the chili.
- Cilantro: Fresh cilantro adds a burst of flavor and freshness to the topping, making it even more vibrant.
- Salt: A pinch of salt enhances the flavors of the avocado and balances the acidity of the lime.
- Optional Add-ins: For extra flavor, consider adding a dollop of sour cream or shredded cheese to the topping. These are optional, but they can make the dish even more indulgent.
How to Make It
Step 1: Brown the Ground Meat
- Heat olive oil or ghee in a large skillet over medium-high heat. Add the ground beef or turkey and cook until browned, breaking it apart with a spoon.
- Season the meat with salt and pepper to taste, and set it aside.
Step 2: Prepare the Vegetables and Base
- In the same skillet, sauté diced onions, bell peppers, and zucchini (or any other low-carb veggies you like) until softened.
- Add minced garlic to the skillet and cook for an additional minute, allowing the garlic to release its aroma.
- Transfer the cooked vegetables to the crockpot, then add the browned meat, crushed tomatoes, tomato paste, and broth. Stir to combine.
Step 3: Add the Spices
- Stir in the chili powder, cumin, paprika, onion powder, garlic powder, and cayenne pepper. Adjust the amount of spice based on your preference for heat.
- Season with salt and pepper, then give everything one final stir.
Step 4: Slow Cook the Chili
- Cover the crockpot and cook the chili on low for 6–8 hours (or on high for 3–4 hours) until the flavors are well blended and the chili has thickened.
Step 5: Prepare the Avocado Topping
- While the chili is cooking, prepare the avocado topping. Cut the avocados in half, remove the pit, and scoop the flesh into a bowl.
- Mash the avocado with a fork until smooth but still slightly chunky.
- Add a squeeze of lime juice, a pinch of salt, and chopped fresh cilantro. Stir to combine and taste for seasoning. Add more lime or salt as needed.
Step 6: Serve and Garnish
Once the chili is cooked, ladle it into bowls and top with a generous dollop of the avocado mixture. For added flavor, garnish with extra cilantro, a sprinkle of shredded cheese, or a dollop of sour cream if desired.
Tips for Success
- Customize the Heat: Adjust the spiciness of the chili by increasing or decreasing the cayenne pepper and chili powder. If you prefer a milder chili, omit the cayenne and reduce the chili powder.
- Add More Veggies: Feel free to add more low-carb veggies, like mushrooms, spinach, or even riced cauliflower, to make the chili heartier.
- Make Ahead: This chili stores well in the fridge for up to 5 days, and the flavors improve as it sits. You can also freeze it in airtight containers for up to 3 months for easy meal prep.
- Garnish Options: To make the chili even more indulgent, top it with shredded cheese, a spoonful of sour cream, or some sliced jalapeños for an extra kick.
Why It’s Perfect for Families
Low-Carb Chili with Avocado Topping is a versatile, crowd-pleasing meal that’s not only keto-friendly but also delicious enough for the whole family to enjoy. The chili is hearty and satisfying, and the creamy avocado topping adds a refreshing contrast to the rich, savory stew. Whether served on its own, with a side of cauliflower rice, or in a lettuce wrap, this dish works well for everyone, regardless of their dietary preferences.
It’s also a great option for meal prepping or large gatherings. The chili can be made in bulk and reheated, and the avocado topping can be prepared in advance and added just before serving. This makes it a stress-free meal that you can enjoy with your loved ones.
Low-Carb Chili with Avocado Topping is the perfect dish for those looking for a keto-friendly meal that’s rich in flavor, protein, and healthy fats. With its combination of savory chili and creamy avocado, this recipe is sure to become a favorite in your weekly meal rotation!
Coconut Curry Shrimp with Spinach
Coconut Curry Shrimp with Spinach is a delicious and aromatic dish that combines succulent shrimp with the rich, comforting flavors of coconut milk and curry spices. This keto-friendly recipe is quick and easy to prepare, making it the perfect weeknight dinner or special occasion meal. The creamy coconut curry sauce infuses the shrimp and spinach with complex flavors, while the spinach adds a healthy boost of greens to keep the dish light and nutritious. This recipe brings the exotic flavors of Southeast Asia to your table, with the added benefit of being low-carb, making it ideal for those following a keto lifestyle.
Why You’ll Love This Recipe
- Creamy and Flavorful: The coconut milk creates a rich, velvety sauce that coats the shrimp and spinach, making each bite a burst of flavor.
- Quick and Easy: Ready in under 30 minutes, this dish is perfect for a fast, healthy dinner that doesn’t skimp on taste.
- Low-Carb and Keto-Friendly: With shrimp, coconut milk, and spinach as the main ingredients, this dish is naturally low in carbs and full of healthy fats and protein.
- Packed with Nutrients: The shrimp provides lean protein, while spinach offers fiber, vitamins, and minerals, making this dish as nutritious as it is tasty.
Key Ingredients
For the Coconut Curry Shrimp:
- Shrimp: Large, peeled, and deveined shrimp are ideal for this dish. They cook quickly and absorb the flavors of the curry sauce beautifully.
- Coconut Milk: Full-fat coconut milk is preferred for its richness and creamy texture. It’s the key to creating the luxurious sauce that envelops the shrimp and spinach.
- Spinach: Fresh spinach adds a burst of color, texture, and nutrients to the dish. It wilts beautifully in the curry sauce, enhancing the dish with its mild, earthy flavor.
- Curry Powder: The signature spice blend that provides the dish with its warm, aromatic flavor. You can use store-bought curry powder or make your own with turmeric, cumin, coriander, and other spices.
- Ginger: Fresh ginger adds a zesty, fragrant note to the curry. It pairs wonderfully with the coconut milk and enhances the overall flavor profile of the dish.
- Garlic: A few cloves of minced garlic provide a savory base for the curry sauce, adding depth and richness.
- Onion: Yellow or red onion adds a slightly sweet and savory flavor to the curry sauce.
- Lime Juice: A squeeze of lime juice brightens the dish, balancing the richness of the coconut milk and adding a fresh, citrusy note.
- Coconut Oil or Olive Oil: A small amount of oil is used for sautéing the aromatics (garlic, onion, ginger) and shrimp. Coconut oil enhances the dish’s tropical flavor, while olive oil is a great neutral option.
- Salt and Pepper: Essential for seasoning the dish and enhancing the natural flavors of the shrimp, spinach, and coconut milk.
Optional Garnishes:
- Chopped Cilantro: Adds a burst of freshness and color to the dish.
- Chili Flakes: If you like a little heat, sprinkle some chili flakes on top for a spicy kick.
- Lime Wedges: Serve with extra lime wedges on the side for added tanginess.
- Toasted Coconut: For a unique twist, sprinkle toasted shredded coconut on top for texture and an extra coconut flavor.
How to Make It
Step 1: Sauté the Aromatics
- Heat coconut oil or olive oil in a large skillet or pan over medium heat.
- Add the diced onion and cook for 3–4 minutes, until softened and slightly golden.
- Stir in the minced garlic and grated ginger, cooking for an additional 1–2 minutes until fragrant.
Step 2: Cook the Shrimp
- Push the onions, garlic, and ginger to the side of the pan, and add the shrimp.
- Season the shrimp with salt and pepper, and cook for 2–3 minutes on each side, until they turn pink and opaque. Remove the shrimp from the skillet and set them aside.
Step 3: Make the Curry Sauce
- In the same skillet, add the coconut milk, curry powder, and a pinch of salt. Stir well to combine.
- Let the sauce simmer for 3–5 minutes, allowing the flavors to meld and the sauce to slightly thicken. If the sauce gets too thick, you can add a splash of water or more coconut milk to reach your desired consistency.
Step 4: Add the Spinach
- Add the fresh spinach to the skillet, stirring it into the curry sauce. Cook for 2–3 minutes, until the spinach wilts and becomes tender.
Step 5: Return the Shrimp to the Pan
- Add the cooked shrimp back into the pan, stirring gently to coat the shrimp in the curry sauce. Let everything simmer together for 2–3 minutes to heat through.
- Squeeze a bit of lime juice over the top for brightness and freshness, and adjust the seasoning with more salt, pepper, or curry powder if needed.
Step 6: Serve and Garnish
- Serve the Coconut Curry Shrimp with Spinach in bowls, garnishing with freshly chopped cilantro, lime wedges, and optional chili flakes or toasted coconut.
Tips for Success
- Shrimp Size: If you’re using smaller shrimp, reduce the cooking time to avoid overcooking. Larger shrimp may take slightly longer to cook, but the key is to look for them to turn pink and opaque.
- Vegetable Variations: You can add other low-carb vegetables to the dish, such as bell peppers, zucchini, or mushrooms, for extra flavor and texture.
- Thickening the Sauce: If you prefer a thicker sauce, you can simmer the coconut milk longer or add a teaspoon of xanthan gum for a quick thickening option.
- Spice Level: Adjust the heat of the curry by adding more curry powder or cayenne pepper. For a milder version, omit the chili flakes and reduce the curry powder.
- Serve with a Side: This dish pairs wonderfully with cauliflower rice or riced zucchini for a complete keto meal.
Why It’s Perfect for Families
Coconut Curry Shrimp with Spinach is a flavorful and vibrant dish that will appeal to both keto eaters and those looking for a tasty, family-friendly meal. The shrimp are succulent and full of flavor, while the creamy coconut curry sauce brings a touch of exotic flair to your dinner table. The spinach not only adds nutritional value but also complements the richness of the curry, making it a well-rounded dish.
Additionally, this recipe is versatile enough to accommodate different preferences and can be easily adapted for larger families by simply increasing the amount of shrimp and spinach. It’s a one-pan dish that makes cleanup a breeze, and the quick cooking time means you can have a delicious dinner ready in no time.
Coconut Curry Shrimp with Spinach is a perfect keto-friendly dish that brings together bold flavors, healthy fats, and lean protein in one satisfying meal. With its vibrant spices and creamy coconut sauce, this recipe is sure to become a favorite in your household!
4) Tips for Making Keto Crockpot Meals Your Family Will Love
Adjust Spice Levels: Offer Tips for Tailoring Recipes to Family Preferences
One of the best parts of cooking is the ability to customize dishes to suit your family’s tastes, especially when it comes to adjusting spice levels. Some family members may love a fiery kick, while others may prefer a milder flavor. Tailoring the spice levels in keto crockpot recipes ensures that everyone can enjoy the meal without compromising on taste. Whether you’re cooking a creamy coconut curry or a hearty chili, there are simple ways to tweak the heat to match your family’s preferences. Here are some practical tips for adjusting spice levels and making your dishes universally enjoyable.
1. Start with Mild Ingredients
For families with varying tolerance levels to spice, it’s often best to start with milder ingredients and allow individuals to add more heat later on. Ingredients like paprika, cumin, and turmeric provide deep flavors without intense heat. These spices can enhance the dish’s flavor profile and serve as a base before you adjust the heat.
Tips:
- Paprika: Sweet or smoked paprika adds color and a subtle smoky flavor without heat. It’s a great option to use as a base when you want to create a mild, flavorful dish.
- Cumin and Coriander: These spices are earthy and warm but are not hot. They’re perfect for building flavor depth before introducing spicy elements.
2. Add Heat Gradually
If your family enjoys some spice but not too much, consider adding heat gradually. Start by using smaller amounts of hot ingredients, such as cayenne pepper, chili powder, or jalapeños, and taste as you go. This allows you to control the spice level and avoid overwhelming the dish with too much heat.
Tips:
- Cayenne Pepper: This spice packs a punch, so start with just a pinch and increase gradually. You can always add more, but it’s hard to dial back once it’s in the dish.
- Chili Powder: While chili powder adds a nice depth to dishes like chili or taco seasoning, it’s not necessarily very hot. Start with a small amount and build up.
- Jalapeños: If using fresh or canned, remove the seeds for a milder heat. Add the diced jalapeños early in the cooking process for a gentle infusion of spice.
3. Keep Separate Spice Blends for Milder and Hotter Versions
If you’re preparing a dish for both spice lovers and those who prefer milder flavors, create two versions of the dish. This is especially helpful with crockpot meals, as they have long cooking times, allowing you to add spices in stages.
Tips:
- Divide the Recipe: For instance, if you’re making a slow-cooked beef stew, divide the batch into two sections: one for those who enjoy spicy food, and one that’s milder.
- Separate Spice Mixes: Make two separate spice mixes before adding to the crockpot. One can be mild with only the base spices (garlic powder, onion powder, and paprika), while the other can be spiced up with cayenne, chili flakes, or hot sauce.
4. Use Dairy to Tone Down Spice
Dairy products can help mellow out overly spicy dishes by binding to the capsaicin (the compound that makes things spicy) and neutralizing the heat. When a dish becomes too hot, adding a dairy element like cream, cheese, or yogurt can help balance the flavors and reduce the spiciness.
Tips:
- Heavy Cream or Coconut Cream: Both options are excellent for creating a creamy base that helps reduce heat, especially in coconut curry or chili-based dishes.
- Sour Cream: For Mexican-inspired dishes like tacos or chili, a dollop of sour cream can cool down the spice and add a tangy contrast.
- Shredded Cheese: Adding cheese on top of a spicy dish like low-carb chili or keto BBQ pulled pork will help cut the heat while making it more indulgent.
5. Experiment with Heat-Reducing Ingredients
Some ingredients have the ability to balance out or reduce the perception of heat in a dish. Avocados, coconut milk, tomatoes, and lime juice can all help reduce spiciness while still keeping the flavor profile intact. Experimenting with these ingredients can help you fine-tune your recipes.
Tips:
- Avocado: For spicy dishes like Coconut Curry Shrimp, serving it with fresh avocado helps cool down the heat and adds a creamy, refreshing texture.
- Coconut Milk: When making curries, add extra coconut milk to smooth out the sauce and dilute the heat from chili powder or curry paste.
- Tomatoes: When making chili or stews, tomatoes can help absorb some of the spiciness. If the dish is too hot, add extra crushed tomatoes or diced tomatoes to balance it out.
- Lime Juice: A squeeze of lime juice can cut through the heat and add a burst of fresh acidity that will balance spicy flavors.
6. Add Heat at the End of Cooking
If you’re unsure about the spice level and don’t want to risk over-spicing the dish, it’s always a good idea to wait until the end of the cooking process to add the final spicy kick. This gives you a better sense of how the flavors have developed and allows you to adjust the spice level as needed.
Tips:
- Hot Sauce: For dishes that can handle heat, such as Keto BBQ Pulled Pork, hot sauce can be added in small increments at the end of cooking to achieve the perfect spice level.
- Chili Flakes or Fresh Chilis: For an extra spicy finish, sprinkle chili flakes or add thinly sliced fresh chilis just before serving.
7. Let Everyone Customize Their Spice
For ultimate control over spice levels, especially when cooking for a family, offer spice options on the side. Allowing everyone to add their preferred amount of heat at the table ensures that no one is left out, and it keeps everyone happy.
Tips:
- Chili Sauce or Hot Sauce: Place a bottle of hot sauce on the table so that those who like extra heat can customize their serving.
- Chopped Fresh Chilies: Provide a small dish of chopped fresh chilis or chili flakes as an optional topping for those who like to spice up their food further.
8. Taste and Adjust as You Go
Always taste your dish as you cook and adjust the spice levels accordingly. Since crockpot meals tend to develop flavors over time, it’s important to check and tweak the seasoning and heat levels in the final stages.
Tips:
- Add Heat Gradually: If you’re unsure about how spicy a dish will be after long slow-cooking, start with less and add more spice at the end, testing as you go.
- Adjust Flavor: If the dish turns out too spicy, balancing it with a pinch of sweetener (such as monk fruit or erythritol) or an extra splash of coconut milk can help neutralize the heat without affecting the overall flavor profile.
Conclusion
Adjusting the spice level of your keto crockpot recipes is all about balancing flavors and ensuring that everyone at the table can enjoy the meal. With these tips, you can easily tailor any dish to suit your family’s preferences—whether they love spice or prefer a milder approach. Start simple, add heat gradually, and experiment with cooling ingredients to create the perfect dish that will satisfy everyone’s taste buds!
please elaborate or expend on the H3 section titled:Involve Kids in Meal Prep: Discuss how involving children in cooking can make them more likely to enjoy the meals.
Add Family-Friendly Sides: Suggest Keto-Friendly Sides Like Roasted Vegetables or Cheese Crisps
Keto crockpot meals are fantastic on their own, but pairing them with the right side dishes can elevate the meal, add variety, and ensure that everyone in the family stays satisfied. The right side can complement the flavors of the main dish, add texture, and provide additional nutrients without derailing your keto goals. Since the ketogenic diet emphasizes low-carb, high-fat, and moderate-protein foods, choosing sides that align with these principles is essential. Below are some keto-friendly side options that are both delicious and family-friendly, making them the perfect complements to your slow-cooked keto meals.
1. Roasted Vegetables
Roasting vegetables brings out their natural sweetness and enhances their flavors, making them a crowd-pleasing option for the whole family. Roasted vegetables are an excellent choice for keto meals as they are low in carbs and high in fiber, providing necessary nutrients to balance out the richness of the main course.
Popular Keto-Friendly Vegetables for Roasting:
- Cauliflower: Cauliflower is a versatile vegetable that can be roasted on its own or used in a variety of dishes. You can make cauliflower “steaks,” cauliflower florets, or even mashed cauliflower for a creamy side dish.
- Zucchini: Zucchini holds up well when roasted and has a mild flavor that pairs well with almost anything. Slice it into rounds or strips, toss with olive oil, garlic, and herbs, and roast until tender.
- Brussels Sprouts: These mini-cabbage-like vegetables are a keto favorite because they are low in carbs but packed with flavor. Roasting them gives them a crispy exterior and tender interior, making them a hit with both adults and kids.
- Broccoli: Roasted broccoli is crispy and caramelized on the edges, which enhances its natural flavor. It pairs wonderfully with a variety of meats, from chicken to pork.
- Asparagus: Roasted asparagus is a quick and easy side dish. The flavor becomes more intense when roasted, and it’s a great accompaniment to any keto meal.
Tips for Roasting Vegetables:
- Use Healthy Fats: Toss your vegetables in olive oil, avocado oil, or ghee before roasting to ensure they are crispy and delicious while also adhering to keto fat requirements.
- Season Generously: Season with garlic powder, onion powder, thyme, rosemary, and black pepper for a flavorful, savory taste. A sprinkle of parmesan cheese at the end of roasting adds richness and umami.
- Roast at High Heat: Roasting at 400°F (200°C) ensures vegetables develop a crispy, caramelized exterior while staying tender inside.
2. Cheese Crisps
Cheese crisps are a keto staple that brings an enjoyable crunch to any meal. These crispy, cheesy snacks are made by baking cheese until it melts and becomes golden and crispy. They are naturally low-carb and high in fat, making them perfect for a keto diet. Cheese crisps are great as a snack, a side dish, or even as a topping for salads or soups.
Popular Keto Cheese Options for Crisps:
- Parmesan: Parmesan crisps are the most common and offer a sharp, nutty flavor. They bake up crispy and have a satisfying crunch.
- Cheddar: Sharp cheddar crisps are a delicious, bold alternative. They add richness and a deeper flavor compared to Parmesan.
- Mozzarella: Mozzarella crisps are milder in flavor but provide an excellent melt for a chewy, crunchy texture.
How to Make Cheese Crisps:
- Preheat the Oven: Preheat your oven to 375°F (190°C).
- Place Cheese on a Baking Sheet: Line a baking sheet with parchment paper. For each cheese crisp, place a small pile of grated cheese on the sheet, about a tablespoon for each.
- Bake Until Golden: Bake for 5-7 minutes or until the cheese is bubbly and golden brown around the edges.
- Cool and Serve: Allow the cheese crisps to cool on the baking sheet for a few minutes before serving. They will become crispy as they cool.
Customization Tips:
- Herbs and Spices: Add garlic powder, onion powder, or chili flakes to the cheese before baking to enhance the flavor profile.
- Seasoning with Salt: Lightly sprinkle with sea salt or pink Himalayan salt for added flavor.
- Make Shapes: For fun, you can shape the cheese into circles or small “chips” before baking.
3. Cauliflower Rice
Cauliflower rice is a popular low-carb alternative to traditional rice and makes an excellent side dish for many keto crockpot meals. It has a mild flavor and a texture that closely resembles rice when cooked, making it a great filler for hearty stews, curries, or stir-fries.
How to Prepare Cauliflower Rice:
- Grate or Process the Cauliflower: Use a box grater or food processor to grate fresh cauliflower into rice-sized pieces.
- Sauté: Heat a little olive oil or butter in a pan over medium heat. Add the cauliflower rice and sauté for about 5-7 minutes until it is tender and slightly golden.
- Seasoning: Add garlic, onion powder, and black pepper to taste. You can also toss in some cilantro or parsley for extra flavor.
- Optional Add-ins: You can make the cauliflower rice more flavorful by adding sautéed onions, coconut milk, or cheese.
Why It’s Great for Keto:
Cauliflower rice is a great low-carb substitute for high-carb sides like regular rice or mashed potatoes. It can be easily paired with rich dishes like slow-cooked beef stew or keto BBQ pulled pork for a complete, filling meal.
4. Avocado Salad
Avocado is a keto favorite due to its healthy fats and creamy texture. An avocado salad is simple to prepare and can add a refreshing, creamy element to balance out richer dishes. Avocados are also loaded with fiber, vitamins, and minerals, making them an ideal choice for keto meals.
How to Make a Simple Avocado Salad:
- Chop the Avocados: Dice 2-3 ripe avocados and place them in a bowl.
- Add Fresh Vegetables: Add diced tomatoes, cucumbers, and red onions for a refreshing crunch.
- Dress: Drizzle with olive oil, lime juice, and a pinch of salt and pepper.
- Optional Additions: Add fresh herbs like cilantro or basil, or toss in some crumbled feta or mozzarella for added flavor.
Why It’s Great for Keto:
Avocados provide healthy monounsaturated fats, keeping you full and satisfied. This salad pairs wonderfully with rich and creamy dishes, like Coconut Curry Shrimp with Spinach or Creamy Garlic Chicken with Zucchini Noodles.
5. Zucchini Noodles (Zoodles)
Zucchini noodles, or “zoodles,” are a fantastic alternative to traditional pasta. Zoodles are low in carbs and high in fiber, making them a great complement to any keto main dish. They can be sautéed or served raw, and they pair perfectly with creamy sauces or hearty stews.
How to Prepare Zoodles:
- Use a Spiralizer: A spiralizer makes it easy to turn zucchini into long, curly noodles. If you don’t have a spiralizer, a vegetable peeler can also create thin, ribbon-like noodles.
- Sauté in Olive Oil: Heat a bit of olive oil in a pan over medium heat. Add the zoodles and sauté for about 3-4 minutes, until they are tender but still slightly firm.
- Season: Add garlic powder, onion powder, and a sprinkle of parmesan cheese or herbs for added flavor.
Why It’s Great for Keto:
Zoodles have a light texture that complements rich, heavy dishes like slow-cooked beef stew or keto chili. They can also be used as a base for creamy sauces, making them a versatile and satisfying side dish.
Conclusion
Adding family-friendly, keto-friendly sides to your crockpot meals is a great way to enhance the meal experience and make your keto dishes even more satisfying. Whether you choose roasted vegetables, cheese crisps, cauliflower rice, avocado salad, or zucchini noodles, these sides are not only low-carb but also full of flavor, nutrients, and texture. By pairing your keto crockpot recipes with these sides, you create a balanced and enjoyable meal that your whole family can love!
Batch Cook for the Week: Encourage Cooking Multiple Portions to Reduce Weeknight Stress
Weeknight dinners can often feel like a race against the clock, especially for busy families or anyone with a packed schedule. One of the most effective strategies to save time and reduce stress during the week is batch cooking. Batch cooking allows you to prepare multiple portions of meals in advance, meaning you’ll always have a healthy, keto-friendly dinner ready to go—without the rush and hassle of cooking every night. With keto crockpot recipes, batch cooking is particularly easy and convenient since most slow-cooked dishes hold up well in the fridge or freezer and reheat beautifully.
Here’s why batch cooking is such a game-changer for busy families and how it can make keto meal planning a breeze.
1. Save Time During the Week
One of the primary benefits of batch cooking is the time you save throughout the week. By preparing meals in advance, you free up your evenings from the pressure of daily meal prep. Instead of spending time chopping vegetables, measuring ingredients, and waiting for food to cook, you can simply reheat a pre-made meal and enjoy a nutritious dinner without the effort.
How It Helps:
- Time-Saving on Busy Nights: On nights when everyone is running in different directions, having a batch-cooked meal ready to go allows you to avoid cooking from scratch. You can reheat your prepped meals in minutes, saving you time and effort.
- Stress-Free Dinner Preparation: With meals already prepared, you don’t need to stress about what to make or how to fit cooking into a busy schedule. Simply pull out a pre-cooked dish from the fridge or freezer, heat it, and serve!
2. Reduce Food Waste and Save Money
Batch cooking helps you take advantage of bulk buying and reduces food waste. When you cook in larger quantities, you can buy ingredients in bulk, which is often cheaper. Additionally, by cooking multiple servings at once, you ensure that the food you’ve purchased doesn’t go to waste—especially since keto-friendly ingredients like vegetables, proteins, and healthy fats can sometimes spoil quickly if not used right away.
How It Helps:
- Cost-Effective: Bulk buying and cooking in larger batches means you can get more value from your ingredients, reducing the overall cost of meals. When you prepare multiple portions, you’re effectively stretching your grocery budget further.
- Less Food Waste: Batch cooking ensures that you use up ingredients before they spoil, helping you avoid wasting food and money.
3. Meal Variety Without the Effort
Batch cooking doesn’t mean eating the same meal every day. By preparing several different keto crockpot recipes at once, you can have a variety of meals on hand for the week. This way, you can rotate through different dishes like slow-cooked beef stew, keto BBQ pulled pork, or creamy garlic chicken with zucchini noodles without feeling like you’re eating the same thing every day.
How It Helps:
- Meal Variety: When you batch cook, you can prepare several dishes in one go—giving your family a variety of meal options throughout the week. For example, you could cook a chili, a pulled pork, and a chicken curry all at once and store them separately, offering a range of flavors and textures.
- Customizable Portions: Since you’re cooking in bulk, you can scale up portions according to family size or preference. This is particularly helpful if some family members prefer more of one dish than another.
4. Batch Cooking for Freezer-Friendly Meals
Many keto crockpot meals are ideal for freezing. Dishes like keto chili, pulled pork, and beef stew freeze exceptionally well, retaining their flavors and textures. Freezing meals in advance ensures that you have an even wider variety of options for busy nights, and it’s a great way to preserve meals for longer periods.
How It Helps:
- Freezer Storage: Once cooked, divide meals into portions and store them in freezer-safe containers. You can then pull them out as needed, reducing your weekly cooking time further.
- Ready-to-Go Convenience: With meals prepped and frozen, all you need to do is defrost and reheat—saving you from the need to cook anything on days when you’re pressed for time.
- Batch Cooking for the Long-Term: You can prepare large batches for several weeks or even months. For example, slow-cooked dishes like low-carb chili or slow-cooked beef stew with cauliflower mash can be frozen in individual portions and reheated as needed.
5. Easy Meal Prep for the Whole Family
Batch cooking allows you to prepare meals for the entire family in one go. Instead of cooking a fresh meal each night, you can have individual portions packed and ready for each person. This method is ideal if you have a busy family with different schedules, picky eaters, or various dietary preferences.
How It Helps:
- Family Meals Ready to Serve: By cooking in bulk, you can easily prepare meals for everyone and store them in containers for easy access. Each person can have their portion at their convenience without needing to cook each day.
- Customizable Portions for Family Members: If your family follows different variations of the keto diet or has specific preferences, batch cooking gives you the flexibility to customize each meal accordingly. For instance, one person may prefer more vegetables, while another might need extra protein.
6. Perfect for Meal Prep Containers and On-the-Go Meals
Batch cooking is perfect for those who prefer meal prepping and need meals that can be easily reheated and taken on the go. Whether it’s lunch for work, school, or just a convenient dinner option, pre-packed meal containers are an easy way to store and transport your keto-friendly meals. Using meal prep containers helps you portion out your meals and ensures that you’re eating the right portion sizes throughout the week.
How It Helps:
- Portion Control: Pre-portioning meals into individual containers ensures you’re sticking to proper portion sizes for your keto goals. This is especially helpful for those tracking their macros or calories.
- Grab-and-Go Meals: Prepped meals stored in containers are perfect for busy people who need a quick meal while on the go. Simply grab your pre-packed meal from the fridge, heat it up, and enjoy!
7. Make the Most of Your Crockpot
Batch cooking and the crockpot are a perfect match. You can use your crockpot to prepare large quantities of food without needing to stand over the stove. Simply load up your crockpot with ingredients in the morning, let it cook during the day, and then store your meals in containers once it’s finished. This hands-off approach means you can prepare meals for the entire week with minimal effort.
How It Helps:
- Set-and-Forget Cooking: The beauty of the crockpot is its ability to cook a large quantity of food with minimal attention. This means you can make several meals at once, letting the crockpot do all the work while you take care of other tasks.
- Minimal Cleanup: After batch cooking in the crockpot, cleanup is easy since you’ve cooked everything in one pot. Simply wash the crockpot once all meals are divided and stored.
Conclusion
Batch cooking is an excellent strategy to reduce weeknight stress and ensure your family enjoys healthy, keto-friendly meals every day of the week. By preparing multiple portions of your favorite keto crockpot recipes in advance, you can save time, reduce food waste, and ensure that nutritious meals are always just a reheat away. Whether you’re cooking for the whole family or prepping individual portions for easy lunches, batch cooking makes sticking to a keto diet easier and more manageable. Give it a try to simplify your meal prep and create a stress-free week!
5) Frequently Asked Questions About Keto Crockpot Meals
Frequently Asked Questions About Keto Crockpot Meals
When it comes to keto crockpot meals, there are often several common questions that arise. Whether you’re a seasoned keto enthusiast or just getting started, it’s important to have the right information to ensure your meals are prepared properly and efficiently. Here are some of the most frequently asked questions about keto crockpot meals, along with practical tips and solutions to make your cooking experience as smooth as possible.
1. Can I Use Frozen Ingredients in the Crockpot?
Yes, you can use frozen ingredients in the crockpot, but there are some important considerations to keep in mind to ensure your meal cooks properly and safely.
Tips for Using Frozen Ingredients in the Crockpot:
- Frozen Meat: While it’s safe to cook frozen meat in the crockpot, it’s generally recommended to thaw it before cooking to ensure it cooks evenly and safely. If you choose to use frozen meat directly, make sure the crockpot is set on the low heat setting, and monitor the temperature to ensure it reaches at least 165°F (74°C) for poultry and other meats.
- Frozen Vegetables: Frozen vegetables can be added directly to the crockpot, but they may release more moisture as they cook, which could make your dish a bit more liquid than desired. To prevent this, you can reduce the amount of liquid in the recipe slightly or add the frozen vegetables later in the cooking process.
- Frozen Sauces: If you’re using frozen sauces, such as a pre-made keto marinara or curry sauce, you can add them frozen to the crockpot. Just be aware that frozen sauces may take longer to heat up and will release more liquid during cooking.
Things to Avoid:
- Avoid putting frozen ingredients into a hot crockpot, as it can cause the temperature to drop too much, leading to unsafe cooking conditions.
- Best Practice: When possible, try to thaw ingredients before adding them to the crockpot to ensure even cooking and the best flavor.
2. How Do I Thicken Sauces Without Flour?
One common challenge on a keto diet is thickening sauces without traditional thickening agents like flour, which are high in carbs. Fortunately, there are several keto-friendly alternatives that can help you achieve the desired consistency without compromising the integrity of your meal.
Keto-Friendly Thickening Alternatives:
- Xanthan Gum: This is a common keto thickener. A very small amount (usually 1/4 teaspoon) can thicken sauces or soups. It’s best to sprinkle it in gradually and whisk it in to avoid clumping.
- Guar Gum: Similar to xanthan gum, guar gum is another low-carb thickener that works well for keto sauces and gravies. It’s especially effective when added to cold or room-temperature liquids before heating.
- Cream Cheese: For creamy sauces, cream cheese is an excellent thickening option. It adds richness and can help create a smooth, velvety texture without the carbs.
- Coconut Cream: Coconut cream, which is thicker than coconut milk, is a great option for thickening curries and sauces. It also adds a subtle, slightly sweet flavor that works well in many dishes.
- Pureed Vegetables: Vegetables like cauliflower or avocado can be pureed and added to sauces to give them a creamy texture. This is a great way to sneak in extra vegetables while keeping the dish thick and satisfying.
- Cheese: Shredded cheddar or parmesan cheese can help thicken sauces, especially for creamy dishes. As it melts, it contributes to both texture and flavor.
- Psyllium Husk: Psyllium husk powder can absorb a lot of liquid and create a thick texture. A small amount goes a long way, so it’s best to add it in small increments.
Best Practices:
- Start with a small amount of thickener and gradually add more until you reach your desired consistency.
- Mix the thickener with a bit of cold liquid first to avoid clumping when adding to hot sauces.
3. What Are the Best Crockpots for Keto Cooking?
When choosing a crockpot for keto cooking, it’s important to select a model that offers features that suit your cooking style and needs. Keto meals often require long cooking times, precise temperature control, and the ability to handle a variety of ingredients, from meats to low-carb vegetables.
Top Features to Look for in a Crockpot for Keto Cooking:
- Programmable Settings: Look for a crockpot that offers programmable settings so you can set the cooking time in advance and have the crockpot switch to a warming setting when the cooking time is complete. This is especially useful for busy families, as it prevents overcooking and ensures meals are ready when you need them.
- Temperature Control: Opt for a crockpot with multiple heat settings (low, high, and warm) to ensure that you can cook keto meals like stews and curries perfectly. Slow cooking at a lower temperature is often preferred for keto meals, so precise temperature control is essential.
- Capacity: Depending on the size of your family or how often you meal prep, choose a crockpot with the right capacity. A 6-quart crockpot is a versatile size that can comfortably feed a family of 4-6 people, while a smaller 3-quart model might be better for smaller households or if you like to cook in smaller batches.
- Insert Quality: Look for crockpots with a non-stick insert for easy cleaning. Some models also offer ceramic inserts, which are great for even heat distribution and enhance flavor by retaining moisture.
- Slow Cooker vs. Multi-Cooker: If you’re looking for more versatility, consider a multi-cooker like an Instant Pot. While it’s technically not a crockpot, it functions as a slow cooker, pressure cooker, and more, giving you the flexibility to cook keto meals in different ways.
Top Recommended Brands for Keto Crockpot Cooking:
- Crockpot® 6-Quart Slow Cooker: A trusted brand with a wide range of features like programmable cooking times and the ability to switch to warm mode automatically.
- Instant Pot Duo: A multi-cooker that can pressure cook, slow cook, sauté, and more—perfect for making keto stews, soups, and even desserts.
- Hamilton Beach 7-Quart Slow Cooker: Offers a larger capacity and a customizable timer, making it perfect for larger batches of keto meals.
- Ninja 3-in-1 Cooking System: Known for its versatility, the Ninja can sear, sauté, and slow cook, giving you the ability to prepare keto meals with fewer steps and more flavor.
4. How Long Can I Store Keto Crockpot Meals?
Knowing how to store keto crockpot meals properly ensures that you can enjoy leftovers without worrying about food safety. Proper storage also helps maintain the quality of your meals, so they taste just as good after being reheated.
How Long Can Keto Crockpot Meals Be Stored?
- In the Refrigerator: Most keto crockpot meals will last in the refrigerator for up to 3-4 days. Store your meals in airtight containers to preserve freshness and prevent contamination.
- In the Freezer: If you want to store your meals for longer, freezing is a great option. Most keto crockpot meals, especially stews, soups, and casseroles, can be stored in the freezer for up to 3 months. Be sure to use freezer-safe containers or resealable bags to avoid freezer burn.
Storage Tips:
- Cool Before Storing: Allow your keto meals to cool to room temperature before placing them in the fridge or freezer. This helps prevent condensation, which can lead to soggy food.
- Portion Meals for Easy Reheating: For convenience, portion out individual servings of your keto crockpot meals before freezing. This makes it easier to defrost only what you need for each meal.
- Label Your Containers: Label your containers with the date you cooked the meal so you can keep track of how long it’s been stored. This helps you avoid keeping food past its prime.
Reheating Tips:
- In the Microwave: Reheat individual portions in the microwave for 2-3 minutes or until heated through. Stir halfway through for even heating.
- In the Oven: Reheat larger portions by covering them with foil and baking at 350°F (175°C) for about 20-25 minutes, or until heated through.
- In the Crockpot: If you prefer to use the crockpot, set it on the low setting and heat for about 2 hours. Add a splash of water or broth if needed to prevent the meal from drying out.
In Conclusion
By understanding how to properly handle frozen ingredients, thicken sauces without flour, choose the best crockpot for your keto meals, and store your meals effectively, you can streamline your keto cooking process and make it more efficient. These practical tips and answers to frequently asked questions will help ensure that your keto crockpot meals turn out delicious, convenient, and easy to enjoy throughout the week.
Conclusion
Incorporating keto crockpot meals into your family’s routine offers numerous benefits, from simplifying meal prep to ensuring everyone enjoys delicious, low-carb meals. The convenience of using a crockpot allows you to create flavorful, family-friendly dishes with minimal effort, saving you time during the week and making it easier to stick to your keto lifestyle. With the versatility of the crockpot, you can easily create a variety of keto meals—whether it’s hearty stews, creamy dishes, or tender meats—that satisfy both taste and dietary needs.
By trying out the recipes shared in this post, you’ll be able to enjoy the ease and flavor of keto crockpot meals while feeding your family healthy, low-carb options. We’d love to hear how these recipes work for you! Share your experiences in the comments below and let us know how you make keto meals your own.
As a bonus, don’t forget to download your free keto meal plan to make your meal prepping even easier or subscribe to our newsletter for more keto tips, recipes, and inspiration straight to your inbox. Happy cooking, and here’s to a stress-free, delicious keto lifestyle!