Introduction
The Blackstone grill is a game-changer for anyone who loves outdoor cooking. Known for its versatility and ease of use, this flat-top griddle allows you to prepare everything from hearty breakfasts to sizzling dinners, making it a must-have for home cooks and grill enthusiasts alike.
Whether you’re hosting a backyard barbecue, celebrating a special occasion, or simply enjoying a weekend cookout, the Blackstone grill can help you take your cooking to the next level. The secret lies in its spacious cooking surface, precise heat control, and ability to handle a wide range of recipes, from juicy smash burgers to hibachi-style fried rice.
In this blog post, we’ll dive into the art of cooking amazing Blackstone grill recipes like a pro. You’ll discover essential tools and accessories, expert tips for griddle cooking, and a selection of crowd-pleasing recipes perfect for your next celebration. Let’s fire up the griddle and get started!

1) Why Choose a Blackstone Grill for Your Celebrations?
for more information: https://noryrecipes.com/what-makes-a-blackstone-special/
Versatility of Blackstone Griddles
One of the standout features of the Blackstone griddle is its incredible versatility. Unlike traditional grills with slats or grates, the Blackstone’s flat-top design opens up a world of culinary possibilities. You’re not just limited to grilling burgers and steaks; you can cook an entire meal on this surface, from breakfast classics to gourmet dinner creations.
Breakfast Favorites
Start your day off right by whipping up a hearty breakfast directly on your Blackstone. The griddle’s large cooking surface allows you to prepare multiple items simultaneously. Cook crispy bacon, fluffy pancakes, scrambled eggs, and hash browns all at once, ensuring everything stays warm and ready to serve. No more juggling pans or worrying about timing—Blackstone makes it simple to feed a crowd.
Lunch and Snack Delights
For lunch, the Blackstone shines with its ability to create quick, delicious meals. Smash burgers are a fan favorite, and the griddle’s high heat allows you to achieve that signature caramelized crust. Add some grilled onions, melted cheese, and a toasted bun for a restaurant-quality burger at home. You can also try quesadillas, grilled sandwiches, or even loaded nachos using the griddle’s even heat distribution.
Dinner Showstoppers
Dinner on the Blackstone takes outdoor cooking to a whole new level. Impress your guests with hibachi-style meals, where you can simultaneously cook fried rice, stir-fried vegetables, and your choice of proteins like shrimp, chicken, or steak. The flat surface is perfect for achieving the quick, high-heat cooking style that gives hibachi dishes their signature flavor.
From fajitas and Philly cheesesteaks to perfectly seared seafood or grilled vegetables, the Blackstone griddle handles it all with ease. Its versatility ensures that you’re never stuck cooking the same thing twice—you can experiment with global cuisines and create customized meals to suit any palate or occasion.
The ability to seamlessly transition between meals and cooking styles is what makes the Blackstone griddle a standout choice for any home cook. Whether you’re feeding your family or entertaining a crowd, this griddle is your ticket to a wide variety of delicious, satisfying dishes.
Ideal for Large Gatherings
When it comes to hosting outdoor parties, family reunions, or neighborhood cookouts, the Blackstone griddle is your ultimate ally. Its design and functionality make it perfect for preparing meals for large groups, ensuring everyone gets a hot, delicious plate without long wait times.
A Spacious Cooking Surface
One of the biggest advantages of the Blackstone griddle is its expansive cooking surface. Depending on the model, you can get griddles with cooking areas ranging from 28 inches to a whopping 36 inches. This large surface allows you to cook multiple servings of food simultaneously, making it ideal for big gatherings. For instance:
- Grill dozens of smash burgers at the same time for a burger bar.
- Prepare an assortment of pancakes, bacon, and eggs for a breakfast feast.
- Cook multiple proteins, vegetables, and side dishes in one go for a balanced dinner spread.
The ample space also means you can prepare meals in bulk, reducing downtime and letting you spend more time with your guests rather than hovering over the grill.
Perfect for Outdoor Parties and Celebrations
Outdoor events are all about creating memorable experiences, and the Blackstone griddle adds a fun, interactive element to your gatherings. Here’s why it’s perfect for celebrations:
- Versatile Menu Options
With the ability to cook a variety of dishes, you can cater to different tastes and dietary needs all at once. From vegetarian options like grilled vegetables and tofu to hearty dishes like steaks and shrimp skewers, the Blackstone has something for everyone. - Interactive Cooking Experience
Guests love watching food being prepared, especially for dishes like hibachi or fajitas. The griddle allows you to showcase your cooking skills, creating a performance element that turns the meal into entertainment. - Fast and Efficient Cooking
The even heat distribution across the griddle ensures that food cooks quickly and consistently. This is especially important when feeding a crowd, as it minimizes waiting time and keeps the food flowing. - Outdoor Ambiance
Cooking outdoors naturally creates a relaxed, festive atmosphere. The Blackstone griddle, with its portable and weather-resistant design, makes it easy to set up in your backyard, at the park, or even on a camping trip.
A Solution for Any Occasion
Whether you’re hosting a casual backyard barbecue, a birthday party, or even a holiday celebration, the Blackstone griddle adapts effortlessly. Its ability to handle high-volume cooking and its versatility in meal preparation make it the centerpiece of any outdoor event. Plus, with fewer dishes to clean up after cooking everything on the griddle, you’ll have more time to enjoy the celebration.
With a Blackstone griddle, feeding a crowd becomes less of a chore and more of a joy. Its large cooking surface and party-ready features make it the go-to choice for anyone looking to impress their guests with delicious, freshly prepared food.
Ease of Use and Maintenance
One of the key reasons the Blackstone griddle has become a favorite among cooking enthusiasts is its user-friendly design and straightforward maintenance. With a little care and the right techniques, you can ensure your Blackstone griddle stays in top condition and delivers consistently excellent results for years to come.
Griddle Seasoning: Building a Natural Non-Stick Surface
Seasoning your griddle is the foundation of great cooking on a Blackstone. Seasoning refers to the process of creating a protective, non-stick layer on the griddle surface using oil and heat. Here’s why it’s crucial and how to do it:
- Why Seasoning Matters
- Prevents rust and corrosion.
- Ensures food doesn’t stick to the surface, making cooking and cleaning easier.
- Enhances the flavor of your dishes over time.
- How to Season Your Griddle
- Preheat the griddle on high until it darkens slightly.
- Apply a thin layer of high-smoke-point oil (like flaxseed or vegetable oil).
- Spread the oil evenly using a paper towel or cloth.
- Allow the oil to burn off and repeat the process 2-3 times to create a durable coating.
Seasoning is a simple yet essential step that transforms your griddle into a reliable cooking surface.
Cleaning Made Simple
Cleaning a Blackstone griddle is quick and hassle-free, making it an attractive option for busy cooks. After every use, follow these steps:
- Scrape the Surface
Use a griddle scraper to remove leftover food debris while the surface is still warm. - Wipe It Down
Dampen a paper towel or use a griddle cleaning pad to wipe away grease and residue. - Reapply Oil
After cleaning, apply a thin layer of oil to maintain the seasoning and prevent rust.
For deeper cleaning, Blackstone offers specialized cleaning kits that include scrapers, sponges, and degreasers to tackle stubborn buildup.
Must-Have Accessories
Investing in the right accessories makes griddle cooking even more convenient. Here are some essentials:
- Griddle Cover: Protects your griddle from weather and debris when not in use.
- Spatulas and Tongs: Essential for flipping, tossing, and turning food with ease.
- Oil Bottles: Help you evenly distribute oil during cooking and seasoning.
- Infrared Thermometer: Useful for accurate temperature readings across different zones of the griddle.
Mastering Temperature Control
Proper temperature control is critical for achieving consistent, professional-quality results. The Blackstone griddle is equipped with multiple burners, allowing you to create different heat zones for versatile cooking. Here’s why this is important:
- Avoid Overcooking or Undercooking
- Use high heat for searing proteins like steaks or burgers.
- Keep delicate items like eggs or pancakes on lower heat zones.
- Cook Multiple Dishes Simultaneously
- Divide the griddle into high, medium, and low-temperature sections to prepare an entire meal at once.
- Reduce Waste
- With precise temperature control, you avoid burning or overcooking food, ensuring all ingredients are used effectively.
Effortless and Efficient
The Blackstone griddle’s ease of use and straightforward maintenance make it accessible to cooks of all skill levels. With just a few simple practices—like proper seasoning, cleaning, and temperature management—you can ensure your griddle performs flawlessly every time. These features, combined with its efficiency and convenience, make the Blackstone a standout tool for both casual cooks and serious grilling enthusiasts.
2) Essential Tools and Accessories for Cooking Like a Pro
Must-Have Griddle Tools
To get the most out of your Blackstone griddle, equipping yourself with the right tools is essential. These tools not only make cooking easier and more efficient but also help you achieve professional-quality results. Let’s explore the must-have griddle tools and their roles in griddle cooking.
1. Spatulas: Your All-Purpose Cooking Companion
A sturdy, flat spatula is perhaps the most iconic tool for griddle cooking. It’s incredibly versatile and serves many purposes:
- Flipping and Turning: Perfect for flipping burgers, pancakes, eggs, and even delicate items like fish fillets.
- Slicing and Chopping: Many spatulas come with beveled edges, allowing you to chop ingredients like onions or break apart ground meat directly on the griddle.
- Scraping and Lifting: Ideal for scraping up browned bits or lifting food that might stick slightly.
For best results, consider having both a wide spatula for large items (like pancakes or omelets) and a narrow spatula for more precise tasks. Some griddlers prefer a second spatula for two-handed tasks, such as flipping large sandwiches or hibachi-style cooking.
2. Tongs: Gripping with Precision
Tongs are another indispensable tool for griddle cooking. They allow you to handle ingredients with precision and safety:
- Turning and Rotating: Use tongs to flip sausages, kabobs, or vegetables without damaging them.
- Grabbing Small Items: Great for picking up smaller items like shrimp, scallops, or sliced vegetables.
- Maintaining Clean Hands: Tongs keep your hands clean and safe from the hot surface, especially when working with greasy or messy foods.
Look for tongs with silicone or heat-resistant tips to prevent scratching the griddle surface.
3. Oil Bottles: Essential for Smooth Cooking
Oil bottles are key to maintaining a well-oiled and seasoned surface throughout your cooking session. Their role includes:
- Even Distribution: A squeeze bottle allows you to spread oil evenly across the griddle, preventing food from sticking.
- Controlled Use: Helps you avoid overusing oil, which can lead to greasy meals or excessive smoke.
- Convenience: Easy to grab and use while cooking, especially for quick seasoning or greasing.
Consider keeping one bottle for cooking oils (like vegetable or canola) and another for flavored oils (like garlic-infused or herb oils) to enhance your recipes.
4. Scrapers: The Cleanup Hero
Scrapers are designed for maintaining a clean and well-functioning griddle surface. They play a crucial role in:
- Debris Removal: Scrape off food residue, grease, or caramelized bits between cooking batches or after meals.
- Surface Preservation: Prevent buildup that can impact cooking performance and food flavor.
- Preparing the Surface: Use the scraper to spread oil evenly when seasoning the griddle.
Heavy-duty scrapers with stainless steel blades are ideal for tough cleaning jobs, while smaller scrapers work well for detailed tasks.
Additional Tools to Consider
Beyond these essentials, a few extra tools can enhance your griddle cooking experience:
- Griddle Cover: Protects the surface from dust, moisture, and debris when not in use.
- Thermometer: An infrared thermometer helps monitor griddle temperature accurately, ensuring even cooking.
- Grill Press: Use a grill press to flatten burgers, speed up cooking, or create those perfect sear marks.
Why Tools Matter
Having the right tools ensures a smooth cooking process and helps you achieve consistent, professional-quality results. They allow you to handle food with precision, keep your griddle in top shape, and make the entire experience enjoyable and stress-free.
By investing in these must-have griddle tools, you’ll be well-equipped to tackle any recipe with confidence and finesse, making your Blackstone cooking sessions truly extraordinary.
Temperature Control Tips
One of the key skills to master when cooking on a Blackstone griddle is temperature control. Proper management of heat zones ensures your food cooks evenly, maintains its flavor and texture, and is ready to serve at just the right moment. Let’s dive into why temperature control is crucial, how to monitor heat zones, and the tools that can help you cook like a pro.
The Importance of Monitoring Heat Zones
Blackstone griddles are designed with multiple burners, allowing you to create different heat zones across the cooking surface. This feature is invaluable when preparing a variety of dishes simultaneously. Here’s why:
- Cooking Multiple Dishes at Once
- High heat is ideal for searing meats like steaks or burgers, giving them a beautiful crust while keeping the inside juicy.
- Medium heat works best for items like stir-fried vegetables or quesadillas, which require thorough cooking without burning.
- Low heat zones are perfect for delicate foods like eggs, pancakes, or keeping finished items warm without overcooking.
- Avoiding Overcooking and Burning
Monitoring and managing heat zones ensures you can cook different ingredients at their optimal temperature. For example, searing shrimp too long at high heat can result in a rubbery texture, while undercooked vegetables may remain too crunchy. - Timing and Efficiency
Heat zones allow you to control the timing of your dishes. You can start cooking proteins on high heat and move them to a lower zone to keep them warm while you finish preparing sides. This makes meal prep efficient and ensures everything is served fresh and hot.
Using Accessories to Master Temperature Control
While the griddle’s built-in knobs help regulate heat, additional tools can enhance precision and help you cook with confidence:
- Infrared Thermometer
- An infrared thermometer is a game-changer for griddle cooking. It provides instant surface temperature readings, helping you ensure the griddle is heated to the desired level before you start cooking.
- For instance, smash burgers require a surface temperature of around 400–450°F for the perfect sear, while delicate items like crepes cook best at around 300°F.
- By checking the griddle’s surface with an infrared thermometer, you can avoid guesswork and achieve consistent results.
- Griddle Thermometer Strips
- These adhesive strips are placed directly on the griddle surface and change color based on temperature, offering a quick visual guide.
- They’re especially useful for identifying heat zones if you’re working with a large cooking area.
- Wind Guards
- Outdoor cooking can be unpredictable, with wind or weather affecting heat retention. Wind guards protect the burners from external factors, ensuring consistent temperature control.
- Heat-Resistant Gloves
- When adjusting burners or handling hot accessories, heat-resistant gloves provide safety and allow you to focus on precise temperature management.
Tips for Managing Heat Zones Effectively
- Preheat Properly
Always preheat your Blackstone griddle for about 5–10 minutes before cooking. This ensures the surface is evenly heated and ready to create defined heat zones. - Plan Your Cooking Zones
Decide on the heat levels for different sections of the griddle based on your menu. For example:- High heat on one side for searing proteins.
- Medium heat in the center for vegetables or side dishes.
- Low heat on the opposite side to keep cooked food warm.
- Adjust As Needed
- Monitor your food closely and adjust the burner knobs to maintain optimal heat levels. If an area becomes too hot, lower the burner or move your food to a cooler zone.
Why Temperature Control Matters
Mastering temperature control on a Blackstone griddle is the difference between good and great cooking. By creating and managing heat zones, you can cook a variety of dishes with precision, avoid common pitfalls like burning or uneven cooking, and ensure your food is always served at its best.
With the help of accessories like infrared thermometers and a little practice, you’ll quickly become a pro at managing heat zones, unlocking the full potential of your Blackstone griddle.
Cleaning and Maintenance Essentials
Proper cleaning and maintenance are critical to keeping your Blackstone griddle in top condition. A well-maintained griddle not only enhances your cooking experience but also extends the lifespan of your equipment, ensuring it remains a reliable centerpiece for your culinary adventures.
Why Cleaning Matters
After every cooking session, leftover food particles, grease, and residue can accumulate on the griddle surface. Cleaning the griddle prevents:
- Rust Formation: Residual moisture can lead to rust, especially on seasoned steel surfaces.
- Off-Flavors: Old grease or burnt food particles can affect the taste of your meals.
- Uneven Cooking: Buildup can create hotspots or uneven cooking surfaces.
By adopting a simple cleaning routine, you can maintain a clean and well-seasoned surface, ready for your next meal.
The Step-by-Step Cleaning Process
Follow these steps to clean your Blackstone griddle effectively after cooking:
- Cool Down Slightly
- Allow the griddle to cool for a few minutes, but not completely. Cleaning is easier while the surface is still warm.
- Scrape Off Debris
- Use a griddle scraper to remove food particles and grease.
- Gently scrape in a back-and-forth motion, focusing on areas with stuck-on food.
- Wipe the Surface
- Use paper towels or a damp cloth to wipe away grease and loosened debris.
- If necessary, add a splash of warm water to deglaze the surface and remove stubborn spots.
- Clean Tough Areas
- For stubborn residue, use a griddle cleaning pad or a soft-bristled grill brush. Avoid using abrasive materials that could damage the seasoning.
- If needed, a mild degreaser or Blackstone’s dedicated cleaning solution can help break down tough grease.
- Reapply Oil
- Once the surface is clean and dry, apply a thin layer of high-smoke-point oil (like vegetable or flaxseed oil).
- Spread the oil evenly using a paper towel to maintain the seasoning and protect the surface from rust.
Deep Cleaning Routine
Occasionally, your griddle may need a deeper cleaning to remove accumulated buildup:
- Heat the griddle to loosen grease and debris.
- Add a splash of water and use a scraper or grill brush to remove stubborn residue.
- Wipe the surface thoroughly, then re-season the griddle to restore its protective layer.
Recommended Cleaning Tools
Investing in quality cleaning tools makes the process faster and more effective:
- Griddle Scraper
- Designed to remove food particles and grease without damaging the surface.
- Look for one with a sturdy, stainless-steel blade and an ergonomic handle for comfort.
- Grill Brush
- A grill brush with soft, heat-resistant bristles is ideal for scrubbing stubborn spots without scratching the griddle.
- Avoid using wire brushes, which can leave metal shards behind.
- Cleaning Pads or Sponges
- Non-abrasive pads help remove residue gently, preserving the griddle’s seasoning.
- Oil Bottles
- Keep a squeeze bottle of oil handy for both cooking and re-seasoning after cleaning.
- Griddle Cleaning Kit
- Blackstone offers comprehensive cleaning kits that include scrapers, pads, degreasers, and more, making it easy to maintain your griddle.
Additional Maintenance Tips
- Protect the Surface
- Always cover your griddle with a protective lid or griddle cover when not in use to shield it from moisture, dust, and debris.
- Inspect Regularly
- Check for signs of rust or damage and address them immediately. Light rust can be removed with a scraper or fine steel wool, followed by re-seasoning.
- Avoid Harsh Chemicals
- Stick to mild cleaning solutions or those specifically designed for griddles to prevent damage to the seasoning or surface.
Conclusion
Cleaning and maintaining your Blackstone griddle is simple and takes only a few minutes after each use. With the right tools and routine, you’ll preserve the griddle’s non-stick surface, keep it free from rust, and ensure it’s always ready for your next cooking session. By prioritizing cleaning and maintenance, your Blackstone griddle will remain a dependable and cherished part of your outdoor kitchen for years to come.
3) Pro Tips for Cooking Delicious Blackstone Recipes
Mastering Griddle Seasoning
Seasoning your Blackstone griddle is one of the most important steps to ensure it performs at its best. Seasoning doesn’t just protect the griddle; it also enhances your cooking experience by creating a natural non-stick surface. Properly seasoned griddles allow food to release easily, cook evenly, and develop rich flavors over time.
Why Is Seasoning Important?
Seasoning involves applying a thin layer of oil and heating it until it bonds with the surface, forming a protective layer. Here’s why it’s essential:
- Non-Stick Cooking
- A seasoned griddle prevents food from sticking, making it easier to cook delicate items like eggs, pancakes, or fish.
- It allows you to use less oil during cooking, promoting healthier meals.
- Rust Prevention
- The seasoning layer acts as a barrier between the griddle surface and moisture, preventing rust and corrosion.
- Enhanced Flavor
- Over time, the seasoning develops a patina that contributes to the flavor of your dishes, much like a well-seasoned cast-iron skillet.
- Durability
- Regular seasoning strengthens the surface, ensuring your griddle lasts for years.
Step-by-Step Guide to Proper Seasoning
Seasoning your Blackstone griddle is simple and straightforward. Follow these steps to create a durable, non-stick surface:
- Prepare the Griddle
- Remove the griddle top from the base if possible.
- Wash the surface with warm soapy water to remove factory oils or residues. This is the only time you should use soap on your griddle.
- Rinse thoroughly and dry completely with a clean towel to prevent rust.
- Preheat the Griddle
- Place the griddle on the base and turn the burners to high heat.
- Allow the surface to heat until it changes color slightly, indicating it’s ready for oil application.
- Choose the Right Oil
- Use an oil with a high smoke point, such as flaxseed oil, vegetable oil, canola oil, or grapeseed oil. Flaxseed oil is often recommended because it creates a durable polymerized layer.
- Apply a Thin Layer of Oil
- Pour a small amount of oil onto the surface.
- Use a paper towel or a lint-free cloth to spread the oil evenly across the griddle, including the edges and corners. Avoid over-oiling, as excess oil can pool and result in uneven seasoning.
- Heat the Oil
- Allow the oil to heat until it smokes and burns off. This process bonds the oil to the surface, creating the first layer of seasoning.
- Once the smoking stops, the surface will darken.
- Repeat the Process
- Repeat the oiling and heating process 3–4 more times. With each layer, the surface will become darker and shinier, indicating the buildup of a strong, non-stick coating.
- Cool Down
- Turn off the burners and allow the griddle to cool completely.
- Inspect the Surface
- A properly seasoned griddle should have a dark, smooth, and slightly glossy finish. If you notice any uneven areas, you can reapply oil and heat those spots specifically.
Maintaining the Seasoning
- Clean Without Soap
- Avoid using soap when cleaning your griddle after seasoning. Simply scrape off debris, wipe down the surface, and apply a thin layer of oil after each use.
- Re-Season as Needed
- If the seasoning begins to wear off or rust appears, repeat the seasoning process to restore the protective layer.
- Use It Regularly
- Frequent cooking naturally reinforces the seasoning as oils from your food bond to the surface.
Common Seasoning Mistakes to Avoid
- Over-Oiling: Applying too much oil can lead to sticky residue or uneven seasoning. Always use a thin, even layer.
- Not Heating Enough: The oil must reach its smoke point to bond with the surface. If it doesn’t smoke, the seasoning won’t be effective.
- Skipping Maintenance: Failing to clean and oil the griddle after use can result in rust or a degraded surface.
The Reward of a Well-Seasoned Griddle
A properly seasoned Blackstone griddle transforms the cooking experience. From the first use to years down the line, this simple process ensures your griddle delivers consistent, high-quality results. Whether you’re searing steaks, flipping pancakes, or cooking delicate seafood, a well-seasoned griddle provides the ideal surface for all your culinary creations.
Using Heat Zones Effectively
One of the standout features of a Blackstone griddle is the ability to create and control multiple heat zones on its large cooking surface. This flexibility allows you to prepare a variety of dishes simultaneously, ensuring each ingredient is cooked to perfection. Understanding how to use heat zones effectively is key to mastering griddle cooking.
What Are Heat Zones?
Heat zones refer to the areas of the griddle surface that are maintained at different temperatures by adjusting the burners underneath. These zones can be classified as:
- High Heat Zone: Ideal for quick searing, browning, and achieving crispy textures.
- Medium Heat Zone: Perfect for cooking foods that require thorough cooking without burning.
- Low Heat Zone: Best for delicate foods or keeping finished dishes warm.
By dividing your griddle into heat zones, you can cook multiple types of food at once, saving time and effort while ensuring everything is ready to serve simultaneously.
How to Create and Control Heat Zones
- Preheat the Griddle
- Turn all burners to high and allow the griddle to preheat for 5–10 minutes. This ensures an evenly heated surface.
- Adjust Burners
- Once preheated, lower specific burners to medium or low, depending on your desired zones.
- For example:
- Leave one side on high for searing.
- Set the center burners to medium for items like vegetables or stir-fries.
- Reduce the opposite side to low for keeping food warm or cooking delicate dishes.
- Monitor Temperatures
- Use an infrared thermometer or griddle thermometer strips to check the surface temperature of each zone. This ensures precise cooking and prevents overheating or undercooking.
What to Cook in Each Heat Zone
- High Heat Zone (400–450°F)
This zone is your go-to for foods that require quick, intense heat to sear or crisp the exterior while locking in juices or flavors.- Meats:
- Steaks, burgers, chicken breasts, pork chops, and shrimp.
- Smash burgers thrive in this zone as the high heat creates a golden crust.
- Searing Vegetables:
- Bell peppers, onions, asparagus, and zucchini slices.
- High heat adds charred, smoky flavors to veggies.
- Stir-Frying:
- Asian-inspired dishes like hibachi-style fried rice or noodle stir-fries benefit from high heat for quick cooking and caramelization.
- Meats:
- Medium Heat Zone (300–375°F)
The medium heat zone is ideal for foods that need consistent, even cooking without the risk of burning.- Breakfast Favorites:
- Pancakes, French toast, eggs, and bacon cook perfectly in this zone.
- Side Dishes:
- Grilled vegetables like squash, mushrooms, or corn.
- Potatoes (hash browns or diced).
- Sandwiches:
- Grilled cheese, quesadillas, and paninis get golden and crispy without burning.
- Proteins:
- Delicate items like fish fillets or skin-on chicken thighs that need even heat to cook through without drying out.
- Breakfast Favorites:
- Low Heat Zone (200–300°F)
Low heat zones are perfect for gentle cooking or keeping food warm without overcooking.- Delicate Foods:
- Eggs, crepes, or soft tortillas require a gentler touch to avoid overcooking or burning.
- Melting Cheese:
- Use this zone to melt cheese on burgers or sandwiches without scorching the bread or patties.
- Holding Area:
- Place finished dishes here to keep them warm while you complete other items. For example, move seared steaks to the low heat zone to rest or keep sautéed vegetables warm until everything is ready to serve.
- Delicate Foods:
Tips for Using Heat Zones Effectively
- Plan Your Cooking Strategy
- Before cooking, decide what foods require high, medium, or low heat and assign areas of the griddle accordingly.
- Start with items that need the highest heat, then move them to lower zones to keep warm while you prepare other dishes.
- Move Food as Needed
- The beauty of heat zones is their flexibility. For example, sear steak on high heat, then transfer it to medium or low to finish cooking without burning.
- Avoid Overcrowding
- Leave enough space for food to cook evenly. Overcrowding can reduce the effectiveness of your heat zones and create inconsistent results.
- Adjust Burners During Cooking
- If a particular zone becomes too hot or cool, adjust the burner knobs to maintain the desired temperature.
Why Heat Zones Matter
Mastering heat zones transforms your Blackstone griddle into a versatile cooking powerhouse. You can cook multiple dishes at once, cater to various preferences, and streamline your preparation for large gatherings. With practice, you’ll learn to orchestrate meals with precision, ensuring every dish is perfectly cooked and served hot.
Experimenting with Flavors
One of the most exciting aspects of cooking on a Blackstone griddle is the endless opportunity to experiment with flavors. With its large, versatile cooking surface, the griddle provides a perfect canvas for culinary creativity. By incorporating marinades, spices, and sauces, you can elevate your meals, infusing them with vibrant and delicious flavors that suit any occasion.
Why Experiment with Flavors?
- Customization: Personalize recipes to match your taste preferences or dietary needs.
- Versatility: Enhance the natural flavors of various ingredients, from proteins to vegetables.
- Culinary Exploration: Try global cuisines, introducing your taste buds to new and exciting combinations.
Using Marinades
Marinades are a fantastic way to add depth and complexity to your dishes, especially when cooking meats or seafood. They tenderize and infuse food with bold flavors.
- How to Marinate
- Combine a liquid base (like oil, vinegar, or soy sauce) with seasonings, spices, and aromatics.
- Allow the food to soak in the marinade for at least 30 minutes or overnight, depending on the recipe.
- Popular Marinades for the Griddle
- Teriyaki Marinade: A mix of soy sauce, brown sugar, garlic, and ginger. Perfect for stir-fries, chicken, or shrimp.
- Citrus-Herb Marinade: Lemon juice, olive oil, garlic, and fresh herbs like rosemary or thyme. Excellent for chicken or fish.
- Spicy BBQ Marinade: A blend of BBQ sauce, paprika, chili powder, and honey. Ideal for ribs or pork chops.
Incorporating Spices
Spices are essential for building layers of flavor and giving your dishes a unique flair. Sprinkle them directly onto ingredients or mix them into dry rubs for meats.
- Griddle-Friendly Spice Combinations
- Smoky BBQ Rub: A mix of smoked paprika, garlic powder, onion powder, and brown sugar. Perfect for burgers, chicken, or pork.
- Cajun Seasoning: A bold blend of paprika, cayenne, thyme, and oregano. Great for shrimp, chicken, or even vegetables.
- Mediterranean Blend: A combination of oregano, basil, garlic powder, and lemon zest. Ideal for chicken, lamb, or roasted vegetables.
- Tips for Using Spices on the Griddle
- Apply spices evenly to avoid clumping or uneven cooking.
- Combine spices with a small amount of oil before applying to ensure even distribution.
Enhancing with Sauces
Sauces are the finishing touch that ties all the elements of a dish together. They can be brushed on during cooking or added at the end to enhance flavor and presentation.
- Popular Sauce Pairings
- Garlic Butter Sauce: A luxurious mix of melted butter, minced garlic, and parsley. Perfect for seafood like scallops or shrimp.
- Teriyaki Glaze: A sweet and savory glaze for stir-fried meats and vegetables.
- Spicy Mayo: A blend of mayonnaise and sriracha, great as a dipping sauce or drizzle for sandwiches, tacos, or fries.
- Chimichurri: A fresh and tangy sauce made with parsley, garlic, olive oil, and vinegar, ideal for grilled steaks or chicken.
- Pro Tips for Using Sauces
- Add sauces toward the end of cooking to avoid burning or caramelization.
- Use a basting brush or squeeze bottle for even application.
Popular Flavor Combinations for the Griddle
Here are some tried-and-true flavor pairings to inspire your next meal:
- Asian-Inspired Stir-Fry
- Protein: Chicken, shrimp, or tofu.
- Marinade: Soy sauce, sesame oil, garlic, and ginger.
- Sauce: Teriyaki glaze.
- Finish with sesame seeds and green onions for extra flavor.
- Garlic Butter Seafood
- Protein: Shrimp, scallops, or lobster tails.
- Spice Blend: Salt, pepper, and smoked paprika.
- Sauce: Garlic butter with a squeeze of lemon.
- Smoky Southwest Style
- Protein: Chicken or steak.
- Spice Blend: Chili powder, cumin, paprika, and garlic.
- Sauce: Creamy avocado-lime dressing or chipotle mayo.
- Serve with charred peppers and onions.
- Classic Burgers and Fries
- Meat: Ground beef patties seasoned with salt, pepper, and onion powder.
- Sauce: BBQ sauce or aioli.
- Side: Griddle-seared fries tossed in garlic butter and parsley.
Encouraging Creativity
Don’t be afraid to experiment with new ingredients and combinations! Try blending spices, mixing marinades, or creating your own signature sauce. Cooking on the griddle is all about discovery, and even small changes can lead to exciting new flavors.
By mastering marinades, spices, and sauces, you can transform simple ingredients into gourmet-level dishes that will impress your family and friends. The possibilities are endless, and the Blackstone griddle is your gateway to exploring them all.
4) Crowd-Pleasing Blackstone Recipes for Your Next Celebration
Smash Burgers
Smash burgers are a culinary phenomenon that has taken the griddle world by storm. Known for their crispy edges, juicy interior, and rich, caramelized flavor, smash burgers are a crowd-pleaser at any party or gathering. Cooking them on a Blackstone griddle takes these classic burgers to a whole new level, thanks to the even heat distribution and ample cooking space.
What Are Smash Burgers?
Unlike traditional burgers, smash burgers are made by pressing a ball of ground beef onto a hot cooking surface, creating a thin patty. This technique maximizes the contact between the meat and the griddle, resulting in a perfectly crispy crust (or “Maillard reaction”) while locking in the juices.
Quick Smash Burger Recipe Overview
Ingredients:
- Ground beef (80/20 blend for optimal fat content and flavor)
- Salt and pepper
- Soft burger buns
- Cheese (American cheese is a classic choice)
- Optional toppings: lettuce, tomato, onions, pickles, and condiments like mayo, ketchup, or mustard
Steps:
- Preheat the Griddle:
- Heat your Blackstone griddle to medium-high heat for an even cooking surface.
- Form the Meat Balls:
- Roll ground beef into golf ball-sized portions (approximately 2–3 ounces each). Avoid packing them too tightly.
- Smash the Burgers:
- Place a meatball on the hot griddle and immediately press it down with a sturdy spatula or a burger press. Apply firm, even pressure to create a thin patty.
- Hold the press for 10–15 seconds to ensure a good crust forms.
- Season and Cook:
- Sprinkle salt and pepper on the patty after smashing.
- Allow the burger to cook for 2–3 minutes without flipping to develop a crust.
- Flip and Add Cheese:
- Flip the patty carefully with a wide spatula, ensuring the crust stays intact.
- Immediately add a slice of cheese to the cooked side. Let it melt as the patty finishes cooking (about 1–2 minutes).
- Assemble the Burger:
- Toast the buns on the griddle for added texture and flavor.
- Layer the burger patty on the bun, add your desired toppings, and serve immediately.
Why Smash Burgers Are a Hit at Parties
- Quick and Easy:
- Smash burgers cook in minutes, making them perfect for feeding a crowd without long wait times.
- Guests love the simplicity and customizable options.
- Crispy, Juicy Perfection:
- The smashing technique creates a crusty exterior that contrasts beautifully with the juicy interior.
- The thin patty ensures balanced flavors in every bite, especially when paired with melted cheese and fresh toppings.
- Interactive Experience:
- Cooking smash burgers on a Blackstone griddle can become a fun, interactive event. Guests can watch the process or customize their burgers with toppings and condiments of their choice.
Tips for Achieving the Perfect Crust
- Start with the Right Meat:
- Use ground beef with at least 20% fat (80/20 blend). The fat content is essential for flavor and helps create a juicy patty. Avoid lean blends, as they may dry out during cooking.
- Preheat the Griddle Properly:
- Ensure the griddle is hot before adding the meat. A preheated surface allows for immediate searing, which is crucial for forming the crust.
- Use the Right Tools:
- A sturdy, flat-edged spatula or a dedicated burger press is essential for smashing the patties. For best results, use parchment paper between the spatula and meat to prevent sticking.
- Don’t Over-Smash:
- While smashing is key, only press the patty down once. Repeated smashing after the initial press can squeeze out juices, leading to a dry burger.
- Don’t Flip Too Soon:
- Allow the patty to cook undisturbed for a few minutes to let the crust develop. The edges should look crispy and caramelized before flipping.
- Work in Batches:
- If you’re cooking for a large group, prepare smash burgers in batches to maintain heat consistency on the griddle and ensure every patty cooks evenly.
Flavor Enhancements for Smash Burgers
- Onion Smash Burgers:
- Add thinly sliced onions to the patty before smashing. The onions will caramelize as they cook, adding sweetness and flavor.
- Seasoned Butter:
- Brush a little garlic or herb butter onto the buns for extra richness.
- Sauce It Up:
- Create a signature burger sauce by mixing mayo, ketchup, mustard, and a touch of pickle juice or hot sauce.
- Double Smash Burgers:
- Stack two patties for an indulgent, restaurant-style experience.
Smash burgers are a surefire way to impress your guests. With their crispy crust, juicy interior, and endless customization options, these griddle-made favorites will quickly become a staple at your gatherings. Perfect your technique, experiment with toppings, and watch as your smash burgers become the star of the show!
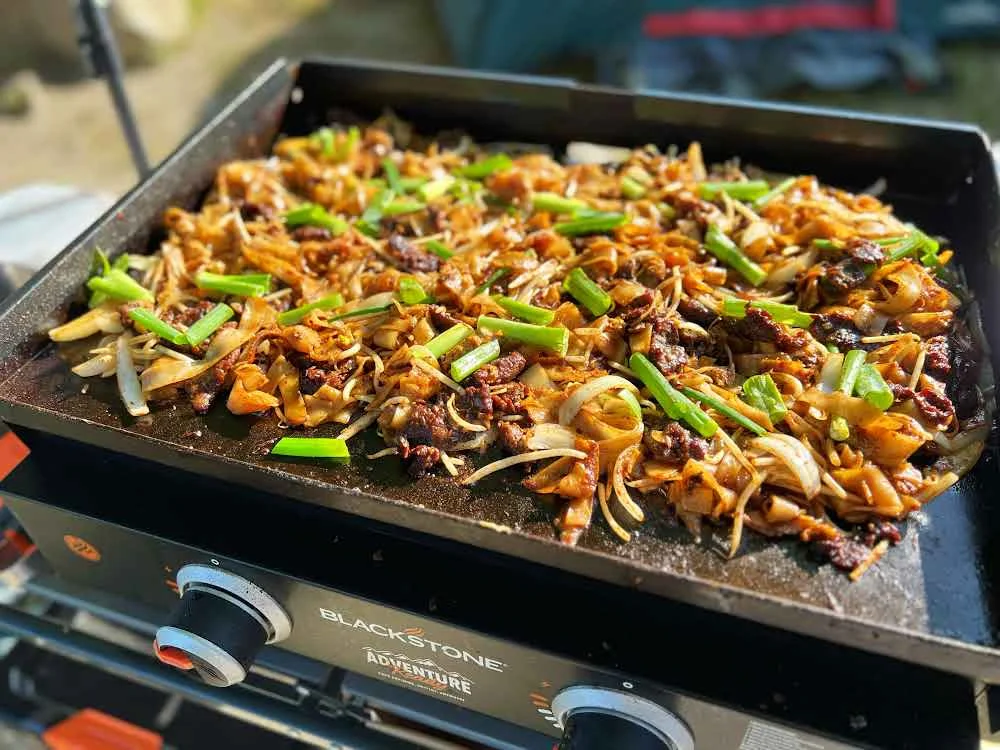
Hibachi-Style Fried Rice
Hibachi-style fried rice is a restaurant favorite that’s surprisingly easy to recreate on a Blackstone griddle. With its smoky flavor, savory seasoning, and customizable protein options, it’s a perfect side dish or standalone meal for gatherings. The griddle’s wide cooking surface and even heat distribution make it ideal for cooking large batches of fried rice, just like the pros.
Why Cook Fried Rice on a Griddle?
- Even Heat Distribution: Ensures consistent cooking without hot spots.
- Ample Space: Allows you to cook rice, vegetables, and proteins simultaneously.
- Authentic Flavor: The high heat of the griddle mimics the conditions of a hibachi restaurant, imparting a smoky, charred flavor to the rice.
Step-by-Step Guide to Hibachi-Style Fried Rice
Ingredients:
- Base Ingredients:
- 3 cups of cold, cooked rice (preferably day-old for better texture)
- 2–3 tablespoons of vegetable oil or sesame oil
- 1/2 cup diced onion
- 1/2 cup diced carrots
- 1/2 cup peas (frozen or fresh)
- 2 eggs, lightly beaten
- Seasonings and Sauces:
- 3–4 tablespoons soy sauce
- 1–2 teaspoons sesame oil
- 1 teaspoon garlic powder or 2 cloves minced garlic
- Salt and pepper to taste
- Optional Proteins:
- Shrimp, chicken, steak, tofu, or scrambled egg as a primary protein
Cooking Instructions:
Preheat the Griddle
Set the Blackstone griddle to medium-high heat and allow it to preheat for 5–10 minutes. Add a drizzle of vegetable oil or sesame oil.
Cook the Protein (if using):
If you’re adding shrimp, chicken, or steak, season the protein with salt, pepper, and a splash of soy sauce.
Cook the protein on the griddle until fully cooked, then push it to the cooler side of the griddle or set aside.
Sauté Vegetables
Add diced onions, carrots, and peas to the griddle. Stir-fry for 2–3 minutes until the vegetables soften and the onions become translucent.
Scramble the Eggs
Push the vegetables to one side of the griddle. Add the beaten eggs to the empty area and scramble them quickly. Mix the cooked eggs into the vegetables once done.
Add the Rice
Spread the cold, cooked rice onto the griddle in a thin layer. Let it heat for 1–2 minutes to remove excess moisture.
Stir the rice with the vegetables and eggs, breaking up any clumps with your spatula.
Season the Rice
Drizzle soy sauce and sesame oil over the rice mixture. Sprinkle with garlic powder or add minced garlic for extra flavor.
Stir-fry everything together, ensuring the rice is evenly coated in the sauce. Adjust seasoning with salt and pepper as needed.
Combine with Protein
Add your cooked protein back into the rice mixture and stir to combine. Cook for an additional 1–2 minutes to meld the flavors.
Serve Hot
Garnish with chopped green onions or sesame seeds for added color and flavor. Serve immediately as a main dish or side.
Protein Add-On Ideas
- Shrimp
- Season shrimp with a bit of garlic powder, salt, and pepper. Sear them on the griddle for 2–3 minutes per side before adding to the fried rice.
- Chicken
- Use diced chicken breast or thighs. Marinate in soy sauce and sesame oil for added flavor before cooking.
- Steak
- Thinly slice steak and season with salt, pepper, and a splash of soy sauce. Cook quickly on high heat for tender results.
- Tofu
- For a vegetarian option, cube firm tofu and toss it with soy sauce and cornstarch for a crispy texture. Sear it on the griddle before mixing it into the rice.
Pro Tips for Perfect Fried Rice
- Use Cold, Day-Old Rice
- Freshly cooked rice is too moist and can become mushy. Day-old rice has a firmer texture, making it ideal for frying.
- Don’t Overcrowd the Griddle
- Give each ingredient space to cook evenly. Overcrowding can lead to steaming rather than frying.
- Control the Heat
- Keep the griddle at medium-high heat to achieve a slight char on the rice and vegetables without burning.
- Adjust Seasoning to Taste
- Start with a moderate amount of soy sauce and sesame oil, then add more as needed. Avoid over-saturating the rice.
- Experiment with Additions
- Add chopped pineapple for a sweet twist, or spice it up with sriracha or chili oil.
Hibachi-style fried rice is a versatile, flavorful dish that brings restaurant-quality cooking to your backyard. Whether served as a side dish or the main attraction, it’s sure to be a hit at any gathering. With a Blackstone griddle and a little practice, you can perfect this crowd-pleasing recipe and impress your guests every time.
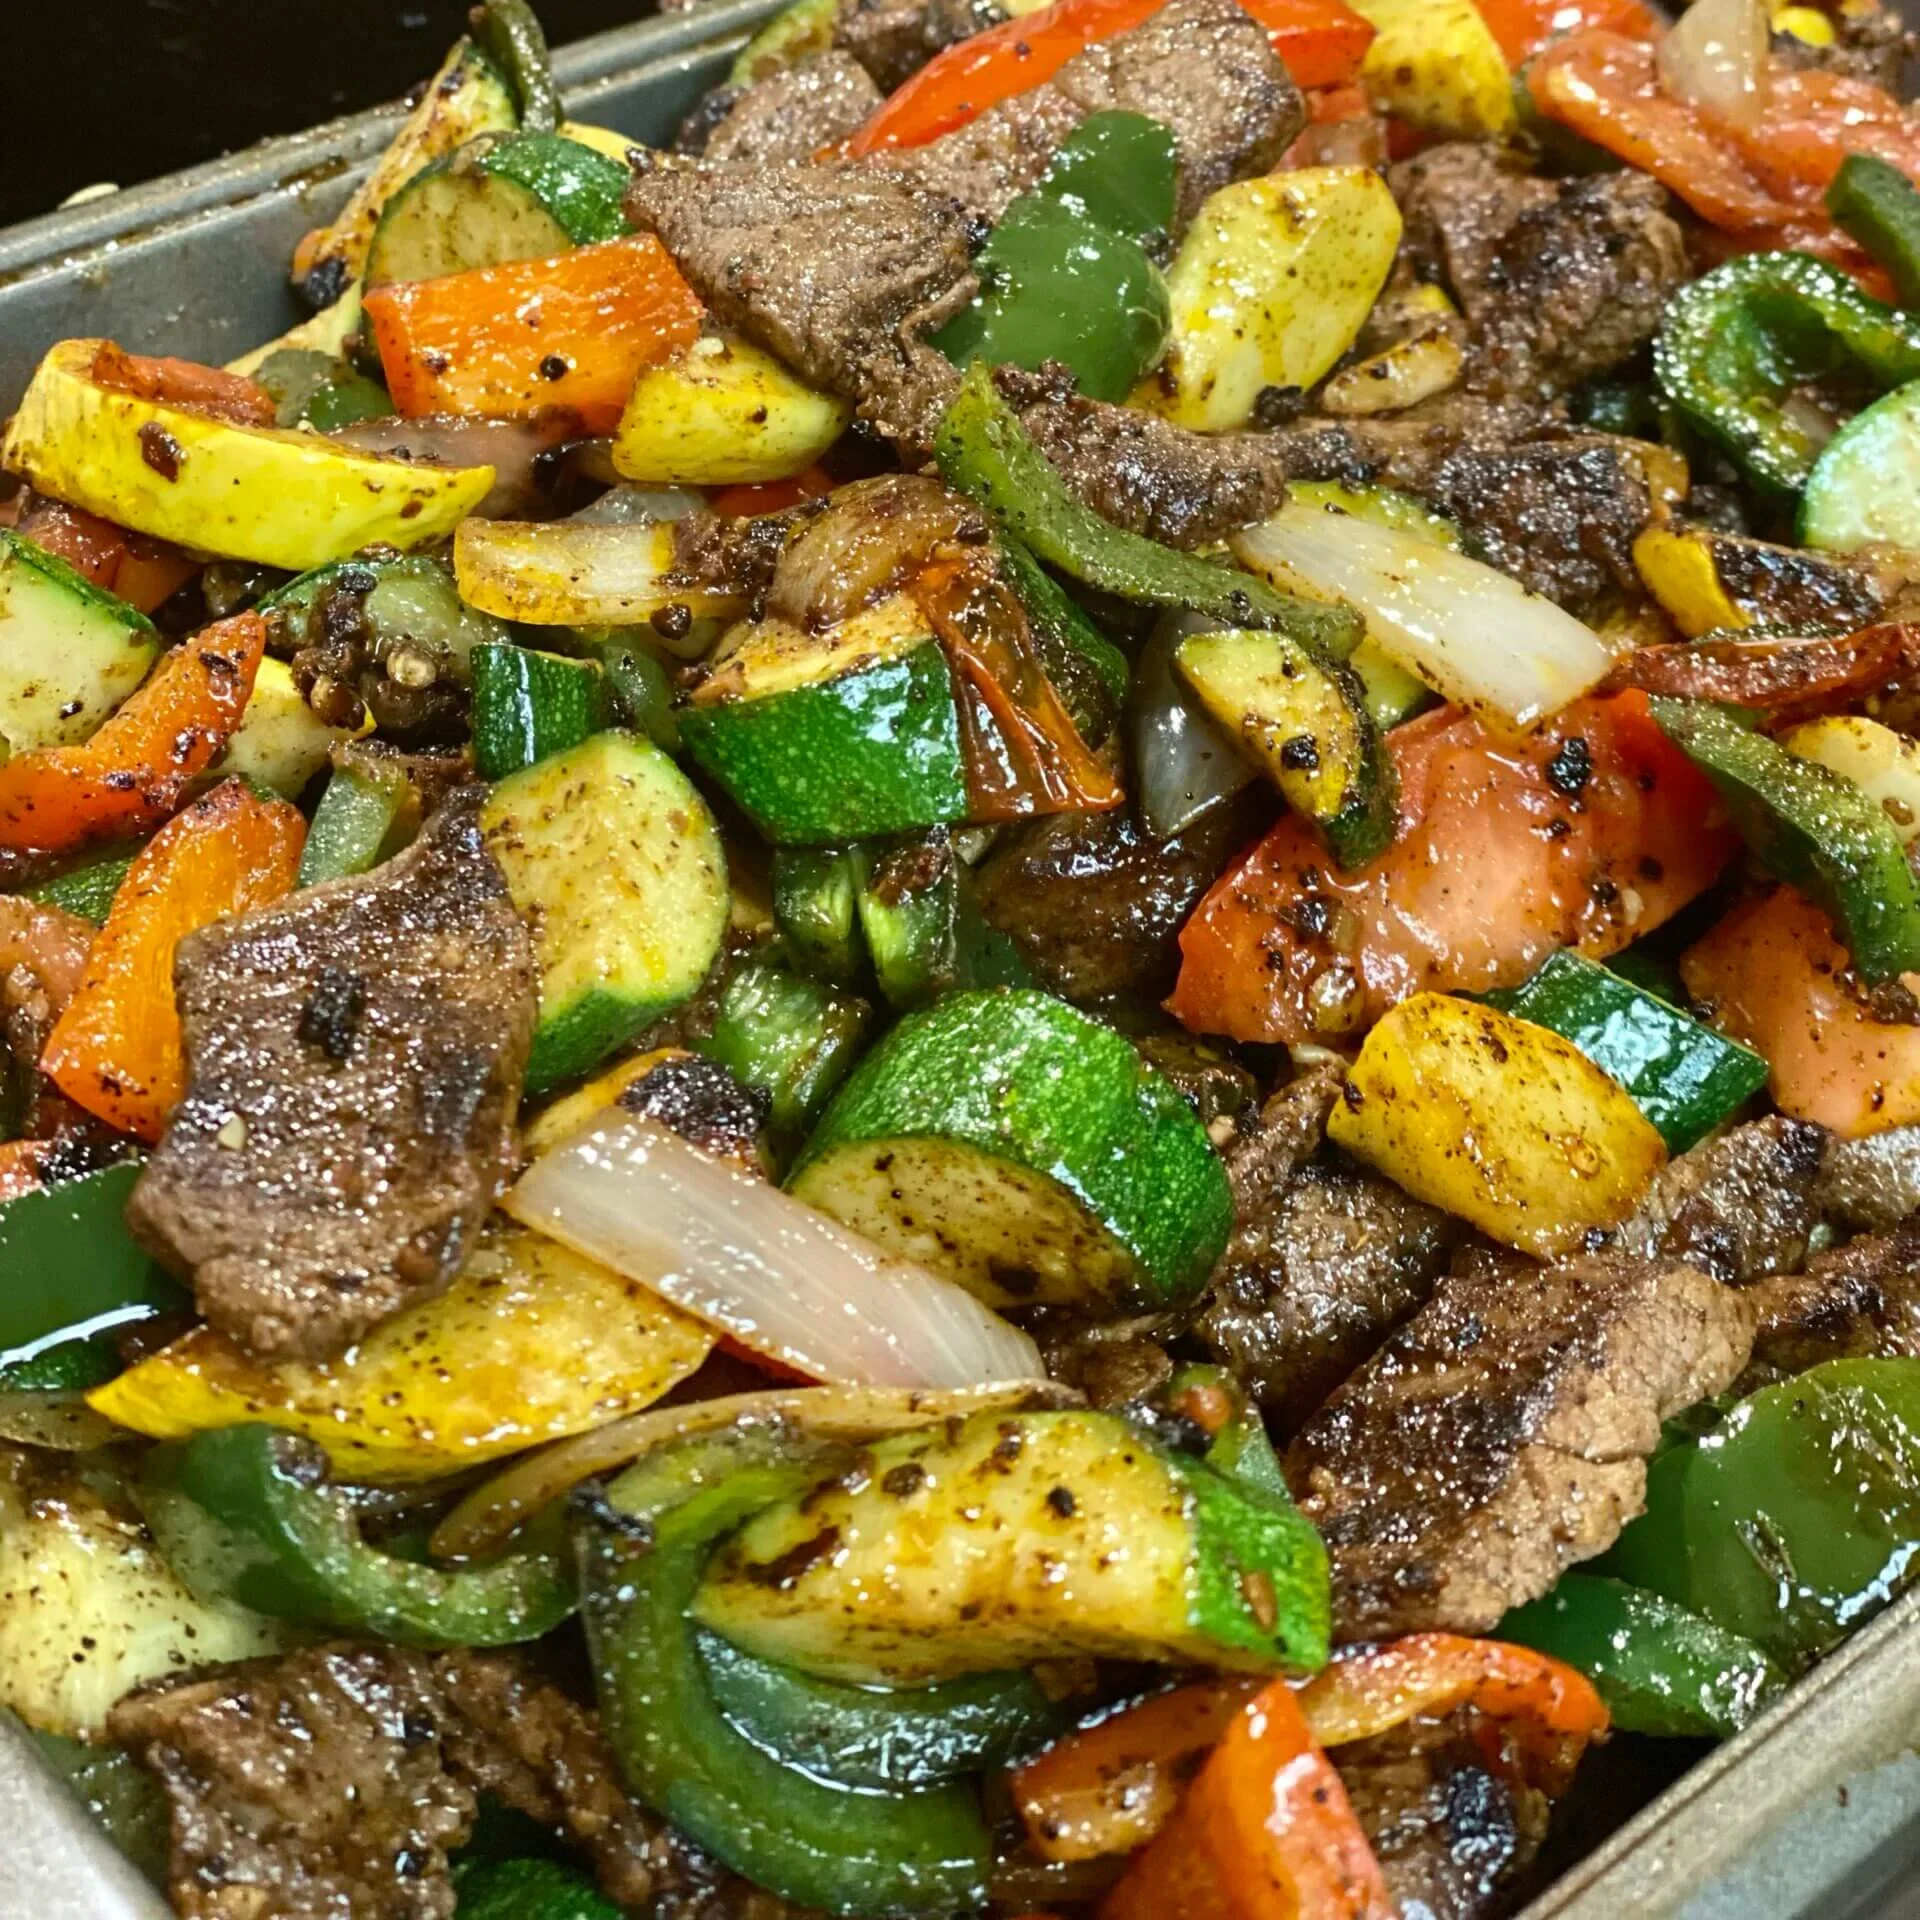
Griddled Vegetables and Side Dishes
Griddled vegetables and side dishes are a versatile and healthy addition to any meal cooked on a Blackstone griddle. The high heat and flat cooking surface make it easy to achieve a perfect char and caramelization, enhancing the natural sweetness and flavors of the vegetables. Whether you’re serving them as a side dish or pairing them with grilled proteins, griddled vegetables are an essential part of a well-rounded meal.
Why Griddling Vegetables is Ideal
- Even Cooking: The griddle’s flat surface ensures even heat distribution, cooking vegetables consistently.
- Caramelization: The high heat brings out the natural sugars in vegetables, giving them a slightly smoky and sweet flavor.
- Quick and Easy: Vegetables cook in just a few minutes, making them a convenient option for busy weeknights or large gatherings.
- Healthy Option: Griddling requires minimal oil, preserving the nutrients and freshness of the vegetables.
Tips for Grilling Vegetables
- Choose the Right Vegetables:
- Sturdy vegetables like zucchini, bell peppers, mushrooms, asparagus, and eggplant are perfect for griddling because they hold up well to high heat.
- Prep the Vegetables:
- Wash and dry the vegetables thoroughly to prevent steaming.
- Slice them uniformly for even cooking. For example:
- Zucchini: Slice into thick rounds or long planks.
- Bell Peppers: Cut into strips or quarters.
- Mushrooms: Slice larger mushrooms in half or leave smaller ones whole.
- Seasoning:
- Toss vegetables with olive oil, salt, and pepper before placing them on the griddle.
- Experiment with additional seasonings like garlic powder, smoked paprika, Italian herbs, or chili flakes.
- Griddle Temperature:
- Preheat the griddle to medium-high heat. The high heat allows for quick cooking and charred edges without overcooking.
- Cooking Technique:
- Place vegetables directly on the hot griddle.
- Avoid overcrowding to ensure they brown rather than steam.
- Flip or stir the vegetables occasionally for even cooking.
- Add a Touch of Acid:
- A squeeze of lemon juice or a drizzle of balsamic vinegar after cooking enhances the flavor and adds brightness to the dish.
Vegetable Cooking Guide
- Zucchini:
- Cooks in 4–5 minutes. Sear until golden brown on both sides.
- Sprinkle with Parmesan or fresh herbs for added flavor.
- Bell Peppers:
- Cooks in 6–8 minutes. Sear until slightly charred and tender.
- Pair with fajita seasoning for a Tex-Mex twist.
- Mushrooms:
- Cooks in 5–6 minutes. Sear until browned and tender.
- Add soy sauce or garlic butter for an umami boost.
- Asparagus:
- Cooks in 3–4 minutes. Sear until bright green and slightly tender.
- Finish with a sprinkle of sea salt and a dash of lemon juice.
- Eggplant:
- Cooks in 6–8 minutes. Slice into thick rounds, and grill until soft and caramelized.
- Brush with olive oil and sprinkle with oregano for a Mediterranean flavor.
Pairing Vegetables with Grilled Proteins
Griddled vegetables pair beautifully with a variety of grilled proteins to create a complete and satisfying meal. Here are some pairing suggestions:
- Zucchini and Grilled Chicken
- Marinate chicken in a lemon-herb marinade and serve with charred zucchini rounds. Add a side of quinoa or rice for a balanced meal.
- Bell Peppers and Steak
- Pair tender bell pepper strips with grilled steak and top with a chimichurri sauce. Add a baked potato or roasted sweet potato for extra heartiness.
- Mushrooms and Shrimp
- Combine seared mushrooms with garlic butter shrimp for a luxurious yet simple dish. Serve over a bed of griddled rice or pasta.
- Asparagus and Salmon
- Griddle asparagus alongside a fillet of salmon brushed with a honey-soy glaze. This pairing is light, fresh, and full of flavor.
- Mixed Vegetables and Burgers
- Serve a mix of bell peppers, zucchini, and onions alongside smash burgers for a colorful and tasty side dish.
Creative Side Dish Ideas
- Vegetable Skewers:
- Thread zucchini, bell peppers, mushrooms, and cherry tomatoes onto skewers. Grill them on the griddle for a visually appealing and flavorful side.
- Griddled Vegetable Salad:
- Combine griddled vegetables with fresh greens, crumbled feta, and a balsamic glaze for a warm, hearty salad.
- Vegetable Stir-Fry:
- Toss a mix of griddled vegetables with soy sauce, garlic, and ginger for a quick and flavorful stir-fry.
- Mediterranean-Style Veggies:
- Season vegetables with olive oil, oregano, and lemon juice. Serve with grilled lamb or chicken and pita bread.
Griddled vegetables and side dishes are the perfect complement to any meal, offering vibrant flavors, appealing textures, and a touch of healthy balance. With the Blackstone griddle, you can create restaurant-quality vegetable dishes that are as delicious as they are easy to prepare. Whether you’re hosting a party or cooking a weeknight dinner, these griddled vegetables are sure to impress!
Conclusion
The Blackstone grill is more than just a cooking tool—it’s a gateway to flavorful meals and memorable celebrations. Its versatility, ease of use, and ability to cook for large gatherings make it a must-have for any outdoor cooking enthusiast. Whether you’re a seasoned grill master or just starting your griddle journey, the Blackstone opens up endless possibilities for delicious dishes that bring people together.
Recap of Benefits
- Versatility: From hibachi-style fried rice and smash burgers to perfectly charred vegetables, the Blackstone griddle excels at cooking a wide variety of recipes, making it the centerpiece of any celebration.
- Efficiency for Large Gatherings: Its ample cooking surface ensures you can prepare multiple servings at once, keeping everyone well-fed and happy.
- Ease of Use and Maintenance: With simple temperature controls, easy cleaning methods, and straightforward seasoning techniques, anyone can quickly master the art of griddle cooking.
Key Takeaways
To help you make the most of your Blackstone grill, here’s a quick summary of the essential tools, techniques, and recipes covered in this guide:
- Must-Have Tools: Equip yourself with spatulas, scrapers, oil bottles, and thermometers for a smooth cooking experience.
- Mastering Techniques:
- Perfect the art of griddle seasoning to ensure non-stick cooking and enhance flavor.
- Use heat zones effectively to cook different ingredients simultaneously, from high-heat searing to gentle warming.
- Tried-and-True Recipes:
- Recreate crowd favorites like smash burgers with crispy edges, hibachi-style fried rice full of flavor, and perfectly griddled vegetables as versatile sides.
Encouragement to Experiment and Share
Cooking on a Blackstone griddle is an adventure that grows with every recipe you try. Experiment with new flavors, marinades, and techniques to make the grill your own. Invite friends and family to join in the fun, whether it’s for a casual weekend cookout or a celebratory feast.
Here’s your challenge: Try out one of the recipes featured in this guide, or put your spin on it by incorporating your favorite ingredients and seasonings. Once you’ve nailed it, share your experience with others. Post pictures, write about your process, or simply tell a friend—because great food is always better when shared.
Final Thoughts
The Blackstone griddle isn’t just a tool; it’s a way to elevate your outdoor cooking and create unforgettable moments with your loved ones. From mastering the basics to experimenting with bold flavors, your journey with the Blackstone is only just beginning. So fire it up, grab your favorite ingredients, and let the celebrations begin!
Ready to get started? Head to your grill, try out these recipes, and let us know how they turn out—we’d love to hear about your griddle success stories!