
Introduction
Italian bread recipes holds a special place in the heart of Italian cuisine. Known for its rich flavors and versatility, it has been a staple in Italian households for centuries. From the soft, pillowy texture of focaccia to the crisp, golden crust of rustic Italian bread, there’s a variety for every palate. Italian bread is often seen as the perfect companion to hearty meals, whether served alongside pasta, soups, or antipasti.
What makes Italian bread so beloved is not just its taste, but also its simplicity. Despite the range of styles, most Italian bread recipes are easy to follow and require basic, everyday ingredients like flour, yeast, and olive oil. In this post, we’ll explore how to make delicious Italian bread at home with easy-to-follow recipes. Whether you’re a beginner or an experienced baker, you’ll find a rustic loaf or a crusty bread recipe that’s perfect for your next meal.
1) What Makes Italian Bread Unique?
The History of Italian Bread
Italian bread has deep roots in the country’s history and culture, evolving over centuries to become an integral part of the Italian dining experience. Bread has been a staple food in Italy for thousands of years, with early origins dating back to the ancient Roman Empire. In those times, bread was often made from simple ingredients, much like it is today. Over time, various regions in Italy developed their own distinct bread-making traditions, using locally sourced ingredients and methods that reflected the diversity of the country’s landscape.
The Origins of Italian Bread
The story of Italian bread begins with the ancient civilizations of the Mediterranean, where wheat was cultivated and used to make basic bread. The Greeks and Romans both made bread, with the Romans even creating the first ovens specifically designed for baking. However, it wasn’t until the Middle Ages that Italian bread truly began to develop into the variety of styles we recognize today.
During this period, the use of sourdough starter began to spread across Italy, providing a more consistent rise and texture. The rise of urban centers and local bakeries also contributed to the popularity of Italian bread, especially as bread became more accessible to the working class.
Focaccia: The Traditional Italian Flatbread
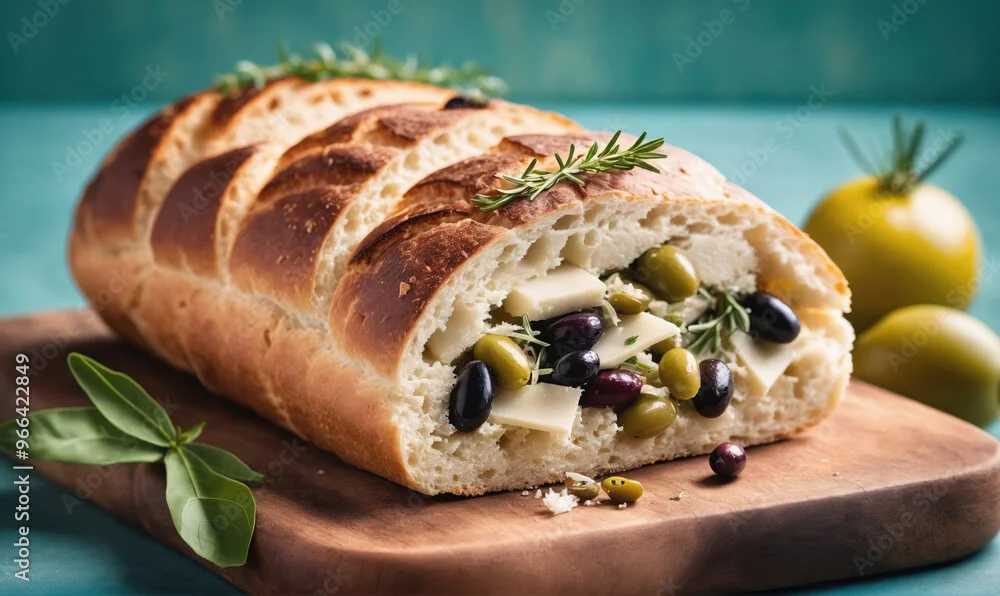
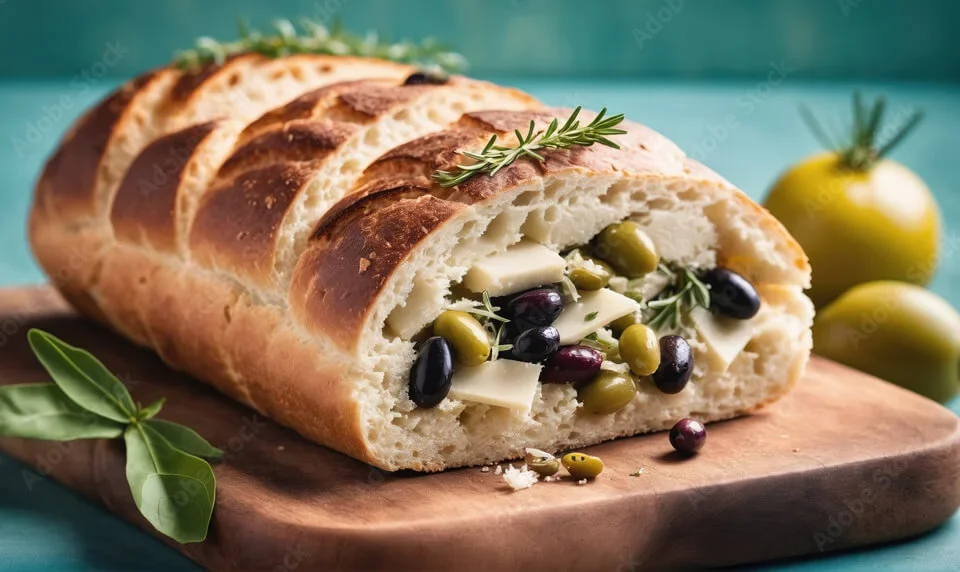
One of the most famous types of Italian bread is focaccia. Originating in the region of Liguria, this flatbread is often infused with olive oil and herbs, making it flavorful and fragrant. Focaccia is thought to have ancient roots, with evidence suggesting that it was baked by the ancient Romans as a type of “bread cake” topped with oils and herbs. Over the centuries, focaccia has evolved into a versatile bread that is enjoyed throughout Italy, served with various toppings like olives, onions, or tomatoes.
The traditional Italian focaccia can be seen as both a side dish and a snack, often paired with meats, cheeses, or fresh vegetables. The texture is soft and airy with a golden, slightly crispy crust.
Ciabatta: A Rustic, Crusty Favorite
Another iconic Italian bread is ciabatta, known for its rustic, slightly chewy texture and its signature, airy holes. Ciabatta, which means “slipper” in Italian, was created in the 1980s by baker Arnaldo Cavallari in the region of Veneto. Unlike focaccia, ciabatta is baked as a more traditional loaf and has a crisp, crunchy crust with a light, open crumb inside. This bread’s creation was influenced by the desire for an Italian version of French baguettes, but with a uniquely Italian twist.
Ciabatta is now a popular bread worldwide and is commonly used for making panini (Italian sandwiches) due to its ability to hold up well to fillings. Its rustic appearance and texture make it a perfect choice for those who enjoy bread with a hearty bite.
Rustic Italian Bread: A Symbol of Simplicity
At the heart of Italian bread-making lies the concept of rustic bread. Known for its hearty, wholesome nature, rustic Italian bread is typically made with a simple combination of flour, water, salt, and yeast. This type of bread is the epitome of the “slow food” movement, where quality ingredients and time-honored techniques are used to create a deeply flavorful loaf. Often baked without any added oils or fats, rustic Italian bread has a thick, chewy crust and a light, airy interior.
Rustic Italian bread can be found in many forms throughout Italy, from country loaves to small, round miche. In some regions, this bread is often referred to as “pane casereccio,” which translates to “homemade bread,” emphasizing its traditional, family-made roots.
Italian Bread and Its Role in Italian Culture
Bread holds great cultural significance in Italy, where it is more than just a food item; it is a symbol of tradition, hospitality, and the Italian way of life. Each region of Italy takes pride in its local bread-making techniques, with variations influenced by climate, geography, and available ingredients. Bread is often seen as an essential part of the daily meal, served at the table alongside pasta, meats, cheeses, and wines.
In Italian culture, the process of making bread is considered an art form, passed down through generations. Families and communities gather around the kitchen to prepare and bake bread together, ensuring that the tradition of artisan bread-making continues to thrive in Italy’s rural and urban areas alike.
Conclusion
From the ancient Roman bakeries to the modern kitchens of today, Italian bread has played an essential role in Italian culture. With a wide range of varieties such as focaccia, ciabatta, and rustic bread, there’s a style for every taste and occasion. Whether enjoyed as a simple loaf or topped with aromatic herbs and oils, Italian bread represents more than just food—it’s a piece of Italy’s rich culinary heritage.
Key Ingredients in Italian Bread Recipes
The beauty of Italian bread lies not only in its traditional techniques but also in its simple, high-quality ingredients. Italian bread recipes rely on just a few key components, yet the careful selection and use of each ingredient play a pivotal role in achieving the signature taste and texture of Italian loaves. From the soft, pillowy crumb to the crispy, golden crust, the quality of these ingredients directly impacts the final result.
Olive Oil: The Heart of Italian Flavor
One of the most distinctive ingredients in many Italian bread recipes is olive oil. Known for its rich, fruity flavor and versatility, olive oil adds moisture to the dough and contributes to the bread’s soft texture. It also helps create a tender crumb and a crisp, golden crust. In regions like Tuscany and Liguria, high-quality olive oil is an essential part of everyday cooking, and its inclusion in bread recipes reflects this tradition.
The use of olive oil is especially prominent in breads like focaccia, where it is often brushed generously over the top before baking, resulting in a wonderfully aromatic and flavorful finish. Olive oil also plays a significant role in giving Italian bread its distinct, slightly nutty flavor, making it a key ingredient in achieving authentic taste.
Yeast: The Secret to a Fluffy, Airy Crumb
Another essential ingredient in Italian bread recipes is yeast, which is responsible for the rise and airy texture of the dough. Yeast ferments the sugars in the flour, producing carbon dioxide gas that causes the dough to expand and form air pockets. This process creates the light, airy crumb that is characteristic of many types of Italian bread, including ciabatta and rustic loaves.
There are two main types of yeast commonly used in Italian bread-making: active dry yeast and fresh yeast. Active dry yeast is more widely available and has a longer shelf life, while fresh yeast is often preferred by professional bakers for its more delicate and complex flavor. The choice of yeast, combined with the proper proofing time, is crucial to achieving the right texture in the bread. Over-proofing or under-proofing the dough can lead to undesirable results, such as dense or unevenly risen bread.
Salt: Balancing Flavors and Enhancing Texture
Salt is another vital ingredient in Italian bread recipes, although it plays more than just a flavoring role. While bread without salt can taste flat and dull, the right amount of salt helps to balance the natural flavors of the flour and yeast. Salt also strengthens the dough’s gluten structure, contributing to a chewy and resilient texture.
In many Italian bread recipes, salt is added after the yeast has been activated to prevent it from interfering with the fermentation process. In some regional breads, like pane toscano, the salt is intentionally left out, as this bread is traditionally served with salted meats or cheeses, allowing the other flavors to shine. Regardless of the variation, salt is an essential part of the bread-baking process and should be used thoughtfully to enhance the bread’s overall flavor.
Flour: The Foundation of Italian Bread
The foundation of any Italian bread recipe is flour. The type of flour you choose directly affects the texture, structure, and flavor of the bread. In Italy, Tipo 00 flour is the preferred choice for many bread recipes due to its fine milling, which results in a smooth, soft dough. This flour is particularly well-suited for making pizza dough and focaccia, where a light and airy texture is desired.
For rustic Italian breads, such as ciabatta or pane casereccio, a more robust flour like semolina or whole wheat might be used. These flours provide a heartier texture and a more complex flavor profile. Semolina, in particular, is made from durum wheat and imparts a subtle, nutty flavor to the bread, making it perfect for rustic loaves with a crispy crust.
The protein content in flour also affects the bread’s structure. Higher-protein flours, such as bread flour, produce stronger gluten and are better suited for breads with a chewy, hearty texture. On the other hand, lower-protein flours, like all-purpose flour, can result in a more delicate, tender crumb.
The Impact of Ingredient Quality on Flavor
While the ingredients themselves are simple, their quality can significantly impact the final product. For example, extra virgin olive oil from a reputable source will bring a deep, fruity flavor to the bread that may be missing if a lower-quality oil is used. Similarly, freshly ground flour or locally milled flour can offer a richer taste and better texture compared to mass-produced alternatives.
Using high-quality yeast can also make a difference in the bread’s rise and flavor. Fresh yeast, for instance, typically results in a more delicate flavor profile and a better rise compared to dry yeast, which can sometimes leave a slightly more pronounced yeasty taste. Furthermore, using a slow fermentation method, like allowing the dough to rest overnight, helps to develop a more complex flavor.
Ultimately, the quality of ingredients is key to making authentic Italian bread. By using the best ingredients available and paying attention to their effects on the dough, you can elevate your bread-making and create loaves that are as flavorful and delicious as those found in Italy’s finest bakeries.
Conclusion
In Italian bread-making, simplicity is the secret to success. By focusing on the quality of just a few essential ingredients—olive oil, yeast, salt, and flour—you can create bread that captures the essence of Italian cuisine. Whether making a rustic loaf, a crusty ciabatta, or a flavorful focaccia, the quality of your ingredients will ultimately determine the taste and texture of the bread. By selecting premium ingredients and respecting the traditional methods of Italian bread-making, you can achieve the delicious results that make Italian bread so beloved around the world.
The Perfect Dough: Secrets to Making Italian Bread
Creating the perfect dough is the foundation of making delicious Italian bread. Whether you’re aiming for a light and airy ciabatta, a crusty rustic loaf, or a soft and flavorful focaccia, the dough’s texture plays a crucial role in the final result. Achieving the ideal dough involves understanding the balance of ingredients, the techniques of kneading, and the importance of proper proofing. By mastering these steps, you’ll be on your way to baking perfect Italian bread every time.
The Importance of the Right Dough Texture
The texture of the dough is essential to achieving the ideal bread, and it can vary depending on the type of bread you’re making. For instance, the dough for ciabatta needs to be wet and sticky, which helps to create its open crumb structure and airy pockets. On the other hand, rustic Italian breads, like pane casereccio, require a firmer dough to achieve their hearty, chewy texture.
The dough for focaccia is typically slightly wetter and more olive oil-rich than other bread doughs, which gives it its signature soft and airy interior with a slightly crispy crust. The goal in all cases is to find a dough consistency that allows the bread to rise well, while also achieving the desired crumb and crust texture.
To get the right dough texture, you must pay attention to the ratio of flour to liquid in your recipe. A higher liquid-to-flour ratio typically results in a more open, airy texture, whereas a stiffer dough will yield a denser, chewier bread.
Kneading: Developing the Dough’s Structure
Kneading is a vital step in developing the dough’s structure and ensuring that the gluten forms properly. Gluten, the protein in wheat flour, gives bread its chewy texture and allows it to hold its shape. Kneading helps to distribute the yeast and air throughout the dough while strengthening the gluten network, which contributes to a lighter, more elastic texture.
To knead the dough properly, you’ll need to use the technique of folding, pushing, and stretching the dough. Begin by pressing down on the dough with the heels of your hands, then fold it over itself and turn it. Repeat this process for 8-10 minutes, or until the dough becomes smooth and elastic. If the dough is sticky, you can lightly flour your hands or the work surface, but avoid adding too much flour, as this can make the dough too stiff and dry.
For softer, wetter doughs like ciabatta, you may need to use the stretch-and-fold technique instead of traditional kneading. This involves gently stretching the dough and folding it over itself several times, which helps build gluten without overworking the dough.
Proofing: The Key to a Light, Fluffy Crumb
Proofing (or fermentation) is the process by which the dough rises and develops flavor. This step is just as important as kneading because it allows the yeast to ferment, producing carbon dioxide and alcohol that causes the dough to expand. Proper proofing gives bread its light, airy texture and complex flavor, so it’s essential to get it right.
There are two main phases of proofing: bulk fermentation and final proofing.
- Bulk Fermentation: This is the first rise after the dough has been kneaded. During this time, the dough should be left to rise in a warm, draft-free area until it has doubled in size—usually around 1 to 2 hours, depending on the temperature of the room. Bulk fermentation is crucial for developing the dough’s flavor and allowing the yeast to fully activate.
- Tip: If you’re making bread on a cold day, you can proof the dough in the oven with just the light on, which creates a warm environment ideal for rising.
- Final Proofing: After the dough has been shaped into loaves or rolls, it undergoes a second rise, known as final proofing. This final rise usually takes about 30 minutes to 1 hour, depending on the dough’s size. The dough should puff up and feel slightly soft to the touch when ready.
- Tip: For breads like focaccia, you can also proof the dough on a baking sheet with toppings like herbs and olive oil, which infuses the bread with additional flavor as it rises.
Overproofing and Underproofing: While proofing is essential, it’s important not to overproof or underproof your dough. Overproofed dough can collapse during baking, resulting in a dense loaf. On the other hand, underproofed dough will not expand properly in the oven, leading to a heavy, dense texture.
To test if your dough is properly proofed, gently press your finger into it. If the indentation slowly springs back, it’s ready. If it doesn’t spring back at all, it’s overproofed; if it bounces back too quickly, it’s underproofed.
Shaping the Dough: Creating Beautiful Loaves
Once your dough has proofed, it’s time to shape it. The shaping process is essential for achieving a consistent texture and an attractive final loaf. For rustic Italian breads, like pane casereccio, the dough is typically shaped into round or oval loaves and baked directly on a baking stone or sheet, allowing for a thick, hearty crust.
For ciabatta, the dough is often stretched into a rectangle before being baked in a high-heat oven, which helps achieve its airy, open crumb structure. Focaccia dough is typically pressed into a pan and dimpled with your fingers before baking, which gives the bread its characteristic texture and helps it hold toppings like herbs and garlic.
Retarding the Dough: Slow Fermentation for Deeper Flavor
To enhance the flavor and texture of your Italian bread, you may choose to retard the dough, which involves refrigerating it overnight. This slow fermentation process allows the yeast more time to break down sugars, resulting in a deeper, more complex flavor profile. While it requires more time, the payoff is worth it, as the bread develops a richer taste and a better structure.
To retard the dough, simply place it in an oiled bowl, cover it with plastic wrap, and refrigerate it after the first proof. The next day, allow the dough to come to room temperature before shaping and baking.
Conclusion
Achieving the perfect dough for Italian bread requires patience, attention to detail, and a bit of practice. By focusing on the right dough texture, mastering the art of kneading, and understanding the critical role of proofing, you can create delicious, authentic Italian bread at home. Whether you’re making rustic loaves, ciabatta, or focaccia, these techniques will help you create bread with the perfect crumb, texture, and flavor—just like the bakers in Italy.
2) Easy Italian Bread Recipes for Beginners
Rustic Italian Bread Recipe: A Step-by-Step Guide
There’s something undeniably comforting about rustic Italian bread. With its thick, golden crust and soft, airy interior, it’s the perfect loaf for any occasion, whether enjoyed on its own with olive oil or served alongside hearty stews, soups, and pastas. The rustic Italian bread recipe is simple yet incredibly rewarding, and when done right, it creates a bread that is crispy on the outside and soft and chewy on the inside. Follow this step-by-step guide to make your own rustic Italian bread at home, and experience the joy of baking a traditional loaf that is both delicious and full of character.
Step 1: Gather Your Ingredients
The key to making rustic Italian bread is simplicity, and the ingredients reflect this. To begin, you’ll need the following:
- 4 cups all-purpose flour or bread flour (for a chewier texture)
- 1 1/2 cups warm water
- 2 teaspoons active dry yeast
- 2 teaspoons salt
- 1 teaspoon sugar (to help activate the yeast)
- 2 tablespoons olive oil (optional, for a richer flavor)
- Extra flour for dusting
The flour, water, yeast, salt, and sugar are the essential building blocks, while olive oil adds flavor and a slightly softer texture.
Step 2: Activate the Yeast
The first step in making your rustic Italian bread is to activate the yeast. In a small bowl, combine the warm water (about 110°F or 43°C) with the sugar and yeast. Stir to dissolve, then let the mixture sit for 5-10 minutes, or until it becomes frothy. This process ensures the yeast is active and ready to help the dough rise.
- Tip: If the yeast mixture doesn’t become frothy, it may be a sign that the yeast is old or the water temperature was too hot or too cold. Be sure to use fresh yeast and check the water temperature before proceeding.
Step 3: Combine the Ingredients
Once the yeast is activated, place the flour and salt into a large mixing bowl. Create a well in the center, then pour in the yeast mixture (and olive oil if you’re using it). Stir with a wooden spoon or dough scraper to combine the ingredients into a rough dough.
The dough should be slightly sticky but not too wet. If it feels too dry, add a little more water, a tablespoon at a time, until you achieve the right consistency. If it’s too sticky, sprinkle in a bit more flour. The goal is to create a dough that is elastic but not too stiff.
Step 4: Knead the Dough
Kneading is essential to developing the gluten structure of the dough, which contributes to the bread’s chewy texture and airy crumb. Transfer the dough to a lightly floured surface and begin kneading.
- Kneading Technique: Push the dough away from you with the heel of your hand, then fold it over and turn it 90 degrees. Repeat this process for about 8-10 minutes, or until the dough becomes smooth, elastic, and slightly tacky to the touch.
If you prefer a less hands-on method, you can use a stand mixer with a dough hook attachment. Mix on low speed for about 6-8 minutes until the dough is smooth and elastic.
Step 5: Let the Dough Rise (First Proofing)
Once the dough is kneaded, place it in a lightly oiled bowl and cover it with a clean kitchen towel or plastic wrap. Let it rise in a warm, draft-free spot for about 1-2 hours, or until it has doubled in size.
- Tip: If you’re baking on a colder day, you can proof the dough in the oven with just the light on to maintain a warm environment, which helps the dough rise.
Step 6: Shape the Dough
Once the dough has risen, it’s time to shape it. Gently punch the dough down to release the air bubbles, then transfer it to a floured surface. Shape the dough into a round or oval loaf by folding the edges of the dough into the center and rolling it gently to form a tight ball.
For a more rustic look, you can simply shape the dough into a rough, free-form loaf without worrying too much about symmetry. The key is to maintain the bread’s natural texture and irregularity.
Step 7: Second Proofing
Now that your dough is shaped, it’s time for the second proofing. Place the shaped dough on a parchment-lined baking sheet or a well-floured proofing basket, then cover it again with a towel or plastic wrap. Let it rest for another 30-45 minutes until it has puffed up slightly and has a soft, pillowy texture.
- Tip: If you want to create a decorative finish, you can score the top of the dough with a sharp knife or bread lame. This will help the bread expand evenly in the oven and create a beautiful pattern on the crust.
Step 8: Preheat the Oven
While the dough is undergoing its second rise, preheat your oven to 475°F (245°C). If you’re using a pizza stone, place it in the oven to heat up as well. Preheating the oven to a high temperature is crucial for creating the perfect crust—hot air is what gives the bread its golden, crispy exterior.
- Tip: To add extra steam for a crispier crust, you can place a small pan of water on the bottom rack of the oven while it preheats. The steam will help the bread rise and develop a thick, crackly crust.
Step 9: Bake the Bread
Once the dough has completed its second rise, it’s time to bake. If you scored the dough, make sure the cuts are facing up on the baking sheet or pizza stone. Place the dough in the preheated oven and bake for 25-35 minutes, depending on the size of the loaf.
As the bread bakes, you’ll see the crust turn golden brown and crack as it expands. For a thick, golden crust, you can also bake the bread a few minutes longer, keeping an eye on it to avoid burning.
- Tip: To check if the bread is done, tap the bottom of the loaf—it should sound hollow. If it does, your rustic Italian bread is ready to come out of the oven.
Step 10: Cool and Serve
Once the bread is baked to perfection, remove it from the oven and let it cool on a wire rack for at least 30 minutes. This allows the steam to escape and the interior to set properly. While it’s tempting to slice into the bread immediately, waiting will help you enjoy the full texture and flavor of the crust and crumb.
- Tip: Rustic Italian bread is best served with a drizzle of olive oil, or paired with your favorite pasta, soups, or cheeses.
Conclusion
Making rustic Italian bread at home is a rewarding process that involves just a few simple steps, but results in a loaf with a beautifully thick, golden crust and a soft, airy interior. By following these steps carefully, from activating the yeast to baking the bread to perfection, you’ll create a bread that captures the essence of Italy’s artisanal baking tradition. Enjoy your homemade rustic Italian bread as a delicious centerpiece for your meals or as a perfect companion for dipping in olive oil.
Easy Crusty Bread Recipe: Achieving Perfectly Crusty Italian Bread Without Special Equipment
Making crusty Italian bread at home doesn’t have to be complicated or require any special baking tools. You can achieve a beautifully golden, crispy crust and a soft, airy interior with just a few basic ingredients and a few simple techniques. This easy crusty bread recipe is perfect for beginners or anyone looking for a straightforward, time-saving method to create bakery-quality bread right in their own kitchen.
Step 1: Gather Your Ingredients
The beauty of this recipe lies in its simplicity—no fancy ingredients needed! For the perfect crusty Italian bread, gather the following:
- 4 cups all-purpose flour
- 1 1/2 cups warm water (about 110°F/43°C)
- 1 tablespoon active dry yeast
- 2 teaspoons salt
- 1 teaspoon sugar (to help activate the yeast)
- 2 tablespoons olive oil (optional, for a richer flavor)
- Extra flour for dusting
These common pantry staples will provide the ideal base for a delicious loaf with a perfect golden crust.
Step 2: Activate the Yeast
The first step is to activate the yeast, which ensures that the bread will rise properly. In a small bowl, combine the warm water with the sugar and yeast. Stir gently to dissolve and then let it sit for about 5-10 minutes, until it becomes frothy and bubbly. This indicates that the yeast is active and ready to help the dough rise.
- Tip: If the yeast mixture doesn’t bubble or foam after 10 minutes, it may be a sign that the yeast is expired or the water was too hot or too cold. Always check that your yeast is fresh and the water is at the correct temperature.
Step 3: Combine the Ingredients
Once the yeast is activated, add the flour and salt into a large mixing bowl. Create a well in the center and pour in the activated yeast mixture. If you’re using olive oil, add it at this stage. Stir everything together until the dough starts to form.
At this point, the dough should be slightly sticky, but not overly wet. If it feels too dry, add a little extra water, one tablespoon at a time. If it’s too sticky, dust with a little more flour.
Step 4: Knead the Dough
Kneading the dough is one of the most important steps in making crusty bread. The kneading process develops the gluten, which gives the bread its chewy texture and contributes to the formation of the crust. The best part about this recipe is that you can knead by hand, without any special equipment.
- Kneading Technique: Transfer the dough onto a clean, floured surface. Use your hands to fold the dough over and press it down repeatedly for about 8-10 minutes. The dough should become smooth, elastic, and slightly tacky. If the dough sticks too much, sprinkle a little more flour, but avoid adding too much as this could affect the texture.
Alternative Method: If you prefer to save time, you can use a stand mixer with a dough hook attachment to knead the dough. Simply mix on low speed for about 6-8 minutes until the dough becomes smooth and elastic.
Step 5: First Proofing (Let It Rise)
Once your dough is properly kneaded, place it into a lightly oiled bowl and cover it with a clean kitchen towel or plastic wrap. Let the dough rise for about 1-2 hours, or until it doubles in size.
- Tip: If you’re pressed for time, you can let the dough rise in a slightly warm oven (with just the light on) or on top of the stove to speed up the process. Just make sure the environment is warm and draft-free.
Step 6: Shape the Dough
After the dough has risen, gently punch it down to release any air bubbles, then transfer it to a floured surface. Shape the dough into a round or oval loaf by folding the edges inward and rolling it gently into a tight ball.
- Tip: For a more rustic look, you can leave the dough in a freeform shape. Don’t worry about perfect symmetry—it’s the irregular shape that gives rustic bread its characteristic look.
Step 7: Second Proofing (Final Rise)
Place your shaped dough on a parchment-lined baking sheet or a well-floured surface to undergo its second rise. Cover the dough with a clean towel and let it rest for another 30-45 minutes. This final proofing allows the dough to rise again before baking, creating that desirable airy crumb inside the bread.
- Tip: During this stage, you can preheat your oven to 475°F (245°C) so it’s ready for baking. To create a crispy, golden crust, you want a hot oven that helps the bread expand quickly.
Step 8: Create Steam for the Perfect Crust
A key element of achieving a crusty bread is creating steam in the oven during the first few minutes of baking. The steam helps the dough rise fully, forming a thick, golden crust.
To create steam without special equipment, simply place a small baking dish or pan with water on the bottom rack of the oven while it preheats. When you’re ready to bake the bread, the steam from the water will create a humid environment inside the oven, which helps the bread expand and form that crispy exterior.
- Tip: You can also spray the bread with a bit of water right before placing it in the oven to add more steam.
Step 9: Bake the Bread
Carefully transfer the dough to your preheated oven. Place it on the middle rack and bake for 25-35 minutes, depending on the size of your loaf. The bread should turn a deep golden brown and develop a crackling sound as it bakes.
For the perfect crust, you can check the bottom of the loaf—tap it gently. If it sounds hollow, your bread is ready. If not, give it a few more minutes in the oven.
- Tip: If the crust isn’t as brown as you’d like, you can turn on the broiler for the last 1-2 minutes of baking. Keep a close eye on it to avoid burning.
Step 10: Cool the Bread
After removing the bread from the oven, allow it to cool on a wire rack for at least 30 minutes before slicing. This resting period allows the steam inside the bread to settle, ensuring the texture is perfect and the flavor fully develops.
- Tip: While the bread cools, you’ll notice the crust becoming even crispier as it sets. The longer you wait, the more perfect the texture will be.
Conclusion: Enjoying Your Easy Crusty Bread
Congratulations! You’ve just made a batch of delicious, crusty Italian bread with minimal effort and no special equipment. The result is a golden, crackling crust with a soft, chewy interior that pairs perfectly with soups, pastas, or simply dipped in olive oil. This easy crusty bread recipe is not only quick to prepare but also adaptable to your tastes—feel free to experiment with different herbs, spices, or toppings to create a loaf that’s uniquely yours. Enjoy the simple pleasures of homemade bread with this foolproof recipe!
Achieving a Crispy Crust: Techniques for Perfectly Baked Italian Bread
One of the most coveted features of Italian bread is its crispy, golden crust. Whether you’re baking a classic baguette, rustic Italian bread, or focaccia, the crust is what often elevates the bread, making it irresistible and satisfying. Achieving the perfect crispy crust requires a combination of techniques that ensure the bread not only bakes evenly but also retains its desirable texture. In this section, we’ll explore the essential steps and methods to help you achieve that beautifully crispy crust on your Italian bread, including the use of steam and high heat.
1. The Role of Steam in Crust Formation
Steam plays a critical role in developing a crispy crust, and it’s one of the most important techniques for achieving that golden, crackling exterior you want from your Italian bread. When baking, steam keeps the outer surface of the dough moist during the first few minutes of baking, allowing the bread to expand fully. This gives the dough a chance to rise before the crust hardens, resulting in a light and airy interior with a crisp, well-formed crust.
- How Steam Works: When water turns into steam, it raises the temperature inside the oven and prevents the dough’s surface from drying out too quickly. The moisture in the air helps the dough rise more easily, creating a thicker, more robust crust. As the bread continues to bake, the steam evaporates, leaving behind the desired crispy texture.
- How to Create Steam in Your Oven:
- Option 1: Use a Baking Dish of Water: Before placing your bread in the oven, place a shallow dish of water on the bottom rack. This will create the moisture needed for the steam. Make sure the dish is sturdy enough to withstand high temperatures, and add the water once the oven is preheated.
- Option 2: Spritz the Dough with Water: Another method is to spritz your bread dough with a spray bottle filled with water just before you place it in the oven. This technique works well for smaller loaves or baguettes. The mist of water helps set the initial rise, forming a crust that is crisp and golden.
- Tip: To maximize steam, you can also cover your bread with a metal or Dutch oven during the first 15-20 minutes of baking. This will trap the steam inside, encouraging better rise and crust development. Remove the cover towards the end of baking to allow the bread to fully brown.
2. The Importance of High Heat for Crust Development
High heat is essential for baking Italian bread with the perfect crust. The intense heat in the oven causes the bread’s surface to caramelize quickly, creating that beautifully golden and crispy exterior. When combined with the steam, high heat ensures that the bread bakes to perfection without drying out or overcooking.
- How High Heat Helps: At higher temperatures, the bread’s outer layer cooks faster, creating a delicate and crunchy crust while preserving the softness inside. The immediate heat also helps form the desirable “oven spring”—the rapid rise of the dough during the first few minutes of baking, which results in a lighter, fluffier loaf.
- Ideal Temperature Range for Italian Bread: The optimal baking temperature for most Italian breads is between 450°F (230°C) and 475°F (245°C). For crusty, rustic loaves or baguettes, the higher temperature (around 475°F) is often preferred, as it promotes a crispier crust. Always preheat your oven to the desired temperature to ensure the heat is evenly distributed throughout the baking process.
- Tip: If you’re baking in a conventional oven (not using a baking stone), consider placing your baking pan on the top rack to achieve even heat exposure. You want the bread to be exposed to as much of the intense heat as possible during the first 15-20 minutes.
3. The Power of a Hot Baking Surface
Another key to achieving a crispy crust is using a preheated hot baking surface. By placing your bread on a hot surface, such as a baking stone or a heavy-duty baking sheet, the dough will immediately start to bake from the bottom. This results in a golden, crispy bottom crust while the steam helps form the top crust.
- How a Baking Stone Helps: A baking stone retains and distributes heat more evenly than a regular baking sheet. It also helps in absorbing moisture from the dough, which can contribute to a crispier crust. The stone’s surface ensures a rapid heat transfer to the dough, leading to better oven spring and more uniform crust formation.
- Using a Baking Sheet: If you don’t have a baking stone, a heavy-duty baking sheet will work just fine. Make sure it’s placed in the oven while it’s preheating so that it’s thoroughly hot when the dough goes in.
- Tip: If you are using a baking stone, be sure to preheat it for at least 30 minutes at the desired baking temperature. This allows the stone to retain enough heat to start cooking the dough instantly when it’s placed on it.
4. How to Achieve an Extra Crispy Crust
If you prefer an especially crisp crust, there are additional techniques to further enhance the crispiness. One of the most effective ways is by finishing the bread under the broiler for a brief moment at the end of baking.
- Broiling for Extra Crispiness: Once your bread has baked and reached the desired golden color, you can turn on the broiler for 1-2 minutes to intensify the browning of the crust. Keep a close eye on the bread during this stage, as broiling can quickly go from golden to burnt.
- Baking with Oil or Butter: Brushing the dough with a light coating of olive oil or melted butter just before baking can help enhance the crispness and give the crust a glossy finish. This step is especially effective for breads like focaccia, where you want a rich, crunchy exterior.
- Tip: For breads like baguettes or rustic loaves, score the dough with a sharp knife or lame before baking. The cuts allow the bread to expand in a controlled way, helping the crust form evenly without cracking too much.
5. Cooling the Bread for the Best Crust
After the bread has finished baking, it’s important to allow it to cool on a wire rack for at least 30 minutes. This cooling period allows the steam inside the bread to dissipate, ensuring that the crust stays crisp. If you cut into the bread too soon, the crust may soften and lose its crispy texture.
- Tip: To maintain the crispness of the crust for longer, store the bread in a paper bag rather than a plastic one. Plastic can trap moisture, making the crust lose its crunchiness more quickly.
Conclusion: Perfecting Your Crispy Crust
Achieving the perfect crispy crust on your Italian bread is all about controlling the heat and moisture during the baking process. By using steam, high heat, a preheated baking surface, and finishing with a broiler, you can achieve that signature crunchy exterior that complements the soft, airy interior. With these techniques, your Italian bread will not only taste amazing but also have a beautifully crisp crust that will impress everyone at the table.
3) Tips for Baking the Perfect Italian Bread
Achieving a Crispy Crust: Techniques to Perfect Your Italian Bread
A crispy crust is one of the defining characteristics of excellent Italian bread. It adds texture, flavor, and an irresistible crunch that complements the soft and airy interior. Whether you’re baking a rustic Italian loaf, focaccia, or a classic baguette, a golden, crispy crust elevates the entire bread. Achieving this perfect crust, however, involves more than just baking the dough. It requires carefully controlled techniques, including the use of steam and high heat, to achieve that perfect balance of crispiness and tenderness. In this section, we’ll explore the steps and strategies that help you get that desirable crispy crust every time.
1. The Role of Steam in Crust Development
Steam is one of the most important elements when it comes to achieving a crispy and golden crust on your Italian bread. This technique works by keeping the bread’s exterior moist during the first phase of baking, which allows it to expand before the crust sets. Steam is essential in creating the right balance of a crunchy outer layer while keeping the interior of the bread soft and airy.
- Why Steam Works: The moisture from the steam delays the hardening of the outer layer of dough, giving the bread time to rise fully before the crust forms. As the bread continues baking, the moisture evaporates, leaving behind a beautiful golden-brown crust. Steam also helps to improve oven spring, or the initial rise of the dough as it bakes, which is key to achieving a light texture.
- How to Create Steam in Your Oven:
- Option 1: Use a Water Pan: Place a shallow pan of water on the bottom rack of your oven while it preheats. When you place your bread in the oven, the water will vaporize, creating steam that surrounds the bread. This technique is simple and effective for most types of bread.
- Option 2: Spritz the Dough: Before putting your dough in the oven, spritz the surface of the dough with water using a spray bottle. This method is especially useful for loaves like baguettes or small rustic breads, where you want to ensure an even layer of moisture on the surface of the dough.
- Option 3: Cover with a Dutch Oven: Placing your bread in a hot, covered Dutch oven traps steam inside the pot, creating the ideal humid environment for crust development. After the first 20-30 minutes of baking, remove the lid to allow the crust to fully brown and crisp up.
- Tip: Be mindful not to overdo the steam. Too much moisture can result in a soggy crust, so it’s important to balance it and ensure the steam dissipates after the initial rise.
2. High Heat for a Perfect Crust
High heat is a critical component in getting the crispy, golden crust that we all crave in Italian bread. The intense heat of the oven caramelizes the sugars in the dough, which creates that signature brown, crunchy exterior. The initial exposure to high heat also contributes to the development of the bread’s crust and allows it to expand quickly, giving your loaf its distinctive rise and texture.
- Why High Heat Matters: The high temperature ensures that the dough cooks quickly on the outside while keeping the inside soft and airy. Additionally, this heat helps the bread to “oven spring”—a rapid rise that occurs in the first few minutes of baking. This is essential for achieving the texture and volume of traditional Italian breads.
- Ideal Temperature for Italian Bread: Preheat your oven to 450°F (230°C) to 475°F (245°C), depending on the type of bread you’re making. For most rustic Italian loaves, a temperature around 475°F is perfect. If you’re baking smaller, thinner loaves like baguettes, the slightly lower temperature may work better.
- Tip: Always allow your oven to fully preheat to the desired temperature before placing the dough inside. An oven that’s too cool will result in a dense, pale crust, while an oven that’s too hot may burn the outside before the inside has fully cooked.
3. The Importance of a Preheated Baking Surface
The baking surface you use plays a key role in creating a crispy crust. A hot surface ensures that the bread starts baking from the bottom as soon as it touches the pan or stone, helping to form a crispier bottom crust while maintaining a light, fluffy interior. The immediate heat helps the dough rise and cook evenly, contributing to the bread’s perfect texture.
- Why a Hot Surface Helps: When you place your dough on a preheated surface, the heat from below promotes an even cook, allowing the bottom of the bread to brown and crisp up. It also prevents the bread from sticking to the pan or tray, which can sometimes interfere with the development of the crust.
- Using a Baking Stone: A baking stone is ideal for getting a crispy crust. It retains and distributes heat evenly, resulting in an even bake. To use a baking stone, place it in the oven during the preheating process. Once the oven reaches the desired temperature, slide your dough onto the stone using a peel or parchment paper.
- Baking Sheet Alternative: If you don’t have a baking stone, a heavy-duty baking sheet can work as well. Just ensure that it’s placed in the oven while it preheats so it gets sufficiently hot.
- Tip: For an even crispier crust, place the baking sheet or stone on the bottom rack of the oven. This will expose the dough to the hottest part of the oven, which helps with the initial rise and contributes to a beautifully crispy exterior.
4. Scoring and Shaping the Dough for Optimal Crust Formation
Scoring your dough, or making shallow cuts in the surface, helps create a better crust while also allowing for the bread to expand in a controlled manner. This is especially important for Italian breads like baguettes, ciabatta, or rustic loaves, where you want the bread to rise evenly and create an attractive shape.
- Why Scoring is Important: When you score the dough, you create controlled openings that allow the bread to expand as it bakes. This helps to avoid irregular crust formation and prevents the bread from bursting unpredictably. Additionally, scoring can enhance the crust’s texture by allowing heat to penetrate more evenly.
- How to Score Dough: Use a sharp razor blade, bread lame, or a sharp knife to make 1/4 to 1/2-inch deep cuts in the dough. The cuts should be made just before the dough goes into the oven. The design of the scores can vary depending on the bread you’re making, but traditional slashes on baguettes and crisscross patterns on rustic loaves are popular choices.
- Tip: Be sure to score the dough just before baking to allow the bread to expand properly during the initial rise. If you score it too early, the dough may lose its structure and flatten.
5. Broiling for Extra Crispiness
For some extra crispiness and a deep golden finish, broiling the bread for a few minutes at the end of the baking process can create an irresistible crunchy crust. The broiler exposes the bread to high heat from above, enhancing the color and texture of the crust.
- How Broiling Works: After your bread has baked to the desired color, you can turn on the broiler for the last 1-2 minutes. This intense, direct heat will caramelize the sugars in the crust even further, resulting in a more vibrant and crunchy exterior.
- Tip: Keep a close eye on your bread while broiling, as this process happens very quickly. Over-broiling can burn the crust, so it’s important to monitor the bread carefully.
Conclusion: Mastering the Crispy Crust
Achieving a crispy, golden crust on your Italian bread is not only about the ingredients but also about the techniques you use throughout the baking process. By utilizing steam, high heat, and a preheated surface, as well as mastering the art of scoring and broiling, you’ll be able to produce bread with that perfect crackling crust that’s crispy, flavorful, and utterly irresistible. With these tips and a bit of practice, you’ll be baking bread that looks and tastes like it came straight from an Italian bakery.
How to Store Italian Bread: Best Practices for Freshness
One of the greatest challenges of baking Italian bread is ensuring that it stays fresh after the initial baking. While homemade Italian bread is delicious right out of the oven, storing it properly is essential to preserve its taste, texture, and crust. Whether you’re baking rustic loaves, focaccia, or baguettes, each type of Italian bread has its own storage requirements to maintain its freshness. In this section, we’ll dive into the best practices for storing Italian bread, along with tips on freezing and reheating to enjoy it days after it’s baked.
1. Storing Fresh Italian Bread: The Right Way to Keep It Soft and Crispy
The first step in preserving the freshness of your Italian bread is understanding how to store it properly at room temperature. Proper storage will keep the bread’s crust crispy while maintaining a soft and airy interior. Let’s explore the best methods for keeping your bread fresh for longer.
- The Ideal Storage Conditions: Italian bread should be stored at room temperature in a dry, cool place. Avoid storing it in places that are too humid, as excess moisture can lead to mold growth. A bread box is an excellent option, as it allows the bread to breathe while keeping it shielded from direct sunlight. This helps prevent the bread from becoming too dry or soggy.
- Paper vs. Plastic: While it may be tempting to store your Italian bread in a plastic bag to retain moisture, this can actually soften the crust over time. The best practice for preserving the crust’s crispiness is to use paper bags. Paper bags allow the bread to retain its crunch while keeping the interior moist enough to stay soft. You can also wrap your bread in a clean kitchen towel to maintain the crispness.
- Avoid Refrigeration: While refrigeration can prolong the shelf life of many foods, it’s not recommended for Italian bread. The cold temperature of the fridge can cause the bread to dry out quickly and lose its flavor. If you’re not going to consume the bread within a couple of days, freezing is a better option.
- Tip: If you’re planning to consume the bread within a day or two, simply store it in a paper bag or wrap it in a towel and leave it on your kitchen counter. For longer storage, freezing is the better option.
2. Freezing Italian Bread for Long-Term Storage
If you’ve baked a large batch of Italian bread or just want to store some for future use, freezing is the best way to preserve it without sacrificing quality. Freezing allows you to keep bread fresh for weeks, and the right freezing methods will ensure that it still tastes freshly baked when you reheat it.
- How to Freeze Italian Bread: To freeze Italian bread, slice it into the desired portions before wrapping it tightly in plastic wrap or aluminum foil. This will allow you to thaw only the amount you need later. After wrapping, place the bread in a resealable freezer bag or airtight container to prevent freezer burn. The bread can be frozen for up to three months without a significant loss of quality.
- Freezing Whole Loafs vs. Sliced Bread: While freezing whole loaves is possible, slicing the bread before freezing allows for easier thawing and reheating. You can simply pull out individual slices as needed, which is particularly convenient for smaller loaves like baguettes or ciabatta.
- Tip: If you plan to freeze multiple loaves, be sure to label the packaging with the date of freezing. This will help you keep track of how long the bread has been frozen.
3. Reheating Frozen Italian Bread: Bringing Back the Freshness
Once your Italian bread has been frozen, it’s important to know how to properly reheat it to bring back its crispy crust and soft interior. Reheating methods can vary depending on the type of bread, but the goal is always the same: to restore that just-baked texture.
- Thawing Frozen Bread: Before reheating, thaw your bread at room temperature for a few hours or overnight, depending on the size of the loaf. If you need the bread sooner, you can thaw it in the microwave for 15–30 seconds. However, be aware that microwaving can soften the crust, so it’s best used for smaller portions rather than whole loaves.
- Reheating in the Oven for a Crispy Crust: The oven is the best method for reheating Italian bread to preserve its crispy crust. Preheat your oven to 375°F (190°C). Place the thawed loaf directly on the oven rack or on a baking sheet and bake for 10-15 minutes, depending on the size of the loaf. This will help the bread regain its crispiness on the outside while warming up the interior.
- Tip for Crispy Perfection: For an extra crispy crust, spritz the loaf with a little water before placing it in the oven. This will create steam inside the oven, helping to re-crisp the outer layer of the bread.
- Reheating Individual Slices: If you only need to reheat a few slices, you can use a toaster or a toaster oven. This method is fast and effective for restoring the bread’s texture. For best results, toast the slices on a medium setting to avoid burning them while still getting that crispy exterior.
- Tip: For softer bread, wrap it in foil before reheating in the oven. This helps the bread retain moisture and prevents it from becoming too dry.
4. Reheating Focaccia and Other Flatbreads
Focaccia and other Italian flatbreads have slightly different characteristics from rustic loaves and baguettes. These breads tend to have a softer, more pillowy texture, and their reheating methods should reflect that. Here’s how to reheat focaccia effectively:
- Reheating Focaccia in the Oven: To reheat focaccia, preheat your oven to 350°F (175°C). Place the focaccia on a baking sheet and heat it for 8–10 minutes, or until it reaches the desired temperature. To preserve the bread’s softness, you can lightly cover it with aluminum foil before heating.
- Adding Toppings: If you want to enhance the flavor when reheating, consider adding a drizzle of olive oil or sprinkle some rosemary or sea salt on top of the focaccia. This will freshen up the bread and give it an extra burst of flavor.
- Tip: For focaccia, you can also reheat it on the stovetop in a skillet over medium heat for 2–3 minutes on each side. This will give it a slightly crispy exterior while keeping the inside soft and chewy.
5. Tips for Preserving the Texture of Rustic Italian Bread
Rustic Italian breads, with their thick, chewy crusts and hearty interiors, require special care when storing. Their dense texture can be harder to preserve than lighter Italian breads, but with the right techniques, you can keep them fresh for days.
- Store in a Bread Box or Cloth Bag: For rustic loaves, a cloth bread bag or a bread box works best to keep the bread’s crust from becoming too soft. These options allow air circulation while still maintaining enough humidity to keep the interior soft.
- Freezing for Long-Term Storage: If you need to freeze a rustic loaf, slice it before freezing. Rustic breads thaw well, and slicing them beforehand makes reheating and serving much more convenient.
- Tip: When reheating rustic loaves, make sure to heat them thoroughly in the oven, as they tend to have a denser texture. The oven will give the crust a chance to crisp up while keeping the inside warm and soft.
Conclusion: Keep Your Italian Bread Fresh with Proper Storage
Properly storing your Italian bread can make all the difference in maintaining its freshness, flavor, and texture. Whether you prefer keeping your bread at room temperature, freezing it for long-term storage, or reheating it to restore its crispy crust, following these best practices ensures that every bite tastes like it was just baked. With these simple tips, you’ll be able to enjoy fresh Italian bread days after baking, without compromising on quality.
Troubleshooting Common Bread-Baking Problems: Solutions for a Perfect Loaf
Baking bread is an art, and like any art form, it sometimes comes with its challenges. Even experienced bakers encounter problems such as flat bread, under-baked crusts, or dough that refuses to rise. The good news is that most bread-baking issues can be fixed with a little knowledge and a few adjustments. In this section, we’ll explore some of the most common bread-baking problems and provide practical solutions to ensure your Italian bread turns out perfect every time.
1. Flat Bread: How to Achieve the Right Rise
Flat bread is one of the most common issues bakers face, and it can be caused by several factors, such as insufficient rising time, incorrect yeast activity, or improper shaping. A flat loaf not only lacks the desired height but also may not have the airy, fluffy texture that defines good bread.
Possible Causes of Flat Bread:
Inactive Yeast: Yeast is the magic ingredient that makes bread rise, so if it’s not working properly, the dough won’t expand. This can happen if the yeast is expired or if the water temperature was too hot or too cold when activating the yeast.
Under-Kneading or Over-Kneading: Proper kneading helps develop the gluten in the dough, which gives the bread structure and allows it to rise. If the dough is under-kneaded, it won’t have the elasticity it needs. On the other hand, over-kneading can cause the dough to become too tight, leading to less rise.
Incorrect Shaping: If the dough is not shaped properly, it may collapse during baking, resulting in a flat loaf. Improper sealing or stretching of the dough can cause it to lose its structure.
Solutions for Flat Bread:
Check Your Yeast: Always test your yeast before using it. To activate it, dissolve the yeast in warm water (around 100°F/37°C) with a pinch of sugar. It should foam within 5-10 minutes. If it doesn’t, discard it and use fresh yeast.
Proper Kneading: Knead the dough until it becomes smooth and elastic. If the dough feels sticky, add small amounts of flour, but don’t overdo it. You want the dough to be slightly tacky, but it should pull away from the sides of the bowl.
Shape with Care: Be sure to shape your dough gently, without pressing out all the air bubbles. For rustic loaves, try the “stretch and fold” method to maintain the integrity of the dough.
Proofing Time: If your dough isn’t rising, give it more time. Sometimes, a cooler environment can slow the proofing process. To help, place the dough in a warmer area (such as a turned-off oven with the light on) or use a proofing box.
Tip: If you’re baking a loaf in a pan, be sure it’s not overfilled. Leave enough room for the dough to rise and expand during baking.
2. Under-Baked Crusts: Getting the Perfect Bake
An under-baked crust can result in bread that looks great on the outside but remains doughy or raw on the inside. This is especially common with thicker crusted breads, such as rustic Italian loaves, where the exterior may appear golden, but the interior hasn’t fully cooked.
Possible Causes of Under-Baked Crusts:
Insufficient Baking Time: The most common cause of an under-baked crust is simply not baking the bread for long enough. Bread with a thick crust needs extra time to ensure that it bakes thoroughly all the way through.
Oven Temperature Issues: If your oven is not preheated correctly or is running too cool, the bread may cook unevenly. A lower temperature can lead to a longer baking time but can also prevent the bread from developing the crispy, golden crust.
Opening the Oven Door Too Often: Constantly opening the oven door to check on your bread allows heat to escape, which can result in uneven cooking. This is particularly problematic for bread that requires high heat to develop a crust.
Solutions for Under-Baked Crusts:
Adjust Baking Time and Temperature: If your bread has a pale, under-baked crust, extend the baking time by 5-10 minutes. Ensure the oven is preheated to the correct temperature and, if needed, increase the heat slightly to 450°F (230°C). Check with a thermometer to make sure your oven is accurate.
Use a Thermometer: The best way to check if your bread is fully baked is by using an instant-read thermometer. Insert it into the center of the loaf, and it should read between 190°F (88°C) and 210°F (99°C) for most breads.
Don’t Open the Oven Too Early: Resist the urge to open the oven door too early in the baking process, as this can cause the bread to collapse or lead to uneven cooking.
Tip: If you suspect your bread is under-baked but the crust is already golden, cover the top with foil and return it to the oven for an additional 10-15 minutes to ensure thorough baking without burning the crust.
3. Dough That Won’t Rise: Troubleshooting Proofing Issues
A common problem, especially for beginner bakers, is dough that fails to rise properly during the proofing process. This can result in dense, heavy bread that lacks the light, airy texture that makes Italian bread so delicious.
- Possible Causes of Dough That Won’t Rise:
- Inactive Yeast: If the yeast is expired or has not been activated properly, it won’t create the necessary gas to make the dough rise. This can result in a dense, flat loaf.
- Cold Dough or Environment: Yeast needs warmth to grow and work its magic. If the dough is too cold, or if the proofing environment is too chilly, the yeast will not activate and the dough will not rise as expected.
- Too Much Salt or Sugar: Salt inhibits yeast activity, and sugar can pull moisture away from the yeast. Too much of either can result in dough that won’t rise properly.
- Solutions for Dough That Won’t Rise:
- Check Yeast Freshness: Always use fresh yeast and test it before using. If your dough is sluggish to rise, try placing it in a warmer spot, such as an oven with the light on, or using a proofing box.
- Provide a Warm Proofing Environment: Yeast thrives in warmth. Ensure your dough is in a draft-free, warm environment (around 75°F/24°C to 85°F/29°C) for proofing. If necessary, place the dough on top of your oven or use a bowl of warm water as a makeshift proofing box.
- Use the Right Amount of Salt and Sugar: Be mindful of how much salt and sugar you add to your dough. For most Italian bread recipes, a teaspoon of salt and sugar should be enough. Don’t overdo it!
- Tip: If your dough has been sitting for hours without rising, or if it appears to have stalled, gently knead it again to redistribute the yeast and give it another chance to rise.
4. Overly Dense Bread: How to Avoid Heavy Loaves
Dense bread can be a result of several factors, such as over-kneading, insufficient yeast, or not allowing enough proofing time. Dense loaves often lack the air pockets and lightness that make Italian bread so appealing, and the texture can feel heavy and tough.
- Possible Causes of Dense Bread:
- Under-Proofing or Over-Proofing: If the dough is not given enough time to rise, it can become too dense. On the other hand, over-proofing can cause the dough to collapse and lose its structure, resulting in a dense loaf.
- Too Much Flour: Adding too much flour can make the dough too stiff, preventing it from rising properly. It can also make the final bread texture dense and crumbly.
- Weak or Expired Yeast: If the yeast is too old or hasn’t been activated properly, it may not produce enough gas to give the bread the lift it needs.
- Solutions for Dense Bread:
- Proper Proofing: Make sure your dough has enough time to rise during both the initial proofing and final proofing stages. If you’re unsure whether the dough has risen enough, perform the “poke test”: gently press your finger into the dough, and if it springs back slowly, it’s ready for the oven.
- Use the Right Flour: Ensure you’re using high-quality bread flour with enough protein content to give the bread structure. Avoid adding too much flour while kneading—only add enough to prevent sticking.
- Use Fresh Yeast: Always check that your yeast is fresh and active. If you suspect your yeast is weak, use a fresh packet to ensure your dough rises properly.
- Tip: If your bread is dense despite following the steps correctly, it might need more time during the second proofing stage. Be patient and allow it to rise fully before baking.
Conclusion: Perfecting Your Bread-Baking Skills
While bread baking can sometimes present challenges, most common issues have simple solutions that can help you improve your technique. By troubleshooting problems like flat bread, under-baked crusts, and dough that doesn’t rise, you can achieve the perfect loaf every time. With practice and attention to detail, your homemade Italian bread will be the talk of your kitchen, offering the perfect balance of flavor, texture, and crust.
4) Variations and Pairings with Italian Bread
Making Crusty Bread with Different Flours: Creating Unique Variations
When it comes to making crusty bread, the type of flour you use can make a significant difference in the texture, flavor, and appearance of the finished loaf. While all-purpose flour is commonly used for Italian bread recipes, experimenting with different types of flour—such as semolina, whole wheat, or even rye—can yield unique results and variations in crustiness. In this section, we will explore how different flours impact the process of making crusty Italian bread and offer tips on how to incorporate them into your recipes.
1. Semolina Flour: A Golden, Crunchy Crust
Semolina flour, made from durum wheat, is commonly used in pasta making but can also be a fantastic addition to bread recipes. Semolina’s coarse texture and high gluten content make it ideal for creating a bread with a crunchy, golden crust and a slightly nutty flavor. It’s particularly popular for making rustic Italian breads like Pane di Altamura and Focaccia.
- Semolina Flour Characteristics:
- Texture: Semolina flour is coarser than all-purpose flour, which helps create a distinctive, crunchy crust. It also gives the bread a slightly grainy texture on the outside, adding an extra layer of flavor and crunch.
- Flavor: The nutty, slightly sweet flavor of semolina enhances the overall taste of the bread, giving it a rich, satisfying flavor that pairs well with various toppings like olives, rosemary, or Parmesan cheese.
- Color: One of the most noticeable effects of using semolina is the beautiful golden color it imparts to the crust. The flour contributes to a deep, rich hue that makes your loaf stand out.
- How to Use Semolina Flour:
- Incorporating Semolina in the Dough: When substituting semolina flour in your recipe, you can replace up to 30% of the all-purpose flour with semolina. For example, if your recipe calls for 500 grams of flour, use 350 grams of all-purpose flour and 150 grams of semolina. This creates a balanced dough with just the right amount of crunch.
- For Dusting: Semolina flour is often used for dusting bread pans, baking sheets, or pizza stones. The flour prevents the dough from sticking and adds a beautiful, textured finish to the crust.
- Tip: If you’re making focaccia or pizza, use semolina flour for a crispier bottom crust that enhances the texture and flavor.
2. Whole Wheat Flour: Hearty Texture and Earthy Flavor
Whole wheat flour is made from the entire wheat kernel, which includes the bran, germ, and endosperm. This gives it a denser texture and richer, earthier flavor compared to white flour. Whole wheat bread has a slightly darker color and a hearty, rustic appeal that makes it a popular choice for those seeking a more robust loaf.
Whole Wheat Flour Characteristics:
Texture: The bran and germ in whole wheat flour make the dough more textured and heavier. As a result, whole wheat bread often has a denser crumb, though this can be balanced by adjusting hydration and kneading techniques.
Flavor: Whole wheat flour imparts a nutty, slightly sweet flavor that complements rustic bread recipes. This flavor works well with savory toppings like olive oil, garlic, or herbs.
Color: Whole wheat bread has a darker, more rustic color than bread made with refined flour. The crumb is typically a pale golden-brown, with the crust often taking on a darker hue as it bakes.
How to Use Whole Wheat Flour:
Substitution Ratios: When substituting whole wheat flour for all-purpose flour, start with replacing 25-50% of the white flour with whole wheat flour. This provides a good balance of texture and flavor without making the bread too dense.
Hydration Adjustments: Whole wheat flour absorbs more water than all-purpose flour due to its higher fiber content. As a result, you may need to increase the hydration in your dough slightly when using whole wheat flour. Add extra water in small increments until the dough reaches the desired consistency.
Kneading for Structure: To achieve the desired crumb, you may need to knead the dough longer than usual. Whole wheat bread benefits from extra kneading to develop the gluten and achieve the right texture. However, don’t over-knead, as this can result in tough bread.
Tip: To lighten the texture of whole wheat bread, consider using a combination of whole wheat and bread flour, which has a higher protein content to help with structure.
3. Rye Flour: Tangy, Dense Loaves with a Rustic Crust
The Rye flour, made from rye grain, is a staple in many traditional European breads, such as Pumpernickel and Rye Sourdough. Rye bread is known for its tangy, slightly sour flavor and dense, chewy texture. The Rye flour contributes to a darker, thicker crust, which can be particularly appealing for those who enjoy a hearty loaf.
Rye Flour Characteristics:
Texture: Rye flour has a lower gluten content than wheat flour, which results in a denser, less airy loaf. This makes it ideal for those who enjoy a heavier, more compact bread.
Flavor: Rye flour gives the bread a distinct, earthy flavor with a slight tang. The acidity in rye flour also makes it an excellent companion to sourdough starters, as it enhances the natural fermentation process.
Color: Rye bread has a deep, almost chocolate-brown color due to the bran and germ in the rye grain. The crust is typically darker and thicker than bread made with wheat flour.
How to Use Rye Flour:
Substitution Ratios: Rye flour can be substituted for all-purpose flour in many bread recipes, but because of its low gluten content, it’s best to use no more than 30-50% rye flour in your dough. For example, if the recipe calls for 500 grams of flour, you could use 250 grams of rye flour and 250 grams of all-purpose or bread flour.
Kneading Rye Dough: Rye dough is often more sticky than wheat dough, and it doesn’t need as much kneading to develop the gluten. Rye flour also absorbs more water, so be sure to adjust the hydration accordingly to achieve the correct dough consistency.
Fermentation and Rising: Rye doughs benefit from longer fermentation times, which allow the natural sourness to develop. This also helps to create a lighter, airier texture despite the denser flour.
Tip: If you’re using rye flour in a sourdough recipe, be sure to feed your starter with rye flour to enhance the tanginess and depth of flavor in the finished bread.
4. Other Flour Options: Oats, Spelt, and More
In addition to semolina, whole wheat, and rye, there are many other types of flour that can be used to create interesting variations of crusty Italian bread. Flours like spelt, oat, and barley bring unique textures and flavors to your bread-baking repertoire.
- Spelt Flour: Spelt is an ancient grain related to wheat and can be used as a substitute for all-purpose flour. It has a slightly nutty flavor and creates a soft, tender crumb. Spelt flour doesn’t require as much kneading as wheat flour, making it easier to work with. Use it in a 1:1 substitution for all-purpose flour or combine it with other flours.
- Oat Flour: Oat flour has a mild, slightly sweet flavor that complements rustic breads. It can be used to replace up to 25% of the flour in most bread recipes. Oat flour adds moisture to the dough, resulting in a soft, slightly chewy texture.
- Barley Flour: Barley flour is a light, sweet flour that can be used in combination with wheat flour for a softer loaf with a delicate crumb. It pairs well with honey and can be used in breads with a slightly sweet profile.
Conclusion: Experimenting with Different Flours for Unique Crusty Breads
Using different types of flour in your crusty bread recipes allows you to explore a variety of flavors and textures, elevating the traditional Italian bread experience. Whether you opt for the golden, crunchy crust of semolina, the hearty, earthy flavors of whole wheat, or the tangy, dense texture of rye, experimenting with different flours will unlock new dimensions of taste in your bread-making. Don’t hesitate to try blending flours to create custom variations of your favorite Italian bread recipes, and enjoy the process of discovering new flavors in every bite.
Perfect Pairings: What to Serve with Italian Bread
Italian bread is incredibly versatile, making it the perfect companion for a wide variety of dishes. Whether you’re enjoying a rustic loaf or a slice of focaccia, there are countless ways to pair your homemade Italian bread to enhance its flavors and create a truly satisfying meal. From antipasti to hearty pasta dishes and comforting soups, the right pairings can elevate your bread experience. In this section, we’ll explore some of the best foods to serve with Italian bread and offer ideas to inspire your next meal.
1. Antipasti: A Classic Italian Starter
Antipasti, meaning “before the meal” in Italian, is a traditional Italian appetizer that sets the stage for the main course. Rustic Italian bread is a perfect vehicle for pairing with a variety of antipasti items, as its chewy texture and hearty crust provide a satisfying contrast to the richness of cheeses, cured meats, and marinated vegetables.
- Cheese Platters: Serve your Italian bread alongside a selection of Italian cheeses such as Parmigiano-Reggiano, Pecorino Romano, and Gorgonzola. The bread’s flavor complements the savory, tangy notes of the cheeses, creating a delightful bite. You can also add a drizzle of olive oil or a spoonful of balsamic vinegar for extra richness.
- Cured Meats: Thinly sliced prosciutto, salami, or capicola are classic Italian cured meats that pair beautifully with rustic Italian bread. The bread absorbs the oils and juices from the meats, adding depth to the flavor. For a more elevated antipasto platter, add soppressata, bresaola, or mortadella to the mix.
- Marinated Vegetables: For a fresh, tangy contrast to the richness of meats and cheeses, serve marinated vegetables like artichokes, olives, sun-dried tomatoes, and roasted red peppers. These Mediterranean-inspired vegetables bring bright, zesty flavors that balance the bread’s earthy taste.
- Tip: Try spreading a bit of bruschetta topping (a mixture of tomatoes, garlic, and basil) on a slice of toasted Italian bread for an extra burst of flavor.
2. Pasta: Italian Bread Meets Pasta Perfection
In Italy, bread and pasta are often served together in one meal, and Italian bread is an ideal accompaniment to soak up the rich sauces and broths found in many pasta dishes. Whether it’s a simple pasta aglio e olio or a hearty, meaty ragù, the bread enhances the overall dining experience.
- Pasta with Tomato-Based Sauces: Classic pasta dishes such as spaghetti marinara, penne arrabbiata, or pasta alla Norma (pasta with eggplant and tomato sauce) pair wonderfully with rustic Italian bread. The bread’s crusty texture is perfect for mopping up the flavorful tomato sauce, while its mild flavor complements the acidity of the tomatoes.
- Creamy Pastas: For pasta dishes with creamy sauces, such as fettuccine Alfredo or pasta carbonara, the bread can provide a great contrast in texture. The dense, chewy bread cuts through the richness of the creamy sauce, offering a balance of flavors.
- Pasta with Meat or Vegetable Sauces: Hearty pasta dishes with meat sauces, like Bolognese or ragù alla napoletana, are perfectly complemented by a thick slice of Italian bread. Use the bread to soak up the delicious sauce, making each bite even more satisfying. Likewise, vegetable-based pasta dishes like pasta primavera or pasta e fagioli (pasta and beans) pair beautifully with rustic bread.
- Tip: Serve bread alongside pasta soup (like minestrone or pasta e fagioli) to soak up the flavorful broth and add texture to the dish.
3. Soups: Comforting Combos with Italian Bread
One of the most comforting ways to enjoy Italian bread is with a warm, hearty soup. Italian soups are often rich and flavorful, featuring fresh ingredients like tomatoes, beans, vegetables, and herbs. The crusty texture of Italian bread is perfect for dunking into a bowl of soup, adding a satisfying crunch and texture to each bite.
- Minestrone Soup: This classic Italian vegetable soup is a perfect match for rustic Italian bread. The thick, chunky soup filled with seasonal vegetables and beans pairs wonderfully with a slice of bread, which helps to absorb the broth and adds depth to each spoonful.
- Pasta e Fagioli: Another iconic Italian soup, pasta e fagioli, is a hearty combination of pasta, beans, and tomatoes. The bread soaks up the flavorful broth and complements the rich, savory flavors of the soup.
- Tomato Soup: Pair your rustic Italian bread with a simple, yet delicious, tomato soup. The bread’s texture holds up well when dunked into the tomato base, providing a satisfying contrast to the smooth, tangy soup.
- Tip: For an even more indulgent experience, make a grilled cheese sandwich using Italian bread and pair it with a bowl of tomato soup for a comforting meal.
4. Olive Oil and Vinegar: Simple Yet Delicious Pairings
In many Italian households, bread is served simply with olive oil and balsamic vinegar for dipping. The high-quality olive oil provides a fruity, slightly bitter flavor that pairs beautifully with the mild taste of Italian bread. Balsamic vinegar adds a tangy-sweet kick, balancing the richness of the oil.
- Olive Oil Dipping: Drizzle some extra virgin olive oil into a small bowl and add a pinch of sea salt and a few cracks of black pepper for a simple yet flavorful dip. The olive oil’s rich, fruity notes are complemented by the rustic Italian bread’s slightly chewy texture.
- Balsamic Vinegar: If you prefer a more tangy dipping sauce, balsamic vinegar works beautifully with rustic bread. For an added layer of flavor, drizzle some honey or sprinkle herbs like thyme or oregano into the vinegar before dipping the bread.
- Tip: Make a simple appetizer by serving slices of toasted Italian bread with a bowl of olive oil and balsamic vinegar, alongside a few cheese cubes and grapes for a well-rounded, light starter.
5. Sweets: Bread and Dessert Pairings
Though Italian bread is often enjoyed with savory dishes, it can also be paired with certain desserts to create an unexpected, delightful combination. Try serving slightly sweeter Italian breads, like Ciabatta or Panettone, with traditional Italian desserts.
- Ciabatta with Mascarpone: Slice ciabatta bread and serve with a dollop of mascarpone cheese drizzled with honey for a light, creamy dessert. The bread’s airy texture and crispy crust work perfectly with the rich, smooth mascarpone.
- Panettone with Fresh Fruit: For a more festive dessert pairing, serve slices of Panettone (an Italian sweet bread typically enjoyed around the holidays) with fresh berries or citrus fruits. The bread’s sweet, fruity flavor complements the tang of the fresh fruit, creating a refreshing dessert.
- Tip: If you enjoy Italian pastries, serve crostata (an Italian fruit tart) with slices of rustic Italian bread on the side to balance the sweetness of the dessert.
Conclusion: Creating the Perfect Meal with Italian Bread
Italian bread is the perfect base for a wide range of pairings, from savory antipasti and pasta dishes to hearty soups and even desserts. By combining the rich, chewy texture and versatile flavor of Italian bread with a variety of complementary ingredients, you can create a well-rounded and satisfying meal. Whether you’re looking for a simple snack or a full-course feast, Italian bread can be the star of your meal or the perfect complement to the dishes you serve. Enjoy experimenting with different pairings and discovering your favorite combinations!
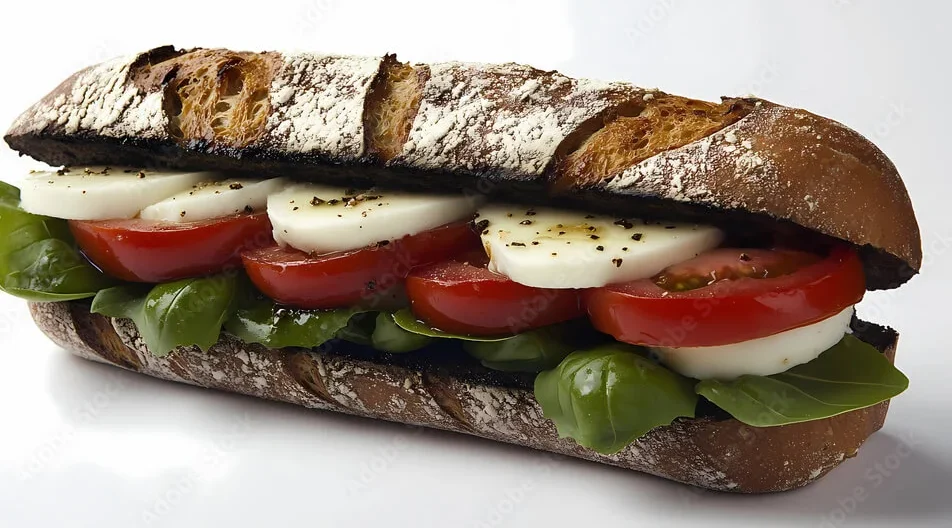
Conclusion
Mastering the Art of Italian Bread at Home
Making Italian bread at home is an incredibly rewarding experience that brings the flavors of Italy right into your kitchen. Whether you’re a novice or a seasoned baker, Italian bread recipes are simple to follow and deliver delicious, crusty results that can enhance any meal. Throughout this guide, we’ve explored various aspects of creating perfect Italian bread—from choosing the right ingredients to techniques for achieving the ideal dough consistency and crust. Let’s recap the key points to help you confidently bake your own Italian bread and elevate your cooking.
1. Simple Recipes, Satisfying Results
The beauty of Italian bread lies in its simplicity. From rustic Italian bread with its thick, golden crust to focaccia topped with fresh herbs, there is a variety of recipes that are easy to make with just a handful of basic ingredients. With the right proportions of flour, yeast, salt, and olive oil, you can create a loaf of bread that is as flavorful as it is satisfying. Each recipe is designed to be approachable for beginners, while also offering room for creativity for more experienced bakers.
2. Essential Tips for Perfect Results
Achieving the perfect loaf of Italian bread comes down to a few key techniques. Kneading the dough properly to develop gluten, proofing the dough to ensure proper rise, and baking at high heat to achieve that sought-after crispy crust are all essential steps. Don’t forget the importance of steam during the baking process to enhance the crust’s texture, or the practice of scoring your bread for a professional touch.
Additionally, by using different types of flour, such as semolina or whole wheat, you can create variations that suit your taste and the bread’s texture. Whether you prefer a crusty bread or a lighter loaf, the possibilities are endless!
3. The Versatility of Italian Bread
One of the most exciting aspects of making Italian bread is its versatility. Not only can you enjoy it on its own with a simple dip in olive oil or balsamic vinegar, but it also pairs perfectly with antipasti, pasta, soups, and even desserts. Italian bread can take center stage as part of a meal or serve as a complement to other dishes, making it an essential part of any Italian-inspired feast. Experimenting with different toppings, fillings, and flours can allow you to customize your bread to suit your meal or occasion.
4. Encouragement to Try These Easy Recipes
Now that you’ve learned the basics of Italian bread-making, it’s time to get baking! These easy recipes for rustic Italian bread, focaccia, and crusty loaves can all be recreated in your own kitchen. Don’t be afraid to experiment with ingredients and flavors to make the bread truly your own. The more you bake, the more you’ll refine your technique, and soon enough, you’ll have a delicious batch of homemade Italian bread to share with friends and family.
Call to Action: Share Your Bread-Baking Journey!
We’d love to hear about your Italian bread-making adventures! Whether you’ve tried the recipes in this post or you have your own family favorite, share your experiences in the comments below. Have you added any unique twists or toppings to your loaves? Or perhaps you’ve encountered a challenge in the process? Whatever your story, your feedback can help others and create a community of passionate home bakers. We encourage you to share your favorite Italian bread recipe or any variations you’ve experimented with.
Happy baking, and buon appetito!
1 thought on ““How to Make Italian Bread: Easy Recipes for Delicious Results””