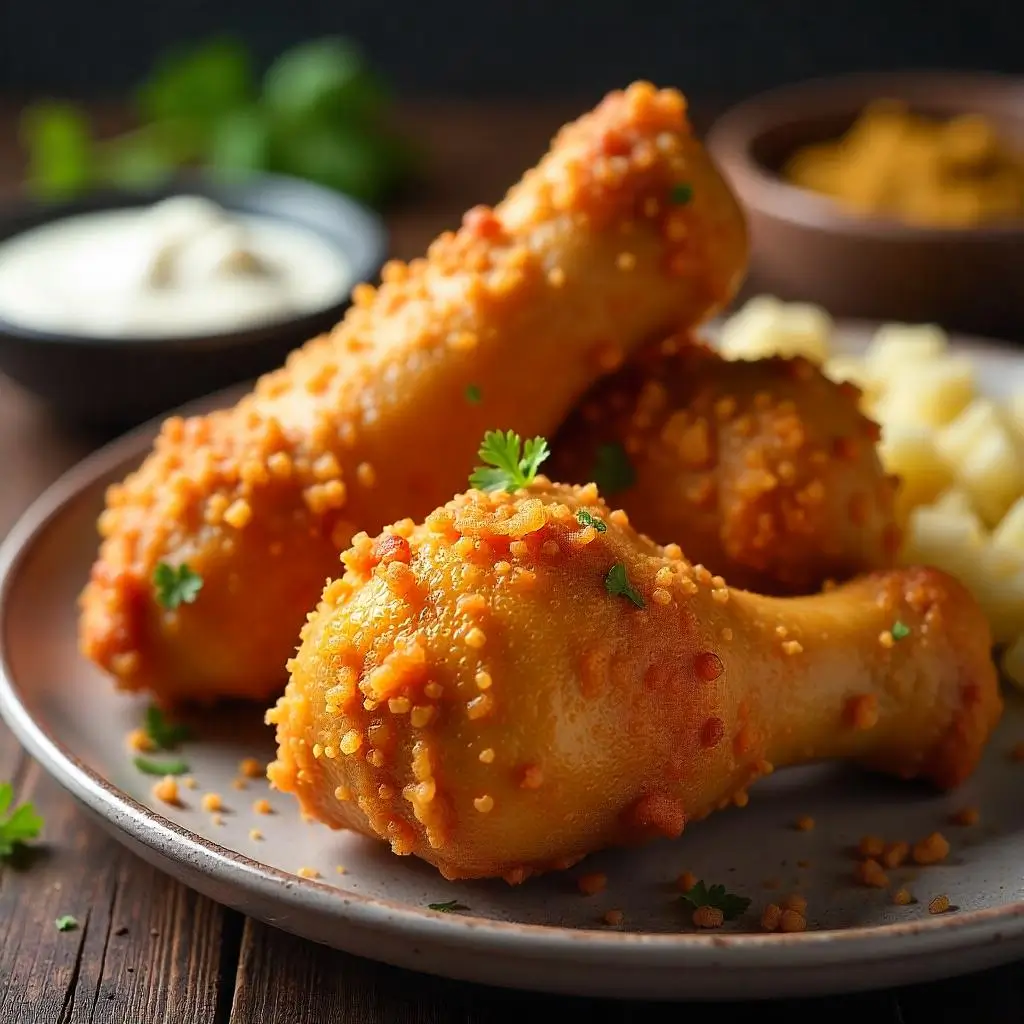
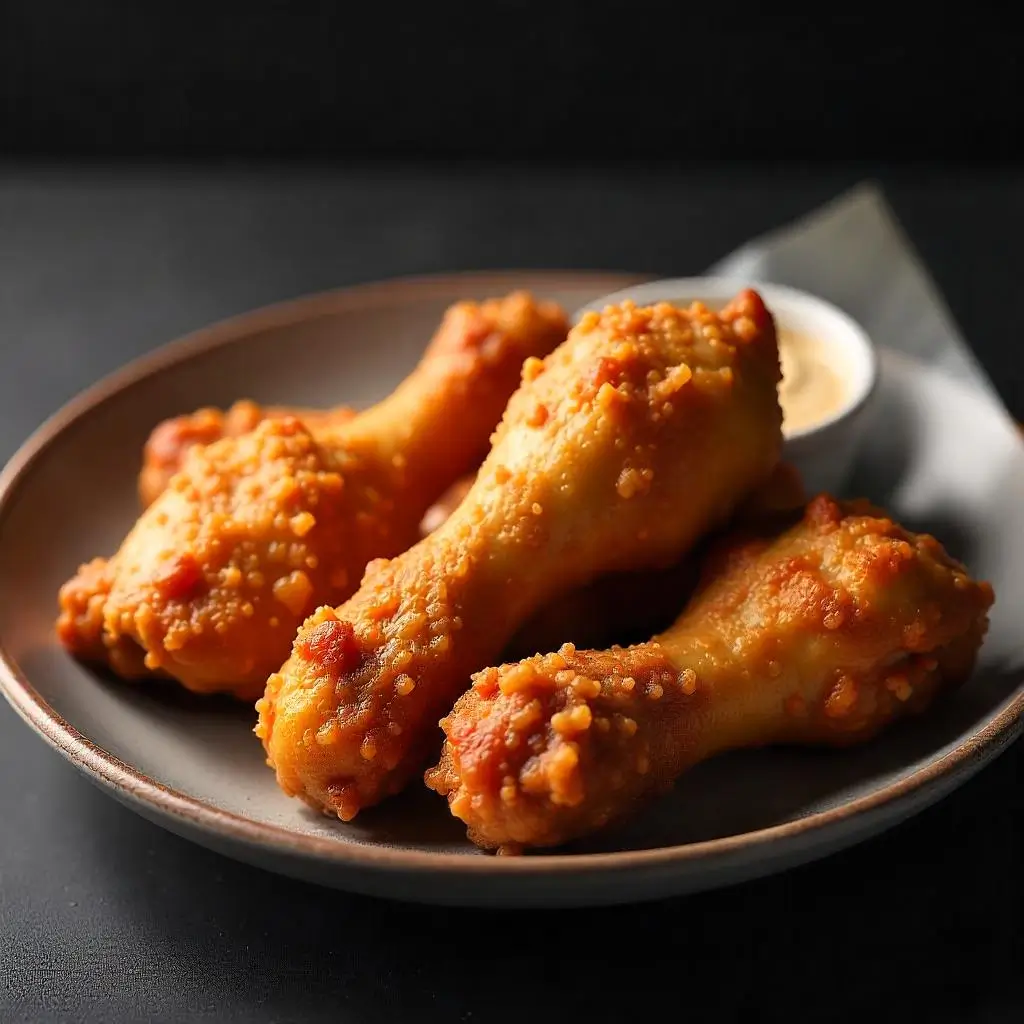
Introduction
Fried chicken legs recipe are a timeless comfort food, known for their crispy, golden exterior and juicy, flavorful meat inside. They’re a favorite at family gatherings, parties, or even as a quick weeknight treat. The good news? You don’t need to be a professional chef to make them at home! With just a few simple ingredients and a clear step-by-step guide, you can enjoy perfectly fried chicken legs right from your own kitchen.
If you’ve ever wondered, “How long should I fry chicken legs?” or “What’s the best way to fry chicken legs on the stove or in a deep fryer?”, you’re in the right place. These are common questions that we’ll answer in this recipe to ensure your chicken legs turn out crispy on the outside and tender on the inside.
By the end of this post, you’ll have all the tools, tips, and tricks you need to master the art of making fried chicken legs that will impress your family and friends. Let’s dive in!
1) What You’ll Need to Make Perfect Fried Chicken Legs
Ingredients: What You Need to Make Fried Chicken Legs
To achieve perfectly crispy and flavorful fried chicken legs, you’ll need a combination of fresh ingredients and pantry staples. Each ingredient plays a crucial role in ensuring that your chicken is juicy on the inside, golden on the outside, and packed with flavor. Here’s a breakdown of what you’ll need:
1. Chicken Legs
- Why Chicken Legs?
Chicken legs are ideal for frying because of their rich flavor and natural juiciness. The dark meat stays tender during cooking, making them a foolproof choice. - Preparation Tip:
Make sure to clean the chicken legs thoroughly, pat them dry with a paper towel, and trim any excess fat or skin. Dry chicken ensures the breading sticks properly and fries evenly.
2. All-Purpose Flour
- The Foundation of Crispy Coating:
Flour is the base of the breading, creating the signature golden crust that everyone loves. - Seasoning Tip:
Mix your flour with spices like salt, paprika, garlic powder, and black pepper to layer flavors directly into the coating.
3. Spices and Seasonings
- Why Seasoning Matters:
Seasoning is key to infusing your chicken with flavor both inside and out. A bland coating can ruin even the crispiest chicken. - Essential Spices:
- Salt and Pepper: The basics for enhancing flavor.
- Paprika: Adds a hint of smokiness and color.
- Garlic and Onion Powder: Boosts the savory notes.
- Cayenne Pepper: For a touch of heat, if you like it spicy.
- Dried Herbs: Optional, but oregano or thyme can elevate the flavor.
4. Buttermilk
- The Secret to Tender Chicken:
Buttermilk is a game-changer when it comes to fried chicken. Its acidity tenderizes the meat while helping the breading stick better. - Alternative Options:
If you don’t have buttermilk, you can substitute with regular milk mixed with a tablespoon of lemon juice or vinegar.
5. Cooking Oil
- Choosing the Right Oil:
A high-smoke-point oil is essential for frying. Popular choices include:- Vegetable oil
- Canola oil
- Peanut oil
- Quantity Matters:
Use enough oil to fully submerge the chicken legs if deep frying, or at least halfway up the sides of the chicken if pan-frying.
Why the Right Ingredients Matter
The combination of these ingredients ensures your chicken legs are flavorful, crispy, and perfectly cooked every time. Skimping on any one element—like not seasoning the flour or skipping the buttermilk—can result in bland or unevenly cooked chicken. With these essentials on hand, you’re well on your way to creating a dish that’s as delicious as it is satisfying.
Next, let’s move on to preparing and frying the chicken legs to perfection!
Tools: Essential Equipment for Perfectly Fried Chicken Legs
To make fried chicken legs that are crispy, juicy, and cooked to perfection, it’s important to have the right tools at your disposal. Using the correct equipment not only simplifies the process but also ensures your chicken cooks evenly and safely. Below is a list of essential tools and tips on how to use them effectively.
1. Frying Pan or Skillet
- When to Use It:
A heavy-bottomed frying pan or skillet is ideal for pan-frying chicken legs. Cast iron skillets are particularly good because they retain heat evenly, which is crucial for consistent frying. - How to Use It:
Choose a pan that is deep enough to hold oil without spilling over when the chicken is added. Ensure the pan is wide enough to fry multiple pieces without overcrowding, as this can lower the oil temperature.
2. Deep Fryer (Optional)
- Why It’s Helpful:
A deep fryer takes the guesswork out of frying by maintaining a consistent oil temperature, which is key for crispy chicken. It’s also safer than frying on a stove, as it reduces the risk of splattering. - Tips for Use:
- Preheat the oil to 350°F before adding the chicken.
- Use a basket for easy removal of chicken legs.
- Clean the fryer after each use to avoid old oil residues that can affect the flavor.
3. Kitchen Thermometer
- Why It’s Essential:
Maintaining the correct oil temperature (350°F) is one of the most important factors in achieving crispy, evenly cooked fried chicken. A thermometer helps monitor the oil temperature to prevent it from getting too hot (burning the chicken) or too cool (resulting in greasy chicken). - Types of Thermometers:
- Clip-on Thermometer: Attaches to the side of your pan or fryer for continuous monitoring.
- Instant-Read Thermometer: Useful for checking the internal temperature of the chicken (165°F for safe consumption).
4. Tongs
- Why You Need Them:
Tongs allow you to handle the chicken legs without piercing the meat, which can cause juices to escape and make the chicken less juicy. They’re also great for safely flipping or removing chicken from hot oil. - Pro Tip:
Use long-handled tongs to keep your hands at a safe distance from the hot oil.
5. Wire Rack and Baking Sheet
- Why It’s Important:
Placing fried chicken legs on a wire rack set over a baking sheet helps them stay crispy by allowing excess oil to drain away. Unlike paper towels, which can trap moisture, a wire rack ensures the chicken retains its crunch. - Bonus Tip:
Preheat the rack slightly in the oven before placing the chicken on it to keep it warm and crispy until serving.
Why These Tools Matter
Having the right tools is just as important as using fresh ingredients. The frying pan or deep fryer ensures even cooking, the thermometer guarantees the perfect oil and meat temperatures, and the tongs and wire rack make handling and serving easy and efficient. Together, these tools simplify the process and set you up for fried chicken success.
Now that your tools are ready, let’s move on to the step-by-step process of frying chicken legs to golden perfection!
Preparation Tips: Setting the Stage for Perfect Fried Chicken Legs
Before you start frying your chicken legs, proper preparation is crucial. This step ensures that your chicken turns out flavorful, crispy, and evenly cooked. Here’s a detailed guide on how to prepare your chicken legs and set up your frying station for a seamless cooking experience.
1. Cleaning the Chicken Legs
- Why It’s Important:
Cleaning chicken removes any impurities, leftover feathers, or debris that may be on the surface. It also ensures that your chicken is ready for seasoning and breading. - How to Clean Chicken Legs:
- Rinse the chicken legs under cold running water.
- Use your fingers or a small knife to remove any visible bits of fat, skin, or debris.
- Avoid soaking the chicken, as this can spread bacteria and dilute the flavor.
2. Patting the Chicken Dry
- Why It’s Essential:
Moisture on the surface of the chicken can prevent the breading from sticking properly and cause dangerous splattering when it comes into contact with hot oil. - Steps to Follow:
- Use paper towels to gently pat the chicken legs dry.
- Focus on all sides of the chicken to ensure it’s completely dry before moving on to seasoning.
- Let the chicken sit at room temperature for 10-15 minutes to reduce the chill from refrigeration, which helps it cook more evenly.
3. Seasoning the Chicken Legs
- Why It Matters:
Seasoning adds flavor directly to the meat, making each bite more delicious. A well-seasoned base ensures your chicken doesn’t rely solely on the coating for flavor. - How to Season:
- Rub the chicken legs with a generous amount of salt, pepper, and your favorite spices (paprika, garlic powder, or cayenne pepper for a kick).
- For deeper flavor, you can marinate the chicken in buttermilk mixed with seasonings for at least 1 hour, or overnight for best results.
- After seasoning, let the chicken sit for a few minutes to absorb the flavors.
4. Setting Up Your Frying Station
- Why It’s Helpful:
Organizing your workspace in advance minimizes stress and ensures you can fry efficiently without interruptions. - What to Include:
- Breading Station:
- Set up three shallow bowls: one for seasoned flour, one for beaten eggs or buttermilk, and another for additional seasoned flour or breadcrumbs.
- Frying Pan or Deep Fryer:
- Preheat your oil to 350°F in a heavy-bottomed skillet or deep fryer. Use a thermometer to monitor the temperature.
- Wire Rack with Baking Sheet:
- Place a wire rack over a baking sheet near your stove to drain excess oil from the fried chicken.
- Tools Within Reach:
- Keep your tongs, slotted spoon, and paper towels nearby for easy access.
- Breading Station:
5. Pro Tips for Smooth Preparation
- Double Breading for Extra Crispiness:
After the first coating, dip the chicken back into the egg mixture and then into the seasoned flour for a second layer. - Test Your Oil:
Drop a small piece of breading into the oil—if it sizzles and floats to the surface, the oil is ready. - Work in Batches:
Avoid overcrowding the pan, as this can lower the oil temperature and result in soggy chicken.
Why Proper Preparation Makes a Difference
Taking the time to clean, dry, and season your chicken, along with setting up an organized frying station, ensures the cooking process goes smoothly. These small but crucial steps help you achieve perfectly crispy fried chicken legs every time.
With your chicken prepped and station ready, it’s time to start frying! Let’s dive into the step-by-step frying process.
2) Step-by-Step Guide: How to Fry Chicken Legs
Marinating and Seasoning: Enhancing Flavor and Tenderness
Marinating and seasoning your chicken legs is the secret to taking them from good to unforgettable. This step infuses the meat with flavor while ensuring it stays tender and juicy during frying. Below, we’ll walk you through the process of marinating and seasoning, along with tips to make the most of this essential step.
1. Why Marinating is Important
- Tenderness Boost:
Buttermilk, a key ingredient in this process, contains lactic acid, which tenderizes the chicken by breaking down the proteins in the meat. This results in juicy chicken legs that are moist and flavorful. - Flavor Infusion:
Marinating allows the seasoning to penetrate the chicken, ensuring every bite is packed with taste.
2. Preparing the Buttermilk Marinade
- Ingredients for the Marinade:
- 2 cups of buttermilk
- 1 teaspoon salt
- 1 teaspoon black pepper
- 1 teaspoon garlic powder
- 1 teaspoon paprika
- Optional: A pinch of cayenne pepper for a spicy kick
- How to Make It:
- In a large mixing bowl, combine the buttermilk and seasonings. Stir until evenly mixed.
- Adjust the spice levels to suit your preference. For a milder flavor, reduce the cayenne or paprika.
3. Marinating the Chicken Legs
- Steps to Follow:
- Place the cleaned and dried chicken legs into the bowl of buttermilk marinade.
- Ensure each piece is fully submerged to absorb the flavors evenly.
- Cover the bowl with plastic wrap and refrigerate for at least 1 hour. For the best results, let the chicken marinate overnight (6–8 hours).
- Pro Tips:
- If you’re short on time, a quick 30-minute marinade can still enhance the flavor, but longer marination is recommended for maximum tenderness.
- Use a resealable plastic bag instead of a bowl for easy cleanup and even coating.
4. Seasoning After Marinating
- Why This Step is Crucial:
While the buttermilk marinade provides a base layer of flavor, additional seasoning before breading ensures the chicken legs are well-seasoned inside and out. - How to Do It:
- Remove the chicken legs from the marinade and gently shake off excess liquid.
- Sprinkle a mix of salt, pepper, and your preferred spices directly onto the chicken before breading. This step creates a flavor foundation that complements the crispy coating.
5. Customizing Your Marinade and Seasoning
- For Bold Flavors:
Add soy sauce, hot sauce, or Worcestershire sauce to the marinade for an extra punch of umami. - For Herbs and Aromatics:
Toss in fresh herbs like thyme, rosemary, or parsley, and minced garlic for a fragrant touch. - For Sweet and Spicy:
Add a drizzle of honey or a dash of chili powder for a balance of sweetness and heat.
Why Marinating and Seasoning Makes a Difference
This step is not just about tenderness—it’s about layering flavor into every bite. A well-marinated chicken leg has depth, complexity, and a juicy texture that elevates your fried chicken from ordinary to extraordinary.
Once your chicken legs are perfectly marinated and seasoned, you’re ready to move on to breading and frying for that irresistible crispy crunch!
Breading for Crispy Perfection: The Secret to That Golden Crunch
The breading process is where the magic happens—turning simple chicken legs into irresistibly crispy bites of comfort food. Proper breading not only creates that golden, crunchy exterior but also locks in moisture, ensuring your chicken stays tender on the inside. Here’s a step-by-step guide to mastering the art of breading, including a pro tip for achieving extra crunch.
1. Preparing the Breading Mixture
- Why It’s Important:
The breading forms the outer layer that crisps up during frying. It’s also your opportunity to add bold, flavorful spices to complement the chicken. - What You’ll Need:
- 2 cups all-purpose flour (the base for your breading)
- 1 teaspoon salt
- 1 teaspoon black pepper
- 1 teaspoon paprika
- 1 teaspoon garlic powder
- 1 teaspoon onion powder
- Optional: A pinch of cayenne pepper for heat
- How to Mix It:
- Combine the flour and spices in a shallow bowl or dish. Stir until the mixture is evenly blended.
- For added texture, you can mix in breadcrumbs or cornmeal for a slight crunch variation.
2. The Breading Process: Step-by-Step
- Steps to Follow:
- Coat in Seasoned Flour:
- Remove the marinated chicken leg from the buttermilk, allowing any excess liquid to drip off.
- Roll the chicken in the flour mixture, pressing lightly to ensure an even coating.
- Dip Back into Buttermilk:
- For the first layer of breading to stick, briefly dip the floured chicken back into the buttermilk. This step adds moisture for the next coating.
- Final Flour Coating:
- Return the chicken leg to the flour mixture and coat it thoroughly. This double layer ensures a thick, crispy crust that clings to the chicken during frying.
- Coat in Seasoned Flour:
- Pro Tip:
After breading, let the coated chicken legs rest on a wire rack for 10–15 minutes. This step helps the coating adhere better and prevents it from falling off during frying.
3. Why Double Breading is Key to Extra Crunch
- Double the Layers, Double the Texture:
The double-breading technique creates a sturdier crust that holds up well in hot oil, giving you an extra crunchy bite. The second coating traps air pockets that expand during frying, resulting in a light yet crispy texture. - When to Use It:
This method is especially useful if you’re making fried chicken legs for a crowd or serving them at a celebration. It ensures every piece is consistently crispy and flavorful.
4. Customizing the Coating
- Adding a Twist to the Bread Crust:
- For Extra Crispiness: Mix crushed cornflakes, panko breadcrumbs, or crushed crackers into the flour for added crunch.
- For a Unique Flavor: Incorporate grated Parmesan cheese or dried herbs like oregano and thyme into the breading.
- For Spicy Chicken: Blend in cayenne pepper, chili powder, or hot paprika to the flour mix.
- Tips for Gluten-Free Breading:
Use gluten-free flour or almond flour as a substitute for all-purpose flour. You can also replace breadcrumbs with crushed rice crackers for crunch.
5. Common Mistakes to Avoid When Breading
- Skipping the Resting Step:
Always let the coated chicken rest before frying. Skipping this step can cause the breading to separate during cooking. - Overcrowding in the Breading Station:
Work with one piece of chicken at a time to ensure even coating and prevent clumps in your flour mixture.
Why Breading is a Game-Changer
Perfect breading is what makes fried chicken legs stand out. The right combination of flour, spices, and technique transforms a simple dish into a culinary masterpiece. By mastering the art of breading and incorporating the double-breading technique, you’ll achieve chicken legs that are irresistibly crispy, golden, and bursting with flavor.
Now that your chicken is breaded to perfection, it’s time to heat the oil and start frying! Let’s move on to the next step for achieving that perfect fry.
3) Tips for Achieving the Crispiest and Juiciest Fried Chicken Legs
Controlling Oil Temperature: The Key to Perfectly Fried Chicken Legs
Controlling oil temperature is one of the most crucial aspects of frying chicken legs. Maintaining a steady temperature of 350°F ensures that your chicken achieves the perfect golden-brown, crispy crust without absorbing too much oil or burning. A thermometer is an essential tool for keeping the oil at the right temperature throughout the frying process. Let’s dive into the importance of controlling oil temperature and how to do it effectively for optimal frying results.
1. Why Oil Temperature Matters
- Crispy Exterior and Tender Interior:
When frying chicken legs, the oil temperature directly impacts the texture of the crust. At 350°F, the oil cooks the breading quickly, creating a crispy outer layer while locking moisture inside, keeping the chicken tender and juicy. - Preventing Sogginess or Burning:
Too low of an oil temperature (below 325°F) will result in greasy, soggy chicken because the breading absorbs too much oil before it crisps up. On the other hand, an oil temperature above 375°F can cause the breading to burn before the chicken is fully cooked inside. - Even Cooking:
Maintaining a consistent temperature ensures that the chicken cooks evenly on all sides, without overcooking some areas while others remain raw.
2. Using a Thermometer for Accurate Oil Temperature
- Why a Thermometer is Essential:
While some experienced cooks can gauge oil temperature by visual or auditory cues, using a thermometer is the most reliable method to ensure the oil stays at 350°F. This tool helps eliminate any guesswork, giving you more consistent results. - How to Use a Thermometer:
- Choose the Right Thermometer:
- For frying, use a deep-frying thermometer with a clip, which attaches to the side of the pot or pan. This allows you to monitor the temperature without touching the oil.
- Alternatively, a digital instant-read thermometer can be used by inserting the probe into the oil.
- Place the Thermometer in the Oil:
- Attach the thermometer to the side of the pan or deep fryer, ensuring the probe is submerged in the oil but not touching the bottom of the pot.
- Allow the thermometer to stabilize and read the temperature.
- Adjust Heat as Needed:
- If the oil is too hot (over 375°F), lower the heat slightly to bring it back to 350°F. If the oil is too cool, increase the heat gradually to reach the optimal temperature.
- Choose the Right Thermometer:
3. Monitoring and Maintaining the Right Temperature
- Why Consistency is Key:
The oil temperature fluctuates naturally as you add chicken to the pan. For the best results, you’ll need to monitor and adjust the heat during frying. - How to Maintain a Steady Temperature:
- Fry in Small Batches:
- Avoid overcrowding the pan, as this causes the temperature to drop suddenly, leading to uneven cooking. Fry 2-3 chicken legs at a time to maintain a consistent oil temperature.
- Adjust Heat as Needed:
- If the temperature drops below 350°F when you add chicken, increase the heat slightly and wait for the oil to stabilize. If the temperature rises above 350°F, lower the heat to avoid burning the chicken.
- Keep Checking the Thermometer:
- Make it a habit to check the oil temperature every few minutes while frying. Keeping an eye on the thermometer ensures that the oil stays within the ideal range for crispy, perfectly fried chicken legs.
- Fry in Small Batches:
4. Signs the Oil is at the Right Temperature Without a Thermometer
- Sizzling Sound:
If you don’t have a thermometer, listen for the distinct sizzle when you drop a small piece of breading into the oil. It should sizzle immediately and float to the surface. If it doesn’t sizzle, the oil is too cold. If it splatters aggressively, the oil is too hot. - Test with a Wooden Spoon:
Dip the end of a wooden spoon or a chopstick into the oil. If bubbles form around it and rise to the surface, the oil is at the right temperature for frying. - Bread Crumb Test:
Drop a small piece of bread or breading into the oil. If it turns golden brown in about 2 minutes, the oil is ready.
5. How to Adjust Oil Temperature During Frying
- If the Oil is Too Hot:
- Reduce the heat gradually, allowing the oil to cool to the right temperature.
- If you’re using a deep fryer, most models allow you to adjust the temperature settings easily.
- Remove the chicken and allow the oil to cool before continuing frying if necessary.
- If the Oil is Too Cool:
- Increase the heat carefully and gradually, being cautious not to make the oil too hot.
- If you find the oil cooling too quickly, consider frying smaller batches or adjusting the heat as you go.
6. Maintaining Oil Temperature for Multiple Batches
- Reheating the Oil Between Batches:
If you are frying several batches of chicken, the oil may cool down as you remove each batch. Allow the oil to reheat to 350°F before adding more chicken to prevent overcooking. - Dealing with Oil Build-up:
After several batches, the oil may develop a layer of breadcrumbs or batter particles. Strain the oil or clean the fryer to keep the oil clean for the best frying results.
Why Oil Temperature is the Secret to Crispy Chicken
Maintaining the right oil temperature is essential for creating fried chicken legs with the perfect balance of crispy, golden exterior and juicy, tender interior. Using a thermometer to monitor the oil temperature ensures your chicken comes out consistently delicious every time. Mastering oil temperature control is the key to achieving that restaurant-quality fried chicken at home.
Once your oil is at the right temperature, you’re ready to move on to frying your chicken legs to crispy perfection!
Avoiding Soggy Coating: How to Keep Your Fried Chicken Legs Crispy
After frying, the final step to achieving perfectly crispy chicken legs is ensuring the coating stays crisp and does not become soggy. While it’s tempting to dive right in and serve, resting the chicken on a wire rack is a crucial step in maintaining the texture and preventing moisture from softening the crispy coating. Here’s why resting on a wire rack is key, along with other tips to help you avoid a soggy crust.
1. Why Resting on a Wire Rack is Essential
- The Importance of Air Circulation:
After frying, the breading is hot and crisp, but if the chicken is placed directly on a flat surface (such as paper towels), steam from the chicken will get trapped underneath the crust. This moisture can cause the coating to soften and lose its crunchy texture.- Wire Rack = Airflow: Resting fried chicken on a wire rack allows air to circulate freely around the chicken, ensuring that any steam escapes and the coating stays crisp. The rack lifts the chicken off the surface, preventing the crust from becoming soggy.
- Maintaining a Crisp Texture: By using a wire rack, the chicken remains elevated, allowing the crust to stay firm and the texture to be preserved.
2. How to Set Up a Proper Resting Station
- Choosing the Right Wire Rack:
- A standard cooling rack or a baking rack works well for this purpose. Make sure the rack has small enough gaps to support the chicken without the coating falling through.
- Elevated Resting:
Place the wire rack over a baking sheet or large platter to catch any drips or oil that may come off the chicken during the resting process. This helps keep your kitchen clean and prevents any excess oil from pooling around the chicken.
- Spacing the Chicken Legs:
- Avoid overcrowding the wire rack. Leave some space between each chicken leg to ensure proper airflow and allow the crust to dry properly. Placing the chicken too close together can trap steam and cause the breading to lose its crispness.
3. The Resting Time: How Long Should You Let the Chicken Rest?
- Why You Should Rest for a Few Minutes:
After frying, it’s essential to let the chicken rest for about 5-10 minutes. During this time, the internal juices of the chicken redistribute, keeping the meat tender and juicy.- Resting Prevents Overcooking: If you serve the chicken too soon, the heat may continue to cook the meat, resulting in dryness. Resting allows the chicken to cool slightly, helping you avoid this.
- Let the Coating Firm Up: Allowing the chicken to sit for a few minutes also gives the breading a chance to firm up and fully set.
4. Additional Tips for Keeping Fried Chicken Legs Crisp
- Serve Immediately After Resting:
While resting is essential for maintaining the crispy coating, it’s also important to serve the chicken soon after. The longer it sits, the more likely the coating is to lose its crunch, even if it’s on a wire rack. - Avoid Wrapping the Chicken:
Do not wrap the fried chicken in foil or place it in a covered container, as this traps steam and causes the breading to become soggy. If you need to store leftovers, let the chicken cool completely and store it uncovered in the fridge to preserve the coating. - Keep the Chicken Warm While Resting:
If you’re cooking a large batch and want to keep the chicken warm without compromising the crispiness, place the wire rack with the chicken in a low-temperature oven (around 200°F or 90°C) while it rests. This will keep the chicken warm without steaming it.
5. Using Paper Towels: When to Use and Why to Avoid Excessive Use
- Why Paper Towels Aren’t the Best Resting Surface:
While it’s common to place fried food on paper towels to absorb excess oil, doing so for an extended period can lead to a soggy crust.- Proper Paper Towel Use:
Paper towels are best used immediately after frying to absorb excess oil. However, the chicken should be transferred to a wire rack soon after.
- Proper Paper Towel Use:
- Avoid Overusing Paper Towels:
If you use too many paper towels or leave the chicken sitting on them too long, you’ll trap moisture underneath the chicken, causing the breading to lose its crispiness.
6. Why Resting on a Wire Rack is the Secret to Crispy Perfection
The wire rack technique is a simple yet effective way to keep your fried chicken legs crispy, ensuring that the breading stays firm and the chicken remains juicy. By allowing proper airflow around the chicken, avoiding overcrowding, and giving the chicken a few minutes to rest, you’re setting yourself up for fried chicken perfection. With this easy method, you’ll have golden, crunchy chicken legs every time, no matter how many batches you make.
Now that your chicken is resting and crisping to perfection, it’s time to serve and enjoy the fruits of your labor!
4) Common Questions About Frying Chicken Legs
Flavor Boosts: Elevate Your Fried Chicken Legs with Spices, Herbs, and Unique Coatings
While a basic fried chicken recipe can deliver delicious results, adding extra layers of flavor through spices, herbs, and alternative coatings can take your fried chicken legs to a whole new level. Whether you prefer bold, smoky, spicy, or herby flavors, there are plenty of ways to elevate the taste of your fried chicken legs. Let’s explore some flavor boost ideas that will make your fried chicken legs stand out and become a crowd favorite.
1. Spice Blends to Enhance the Flavor
- Why Spices Are Essential:
Spices are the key to transforming your fried chicken into a flavor-packed dish. A blend of savory, sweet, and spicy notes can make your fried chicken legs uniquely yours. - Popular Spice Mixes for Fried Chicken:
- Classic Southern Spice Blend:
- A mixture of paprika, cayenne pepper, garlic powder, onion powder, and black pepper. This blend brings a warm, smoky, and slightly spicy kick that complements the crispy crust.
- Smoky BBQ Flavor:
- Add smoked paprika, brown sugar, chili powder, and a pinch of cayenne to create a sweet and smoky coating. This mix is perfect for those who love a BBQ-inspired fried chicken.
- Cajun Kick:
- For a bold, spicy kick, use a Cajun seasoning mix, which typically includes paprika, thyme, oregano, cayenne pepper, garlic, and onion powder. This will give your fried chicken a bold, zesty punch.
- Indian-Inspired Coating:
- Try a mix of ground turmeric, cumin, coriander, garam masala, and chili powder for an aromatic and slightly earthy flavor profile. Perfect for those who love a hint of exotic spices.
- Classic Southern Spice Blend:
2. Adding Fresh Herbs for a Fragrant Twist
- Why Fresh Herbs Make a Difference:
Fresh herbs not only add color but also bring a fragrant, vibrant flavor to fried chicken legs. Herbs can infuse the chicken’s crust with aromatic notes, making each bite more complex and refreshing. - Herb Ideas for Flavorful Fried Chicken:
- Rosemary and Thyme:
- Chop fresh rosemary and thyme and mix them into your flour coating for a fragrant, earthy flavor. These herbs pair wonderfully with the crispy crust, especially when combined with garlic.
- Oregano and Basil:
- For a Mediterranean-inspired twist, add dried oregano and fresh basil to the breading. This combination works well with a lighter, lemon-infused fried chicken.
- Parsley and Dill:
- Fresh parsley and dill can be sprinkled into your flour mixture for a bright, refreshing finish. This works particularly well with a lemony fried chicken, adding a fresh burst of flavor.
- Rosemary and Thyme:
3. Adding Heat: Spicy Kick for Bold Flavors
- Why Heat Elevates Fried Chicken:
A little bit of heat can turn your fried chicken legs into something special, offering a balance to the richness of the crispy coating. Spice lovers will appreciate the extra heat that can be infused into the chicken, giving it a satisfying kick. - Ways to Add Heat to Your Chicken:
- Cayenne Pepper and Chili Powder:
- Sprinkle cayenne pepper or chili powder into your flour mixture to add a fiery heat that complements the savory coating. Adjust the amount depending on your spice tolerance.
- Hot Sauce Infusion:
- Add a splash of hot sauce to the buttermilk marinade for a spicy tang. The acidity in the hot sauce also helps tenderize the chicken while infusing it with bold heat.
- Pepper Flakes or Chili Paste:
- For a more complex spice, incorporate red pepper flakes or chili paste into the breading mixture. This creates a crispy, spicy crust that adds both heat and flavor.
- Cayenne Pepper and Chili Powder:
4. Alternative Coatings for Unique Textures and Flavors
- Why a Change in Coating Adds Excitement:
While traditional flour-based breading is classic, using alternative coatings can enhance both the texture and flavor profile of your fried chicken legs. Experimenting with different coatings allows you to play with flavor combinations and textures. - Creative Coating Ideas:
- Cornstarch and Rice Flour:
- For an ultra-crispy texture, mix cornstarch or rice flour with your regular flour. This will create an even crunchier exterior, which is perfect for those who love extra crispiness.
- Panko Breadcrumbs:
- Swap regular breadcrumbs for panko breadcrumbs to achieve a light, airy, and extra-crunchy coating. Panko adds texture and makes the crust lighter than traditional breading.
- Crushed Crackers or Chips:
- Crushed saltine crackers or tortilla chips can be used to coat your chicken legs for a different texture and flavor. Crushed chips, like nacho cheese-flavored chips, can also add a savory, cheesy touch.
- Buttermilk and Parmesan Crust:
- For a richer, more indulgent coating, mix grated Parmesan cheese with your flour and buttermilk mixture. The cheese adds a salty, umami depth to the crust, perfect for those who enjoy a cheesy twist.
- Cornstarch and Rice Flour:
5. Zesty Flavors: Adding Citrus for Brightness
- Why Citrus Adds Freshness:
Citrus can balance out the richness of fried chicken by providing a burst of freshness and acidity. A squeeze of lemon or lime can cut through the richness, making each bite feel lighter and more vibrant. - How to Incorporate Citrus:
- Lemon Zest in the Coating:
- Add lemon zest to your flour mixture for a subtle, aromatic citrus flavor that permeates the crust. This adds brightness without overpowering the other flavors.
- Lemon or Lime Marinade:
- Incorporate lemon or lime juice into your buttermilk marinade. The citrus acidity helps tenderize the chicken while infusing it with a refreshing, tangy flavor.
- Serve with Lemon Wedges:
- When serving the fried chicken legs, add a few lemon wedges on the side. A quick squeeze of fresh lemon juice right before eating can elevate the flavor, giving it a fresh, zesty finish.
- Lemon Zest in the Coating:
6. Sweet and Savory Combinations: Balancing Flavors
- Why Sweet and Savory Work Well Together:
Combining sweet and savory flavors creates a well-rounded, dynamic taste experience. A hint of sweetness can counterbalance the saltiness and heat of the chicken, creating a satisfying contrast. - Sweet Boost Ideas for Fried Chicken:
- Honey or Maple Syrup Glaze:
- After frying, drizzle honey or maple syrup over the chicken legs for a sweet finish that balances the crispy, savory coating. This works particularly well with spicy fried chicken for a sweet heat combination.
- Brown Sugar and Spice:
- Add a tablespoon of brown sugar to your seasoning mix to create a caramelized coating. The sugar melts during frying, adding a subtle sweetness that pairs beautifully with a spicy or smoky seasoning blend.
- Honey or Maple Syrup Glaze:
7. Why Experimenting with Flavors Makes Your Fried Chicken Stand Out
By experimenting with spices, herbs, alternative coatings, and flavor enhancements like citrus and sweetness, you can customize your fried chicken legs to suit your preferences or impress your guests. Whether you prefer bold and spicy, herby and fresh, or sweet and savory, flavor boosts can transform your fried chicken into a memorable dish. Try mixing and matching different flavors to find your perfect fried chicken combination!
With these flavor boost ideas, your fried chicken legs will go from basic to extraordinary in no time.
What to Serve with Fried Chicken Legs? Delicious Side Dishes and Sauces to Complement Your Meal
Fried chicken legs are a classic comfort food that pairs well with a variety of side dishes and dipping sauces. Whether you’re hosting a family dinner, picnic, or celebration, selecting the right sides can elevate your meal and create a harmonious balance of flavors and textures. Below are some delicious and complementary side dish ideas, along with dipping sauces, to take your fried chicken legs from good to great.
1. Creamy and Crunchy: Coleslaw
- Why Coleslaw Pairs Perfectly with Fried Chicken:
The creamy, tangy flavor of coleslaw provides a perfect contrast to the crispy and savory fried chicken. The crunchiness of the cabbage adds texture, while the creamy dressing helps balance the richness of the fried chicken legs. - Coleslaw Variations to Try:
- Classic Creamy Coleslaw:
- A blend of shredded cabbage, carrots, and a mayonnaise-based dressing with a hint of vinegar for tang. Add a touch of sugar to balance the acidity and create a slightly sweet finish.
- Spicy Jalapeño Coleslaw:
- For a kick, mix in some finely chopped jalapeños and a bit of hot sauce to your classic coleslaw for a spicy twist. The heat pairs wonderfully with the crispy chicken.
- Apple Cider Vinegar Coleslaw:
- For a lighter, tangier option, try a vinegar-based slaw without mayo. Apple cider vinegar, mustard, and a touch of honey make for a zesty, refreshing side.
- Classic Creamy Coleslaw:
2. Comforting and Creamy: Mashed Potatoes
- Why Mashed Potatoes are the Ultimate Comfort Side:
The creamy, velvety texture of mashed potatoes complements the crispy exterior of fried chicken legs, creating the perfect contrast of soft and crunchy textures. The rich, buttery flavor of mashed potatoes enhances the savory taste of the chicken. - Mashed Potato Variations to Elevate Your Meal:
- Classic Garlic Mashed Potatoes:
- Infuse mashed potatoes with roasted garlic for a rich, aromatic flavor. The garlic adds depth to the creamy potatoes, making it a perfect match for fried chicken.
- Buttermilk Mashed Potatoes:
- For a tangy twist, use buttermilk in place of regular milk. The acidity of the buttermilk balances the richness of both the potatoes and the fried chicken, giving the potatoes a smooth, tangy finish.
- Cheddar and Chive Mashed Potatoes:
- Add shredded cheddar cheese and freshly chopped chives for a cheesy, herby kick. The addition of cheese makes the mashed potatoes even more indulgent, and the chives provide a fresh note.
- Classic Garlic Mashed Potatoes:
3. Crisp and Refreshing: Salad
- Why a Fresh Salad Balances Out the Richness of Fried Chicken:
A fresh, light salad can cut through the richness of fried chicken, offering a burst of freshness and crunch. The acidity from the dressing can also help cleanse the palate between bites of crispy chicken. - Salad Ideas to Pair with Fried Chicken Legs:
- Classic Garden Salad:
- A simple salad with mixed greens, cucumbers, tomatoes, and red onions dressed in a tangy vinaigrette. The crisp vegetables and light dressing offer a refreshing contrast to the fried chicken.
- Southern-Style Pecan Salad:
- Toss mixed greens with candied pecans, goat cheese, and dried cranberries for a sweet and savory salad that pairs perfectly with fried chicken. A honey balsamic dressing ties the flavors together.
- Colossal Caesar Salad:
- If you want to go for something a little heartier, a Caesar salad with crunchy croutons and creamy dressing adds richness and texture, complementing the fried chicken without overwhelming it.
- Classic Garden Salad:
4. Flavorful Sides with a Southern Touch: Cornbread
- Why Cornbread is a Southern Favorite with Fried Chicken:
Cornbread has a slightly sweet, crumbly texture that complements the savory and spicy flavors of fried chicken legs. The dense, slightly sweet flavor of cornbread pairs perfectly with the crispy chicken, making it a must-have side dish for many. - Cornbread Variations for Extra Flavor:
- Classic Southern Cornbread:
- Make a simple cornbread with cornmeal, flour, sugar, eggs, and butter. Bake it until golden and serve with a drizzle of honey for an extra layer of sweetness.
- Jalapeño Cornbread:
- Spice things up by adding finely chopped jalapeños to the batter. The heat from the peppers adds a burst of flavor that pairs wonderfully with the fried chicken.
- Cheddar Cornbread:
- For a cheesy twist, fold shredded cheddar cheese into the batter. The melty cheese adds richness and flavor, making each bite even more delicious.
- Classic Southern Cornbread:
5. Dipping Sauces: Add Extra Flavor to Your Chicken
Dipping sauces are a great way to add even more flavor to your fried chicken legs, giving your guests a chance to enjoy a variety of tastes.
- Popular Dipping Sauces to Serve with Fried Chicken:
- Creamy Honey Mustard:
- The tangy and sweet combination of honey mustard is a classic dipping sauce for fried chicken. Its creamy texture and mild spice complement the crispy, savory chicken perfectly.
- Spicy Ranch:
- For a creamy and tangy sauce with a kick, mix ranch dressing with hot sauce. The coolness of the ranch combined with the heat of the hot sauce creates a flavorful dip that enhances the fried chicken.
- Barbecue Sauce:
- Smoky, tangy, and sweet barbecue sauce is a great choice for those who love a bold, savory dip. The sauce adds an extra layer of flavor to each bite of chicken.
- Garlic Parmesan Sauce:
- For a rich, indulgent dip, combine melted butter, garlic, and Parmesan cheese for a creamy, savory sauce that complements the crispy chicken.
- Sweet Chili Sauce:
- For those who enjoy a bit of heat, sweet chili sauce offers the perfect balance of sweetness and spice. Its slight tang makes it an excellent choice for dipping fried chicken legs.
- Creamy Honey Mustard:
6. Baked Goods: Biscuits or Dinner Rolls
- Why Biscuits and Dinner Rolls Are Perfect with Fried Chicken:
Soft, warm biscuits or dinner rolls are a great way to complete a meal with fried chicken. They add a comforting, doughy texture that pairs beautifully with the crispy chicken and any sauce or gravy you might serve on the side. - Delicious Variations of Biscuits and Rolls:
- Flaky Buttermilk Biscuits:
- Buttermilk biscuits are buttery, flaky, and light, making them a perfect complement to fried chicken. Serve them warm with a bit of honey or jam for added flavor.
- Garlic Herb Dinner Rolls:
- If you prefer dinner rolls, try adding garlic and herbs to the dough for an aromatic, flavorful twist that complements the fried chicken perfectly.
- Flaky Buttermilk Biscuits:
7. Adding Variety: Sweet Potato Fries or Roasted Vegetables
- Why Sweet Potato Fries Pair Well with Fried Chicken:
The natural sweetness of sweet potatoes adds a nice contrast to the savory flavor of fried chicken legs. Their crispy exterior and soft interior complement the chicken’s texture. - Roasted Vegetables for a Balanced Meal:
- Roasted vegetables like carrots, brussels sprouts, or asparagus offer a healthy and flavorful addition to the meal. The slight caramelization from roasting brings out the natural sweetness of the vegetables, pairing well with the fried chicken’s saltiness.
8. Beverage Pairings:
- Refreshing Drinks to Pair with Fried Chicken:
Fried chicken legs are rich and flavorful, so pairing them with refreshing beverages can help balance the meal. Consider serving iced tea, lemonade, or a cold beer to wash down the crispy, savory chicken.
By pairing your fried chicken legs with any of these delicious sides and dipping sauces, you’ll create a well-rounded meal that’s satisfying and full of flavor. Whether you prefer something creamy like mashed potatoes, something crunchy like coleslaw, or a tangy dipping sauce, there’s a perfect complement for every taste. Enjoy your fried chicken legs with these mouthwatering sides for a complete and memorable meal.
Conclusion
Mastering the Art of Fried Chicken Legs – A Recap and Invitation to Experiment
Fried chicken legs are a beloved dish that can be easily made at home with a few simple steps. Whether you’re a first-time fryer or a seasoned cook, this recipe offers a foolproof way to create crispy, flavorful chicken legs every time. By following the steps to properly prepare, season, bread, and fry, you can enjoy a dish that’s both comforting and satisfying.
1. Recap the Steps for Perfectly Fried Chicken Legs
Let’s quickly recap the key steps to making the perfect fried chicken legs:
- Prepare the Chicken:
Begin by cleaning and patting your chicken legs dry to ensure an even cook and crispy exterior. Don’t forget to season generously to bring out the flavor! - Marinate for Tenderness:
Marinate your chicken legs in buttermilk to tenderize the meat and infuse it with flavor. The longer the marinate, the more tender and juicy your chicken will be. - Bread for Crunch:
Coat the chicken legs with flour and spices, using the double-breading technique for an extra-crispy, flavorful crust. - Fry to Perfection:
Heat your oil to 350°F and fry the chicken legs for 12-15 minutes, turning them occasionally for even browning. Ensure the chicken is fully cooked by checking the internal temperature (165°F). - Rest and Serve:
Once fried, rest the chicken on a wire rack to avoid soggy coating. Then, serve with your favorite sides and sauces.
By following these steps, you’re guaranteed to create fried chicken legs with a golden, crunchy coating and juicy, tender meat inside.
2. Encourage Readers to Experiment with Seasonings and Sides
While this recipe provides a great base, one of the best things about fried chicken legs is how customizable they are. Feel free to experiment with different seasonings, spice blends, or marinades to suit your tastes. Try adding a pinch of cayenne pepper for a spicy kick, or toss in some smoked paprika for a deeper, smoky flavor.
Don’t be afraid to mix and match side dishes either. From classic mashed potatoes and coleslaw to roasted vegetables or cornbread, the possibilities are endless! Every time you make fried chicken legs, you can create a unique and flavorful experience that caters to your family’s preferences.
3. Invite Readers to Share Their Experience
We’d love to hear how your fried chicken legs turn out! Did you try a new seasoning blend, or perhaps a unique side dish to accompany the meal? Share your experiences, tips, or questions in the comments below! We welcome your feedback and suggestions as we build a community of fried chicken enthusiasts.
If you run into any challenges or have questions about perfecting your fried chicken technique, don’t hesitate to reach out. We’re here to help, and together we can make your cooking journey even more delicious!
4. Final Encouragement to Try the Recipe
If you’re ready to take on the challenge of making fried chicken legs at home, we encourage you to give this recipe a try. The process may seem intimidating at first, but with these easy-to-follow steps and a little patience, you’ll soon be able to whip up crispy, golden chicken that will have everyone asking for seconds. Don’t be afraid to get creative and make it your own!
Now, it’s your turn—grab your ingredients, set up your frying station, and enjoy the delicious, comforting results. Happy cooking!